Da Vinci Resolve AI Auto Remove Audio Silences Instantly
Manually finding and trimming every pause can be a huge time sink. Automatic silence removal uses the transcribed text to identify where dialogue stops and starts, allowing the software to precisely eliminate non-speech segments.
This is a game-changer for long interviews, podcasts, or vlogs, significantly improving your overall video editing workflow.
This process begins with the raw audio clip in your project.
First, locate the audio track you want to edit in your project's Media Pool or Bin.
Audio Transcription and select Transcribe.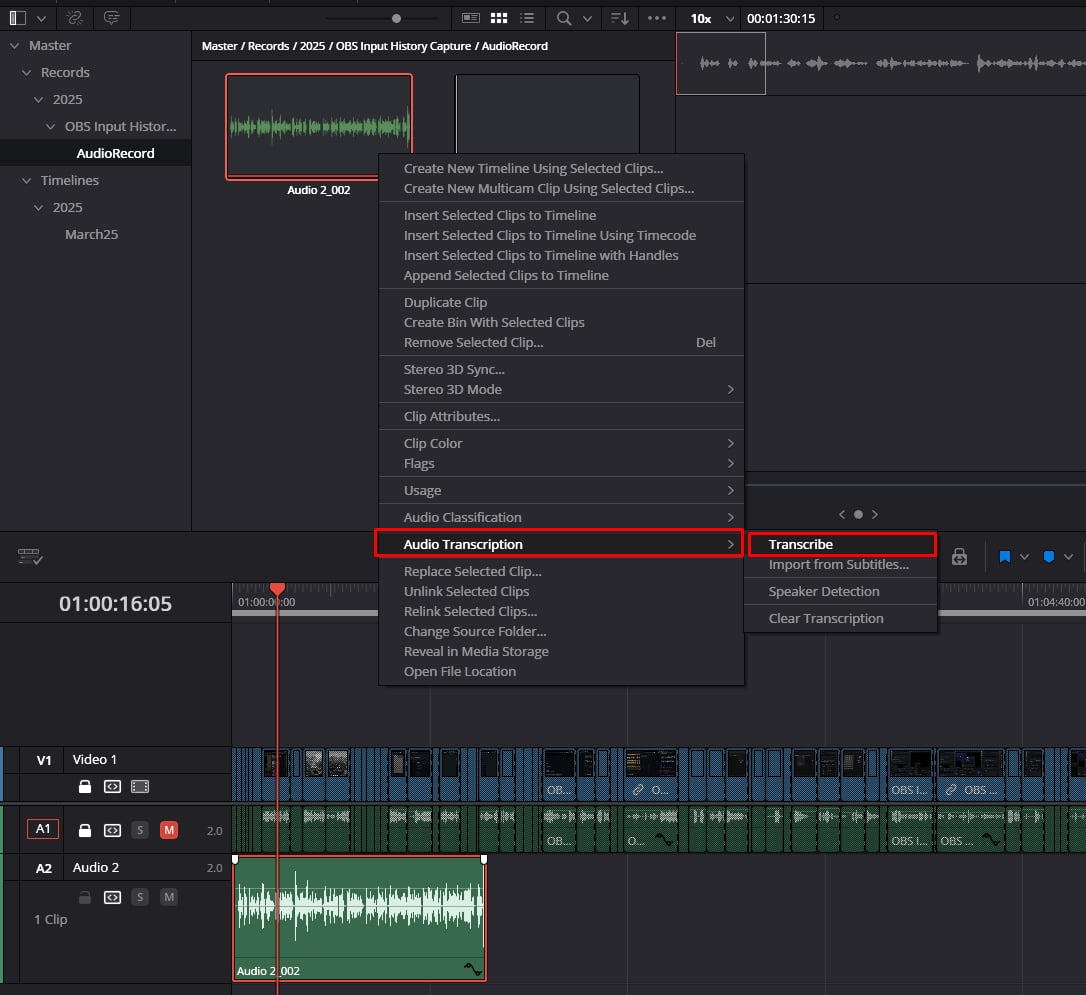
This process analyzes the audio waveform and generates a text file, linking every word to a specific point in your timeline. This feature is often powered by advanced AI/ML models to ensure high accuracy.
After the transcription process completes (it may take a moment depending on the length of your clip), the Audio Transcription window will open, displaying the full, time-coded text.
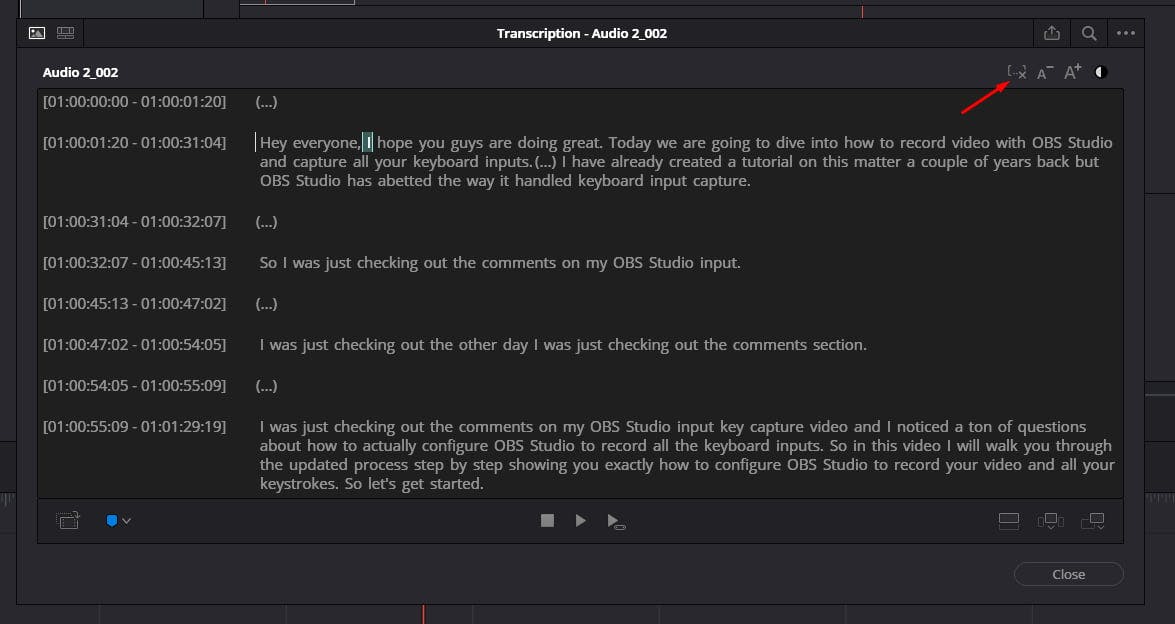
This is your control center. You can check the transcription for accuracy, but for silence removal, your focus is on the tools at the top.
The magic happens with a single click! Once the text is ready, you can instruct the software to edit the audio based on the gaps it found.
The software will now analyze the transcription data and automatically create cuts, eliminating all non-speech segments above a certain threshold (usually configurable in settings). This is the fastest way to get a clean, flowing dialogue track.
The new, tightly edited clip is ready to be used.
Append button.The newly edited clip, with all those awkward pauses expertly removed, will be dropped onto your Edit Timeline, ready for the rest of your video project. Enjoy the instant improvement in pacing and clarity! 🚀

Discover how to group your controls into neat, drop-down accordion sections in DaVinci Resolve Fusion. Stop scrolling and start organizing today

Learn how to create dynamic, character-by-character text animations in DaVinci Resolve Fusion using the Follower modifier, Path keys, and Spline tool

Stop sharing raw .setting files! Discover the professional way to bundles your DaVinci Resolve transitions, effects, and titles into a single, easy-to-install .drfx file