DaVinci Resolve Fusion Tutorial to Create Realistic Glass Distortion Effects
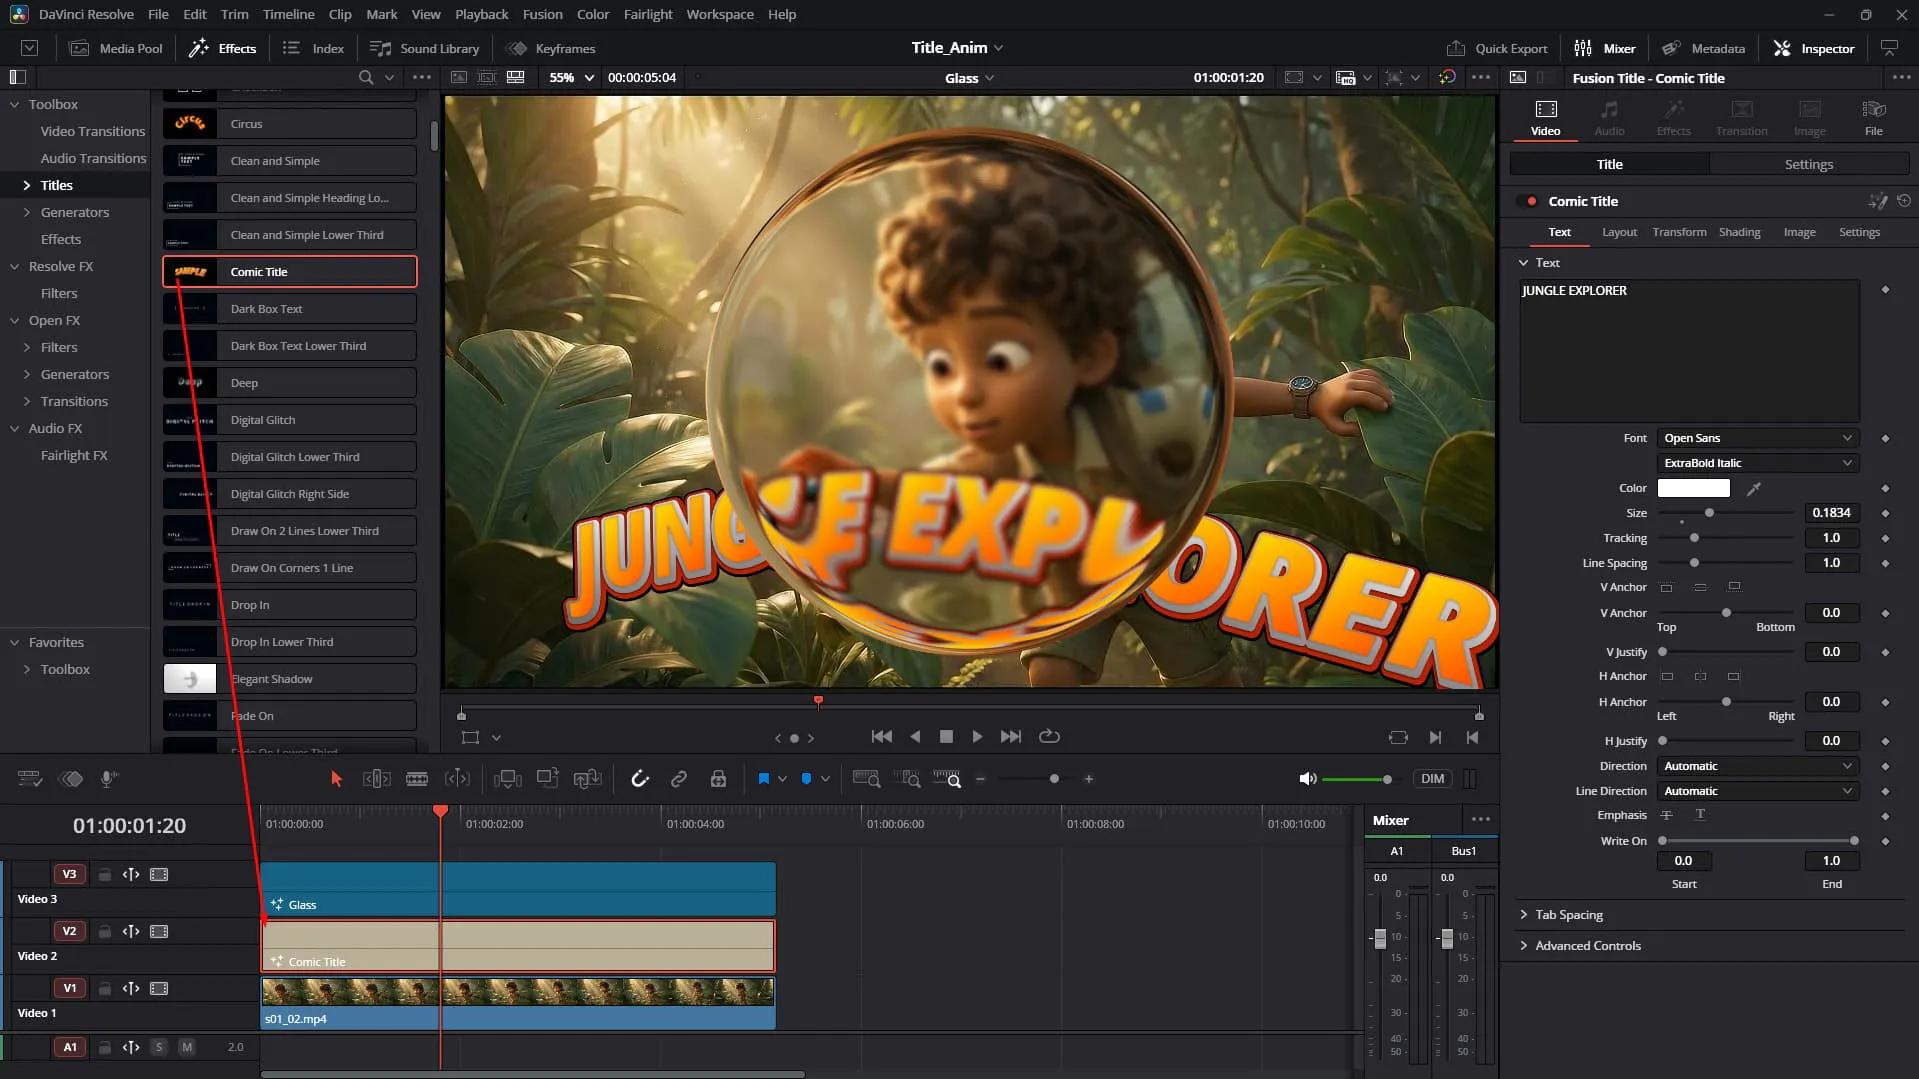
Creating a realistic glass refraction effect is a hallmark of high-end motion graphics. It adds depth, polish, and that specific "premium" feel to your visuals. Whether you're designing a sleek title sequence or an abstract art piece, knowing how to manipulate underlying layers through a "glass" element is a crucial skill in DaVinci Resolve.
In this tutorial, we dive deep into the Fusion page to build a dynamic glass distortion effect using the Displace Node, smart masking, and blur techniques. Let's get creative! 🎨🖥️
First things first, let's get our composition ready.
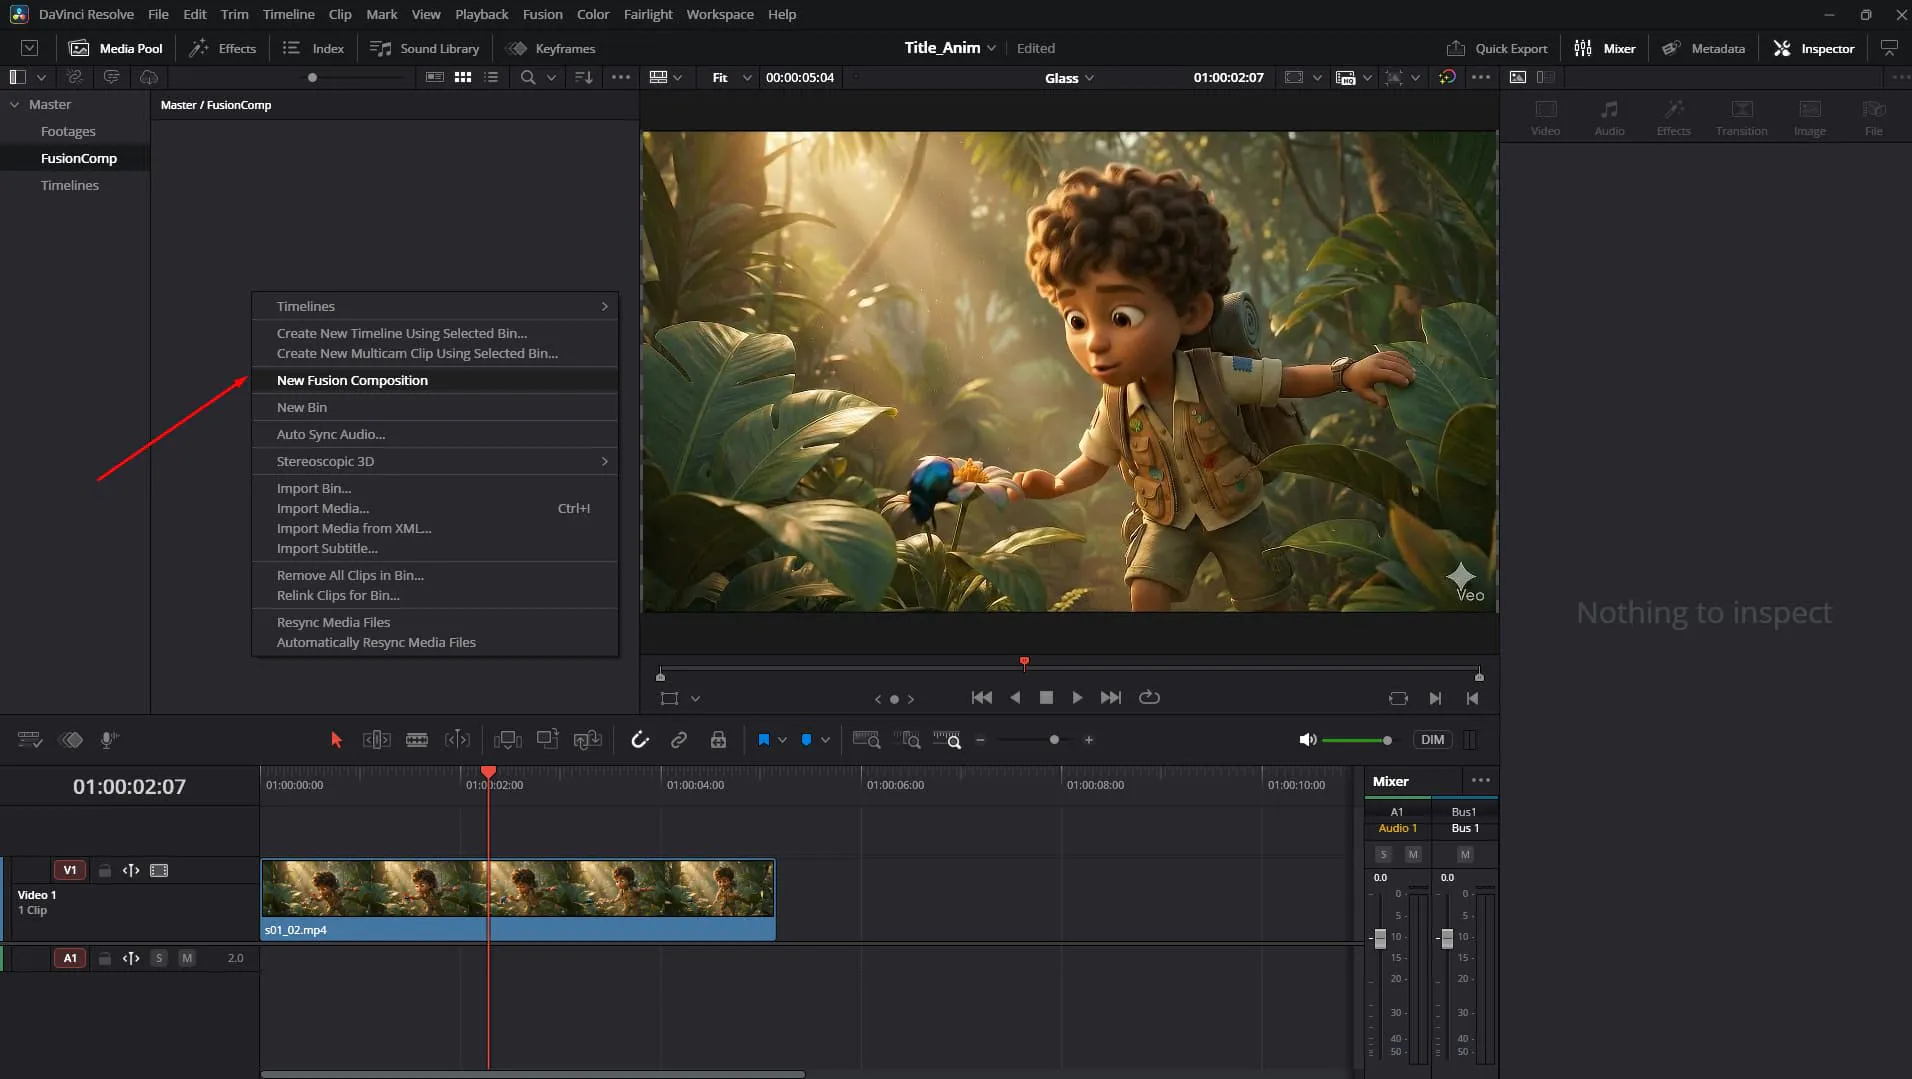
1. Create a New Fusion Composition
Head over to your Media Pool, right-click, and create a new Fusion Composition. This will be the container for our VFX wizardry.
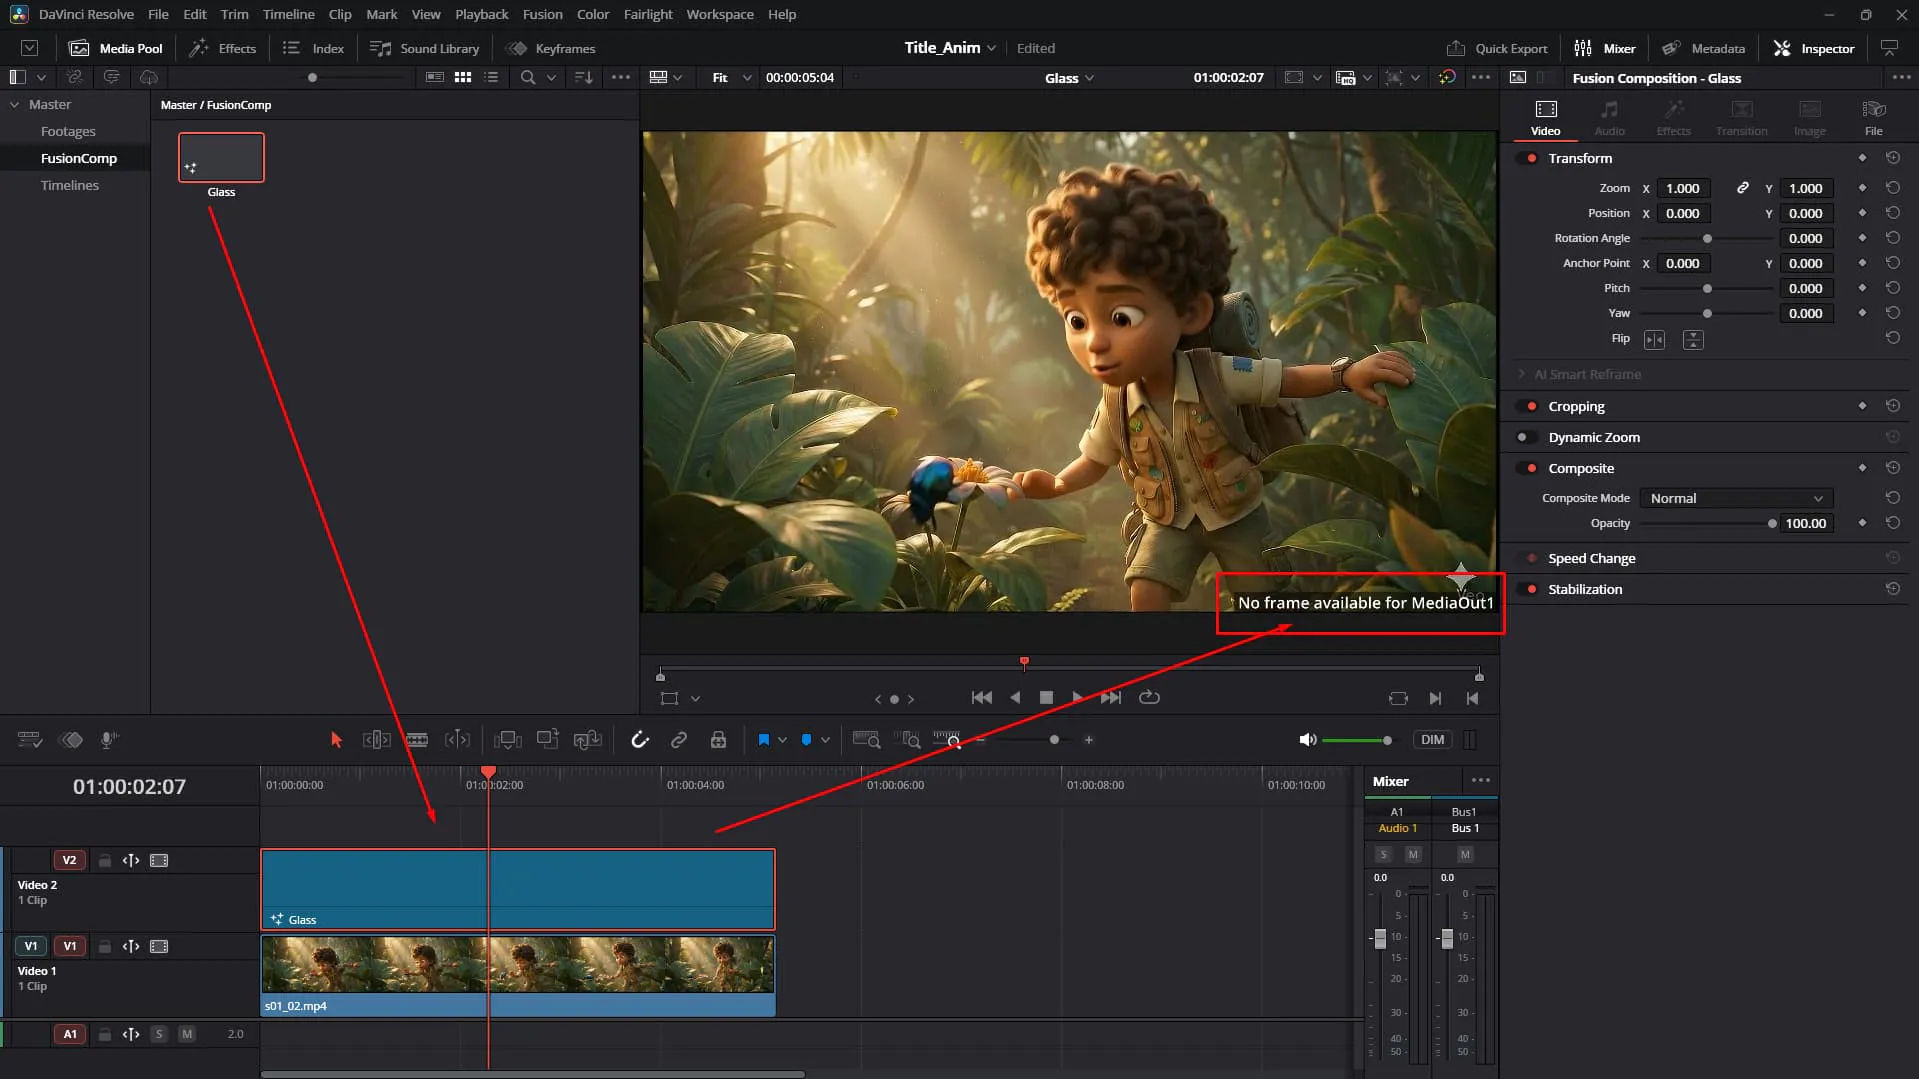
2. Place it on the Timeline Drag and drop your newly created composition onto your active timeline.
You might see
No frame available for Mediaout. This is normal since our newly created fusion composition does not have any media in node yet.
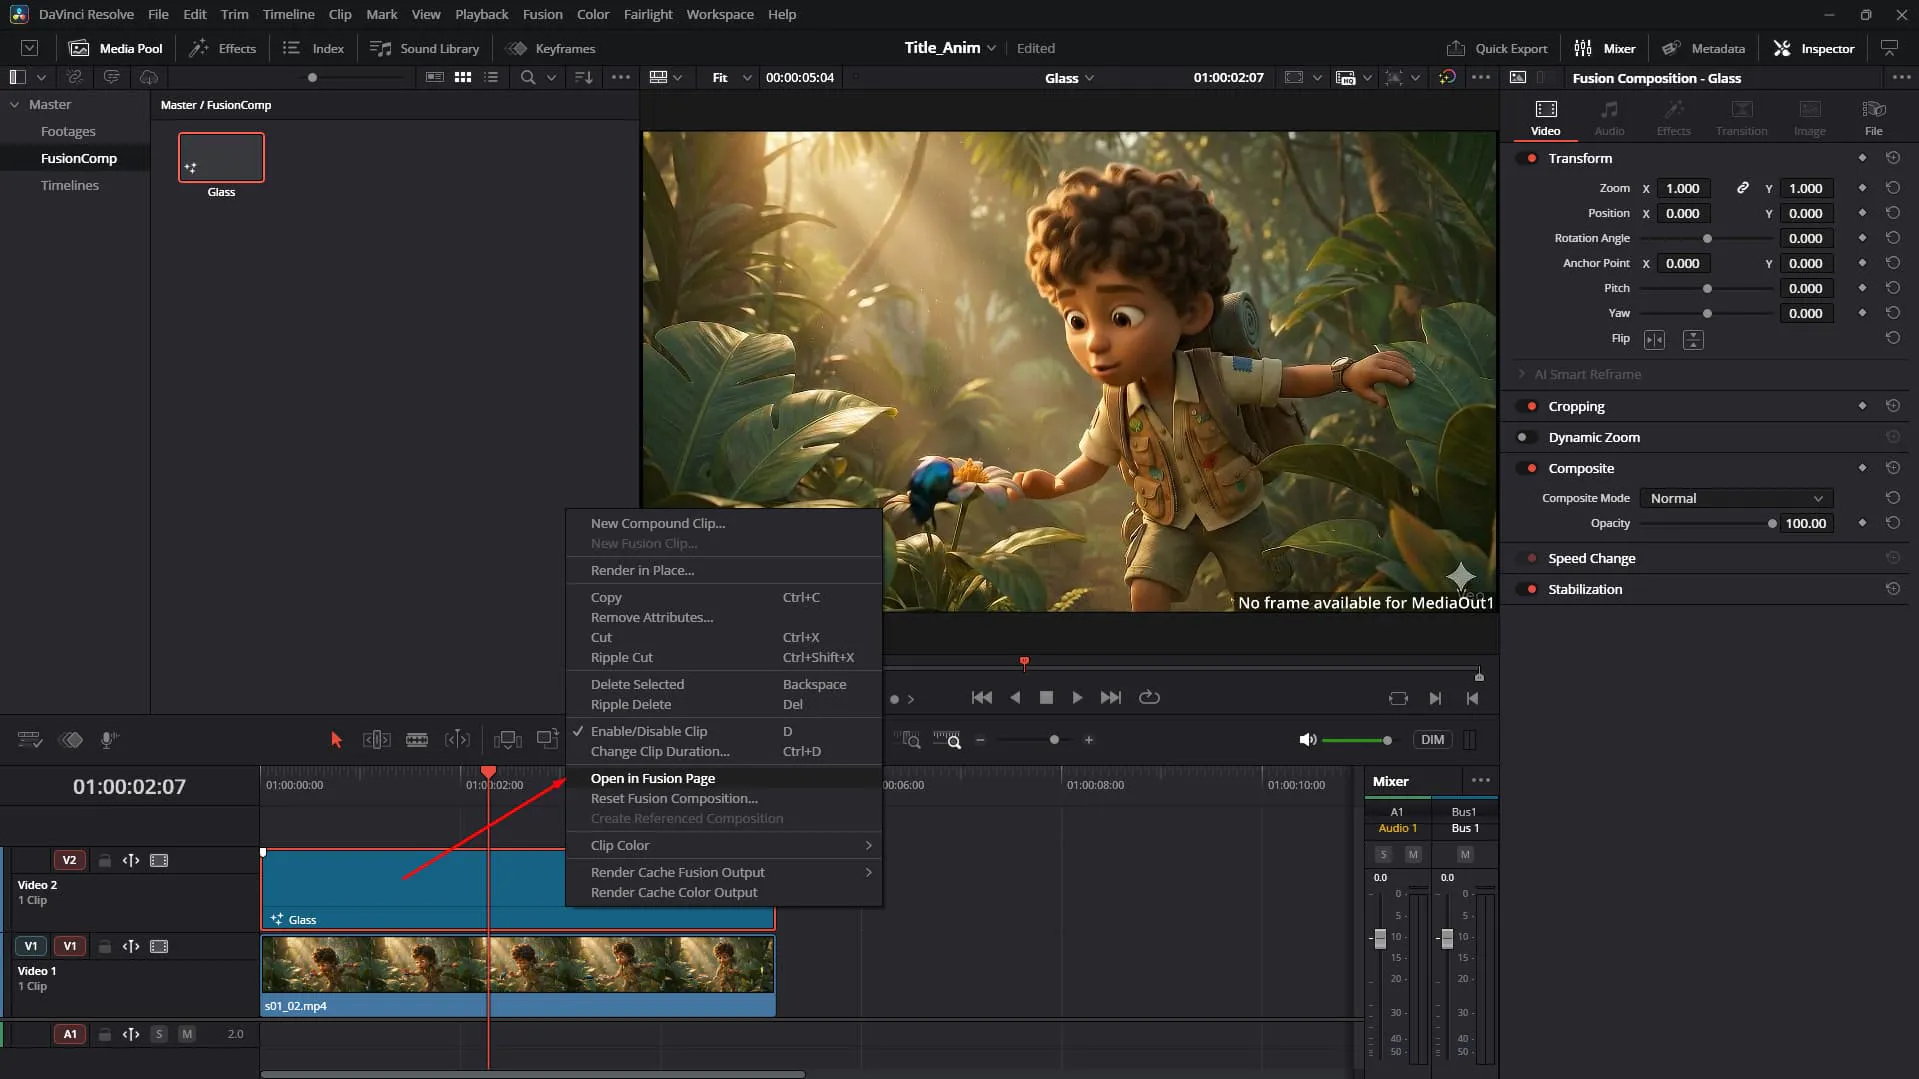
3. Enter the Fusion Page
With the new fusion composition selected, click on the Fusion tab at the bottom of the interface to open the node editor or Right-click to open the context menu and select Open in Fusion Page
Now, let's set up the signal flow. We need a background source that we can distort.
4. Set MediaIn to Background
Add a MediaIn node. In the inspector, set its Media Source to Background. This tells Fusion to use the video clip below this composition on the timeline as the source image.
This is the secret to dynamic overlays! 🤫
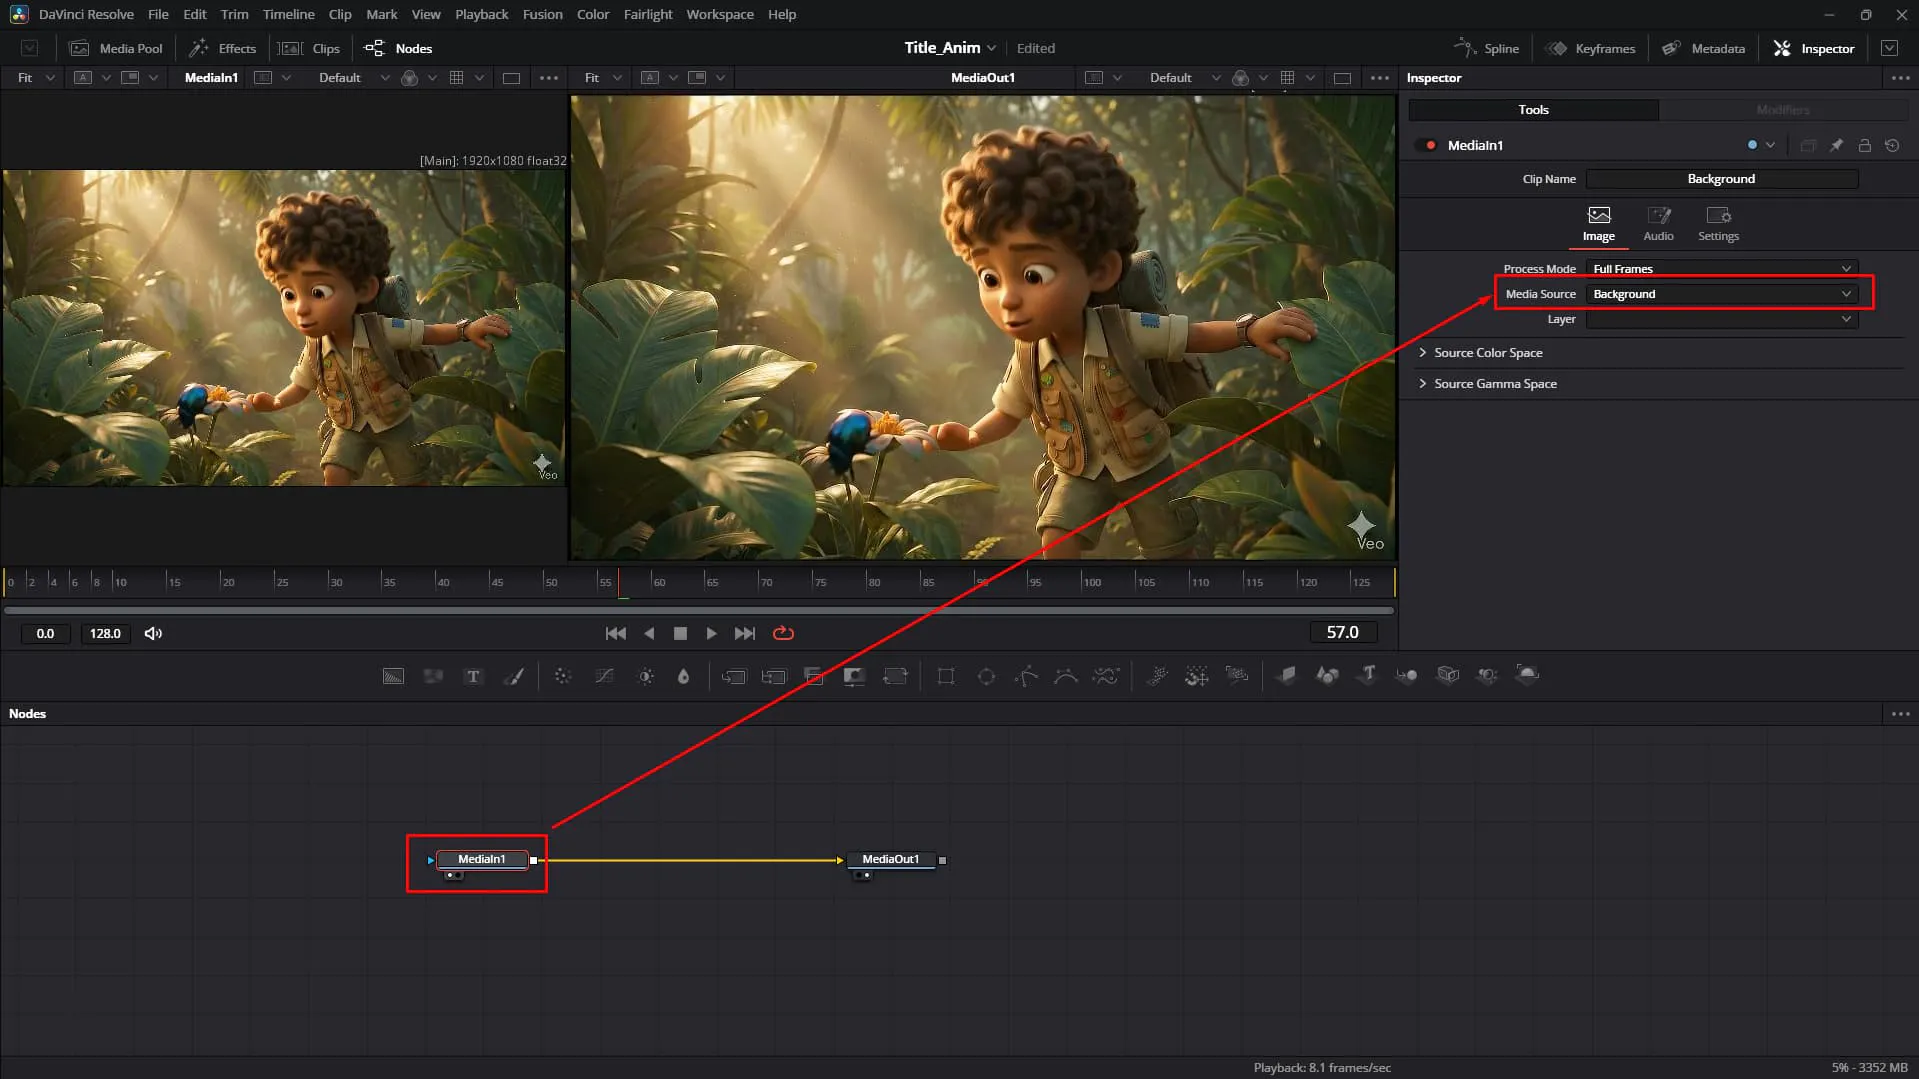
You can press
ctrl + spacebarorshift + spacebarto open the node tool search tab.
5. Add the Displace Node
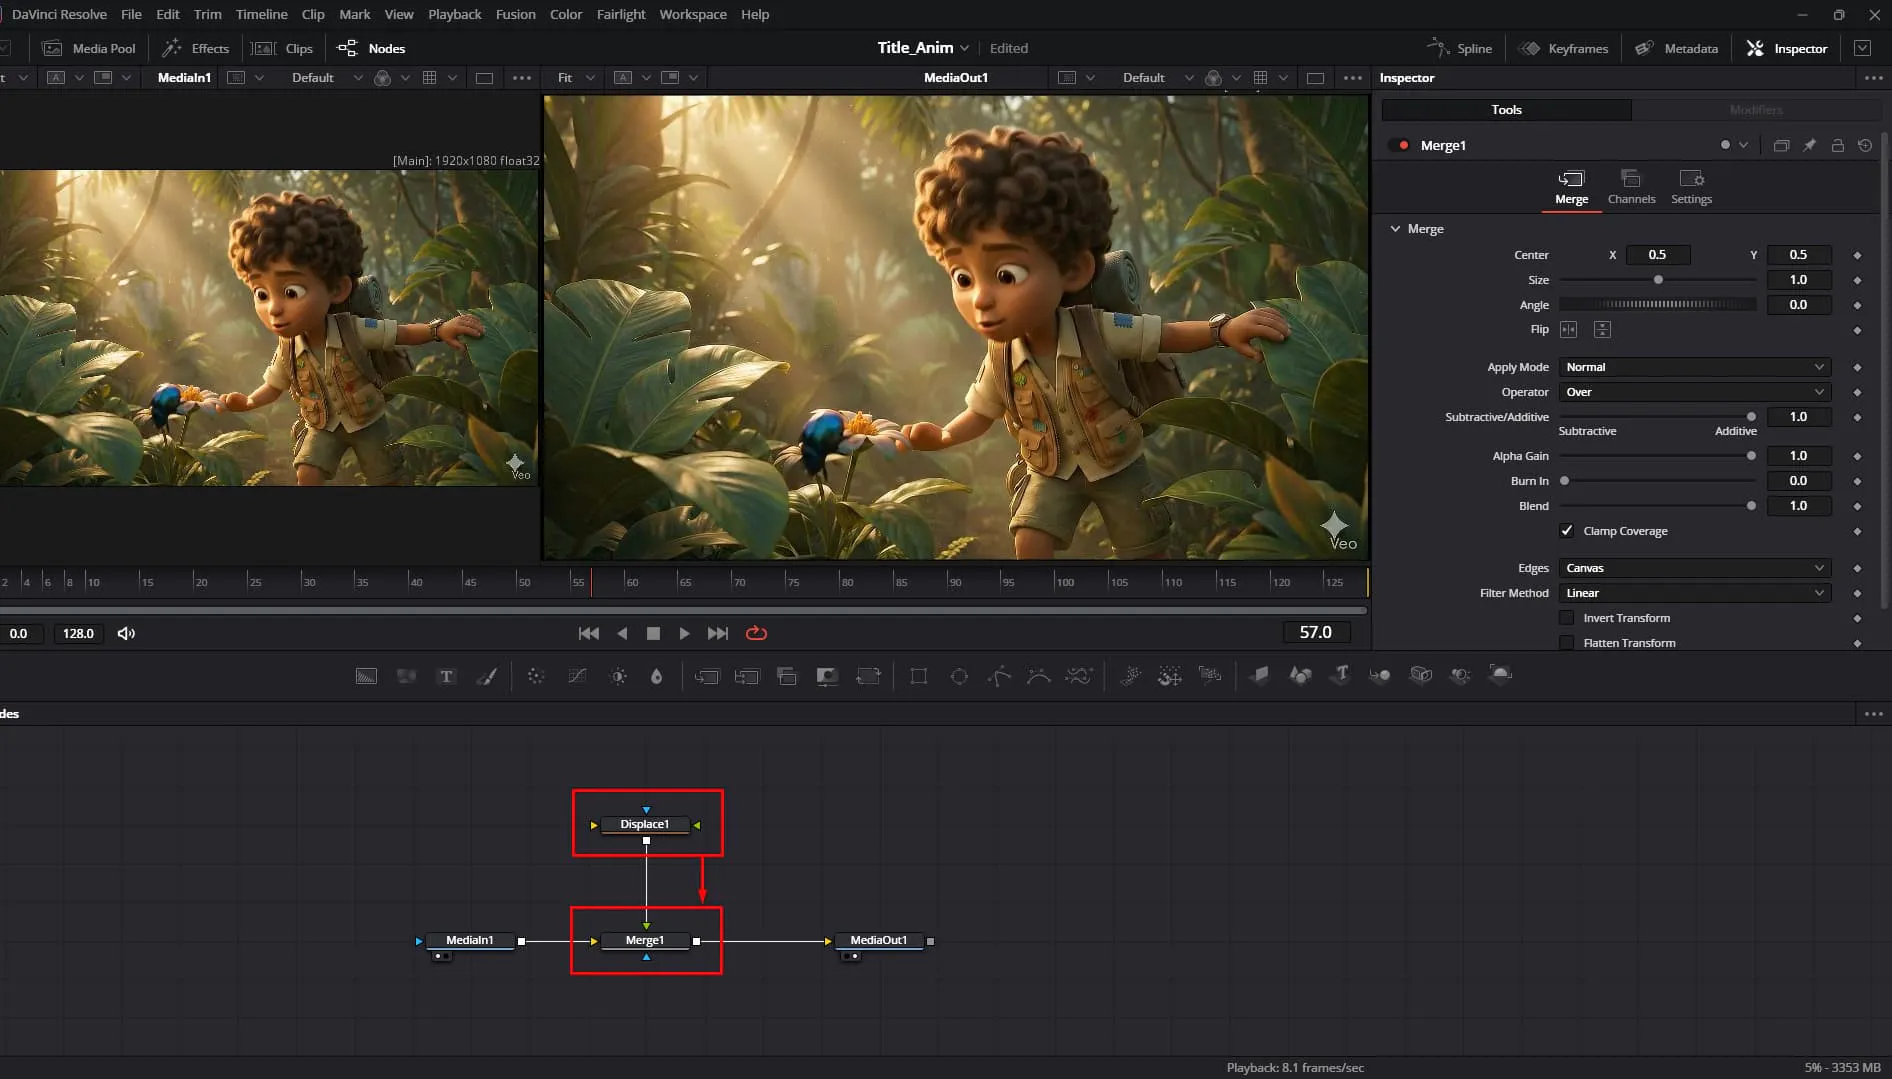
The magic ingredient! 🌟 Add a Displace (Dsp) node and connect it to your node tree. This node shifts pixels based on a map—perfect for simulating refraction.
Connect the Displace output to Merge1 tool's Foreground
6. Route the Signal
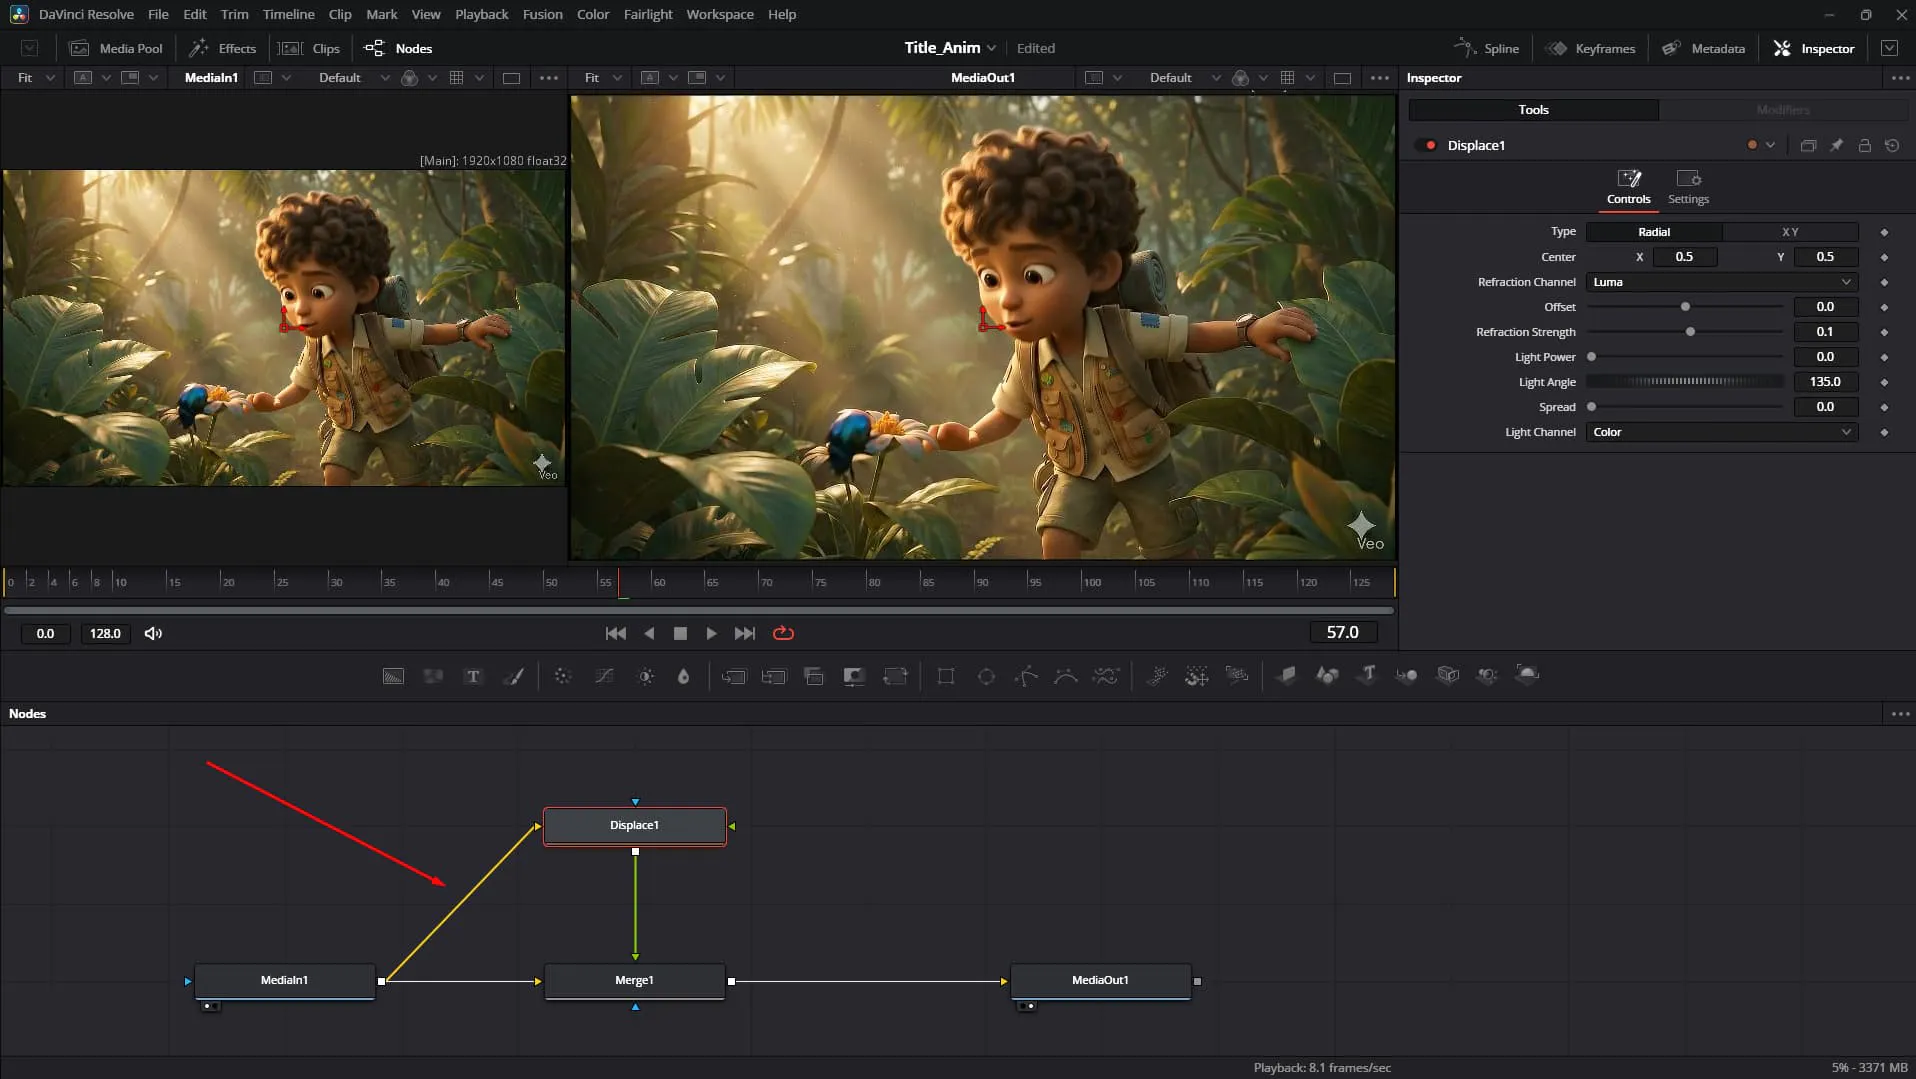
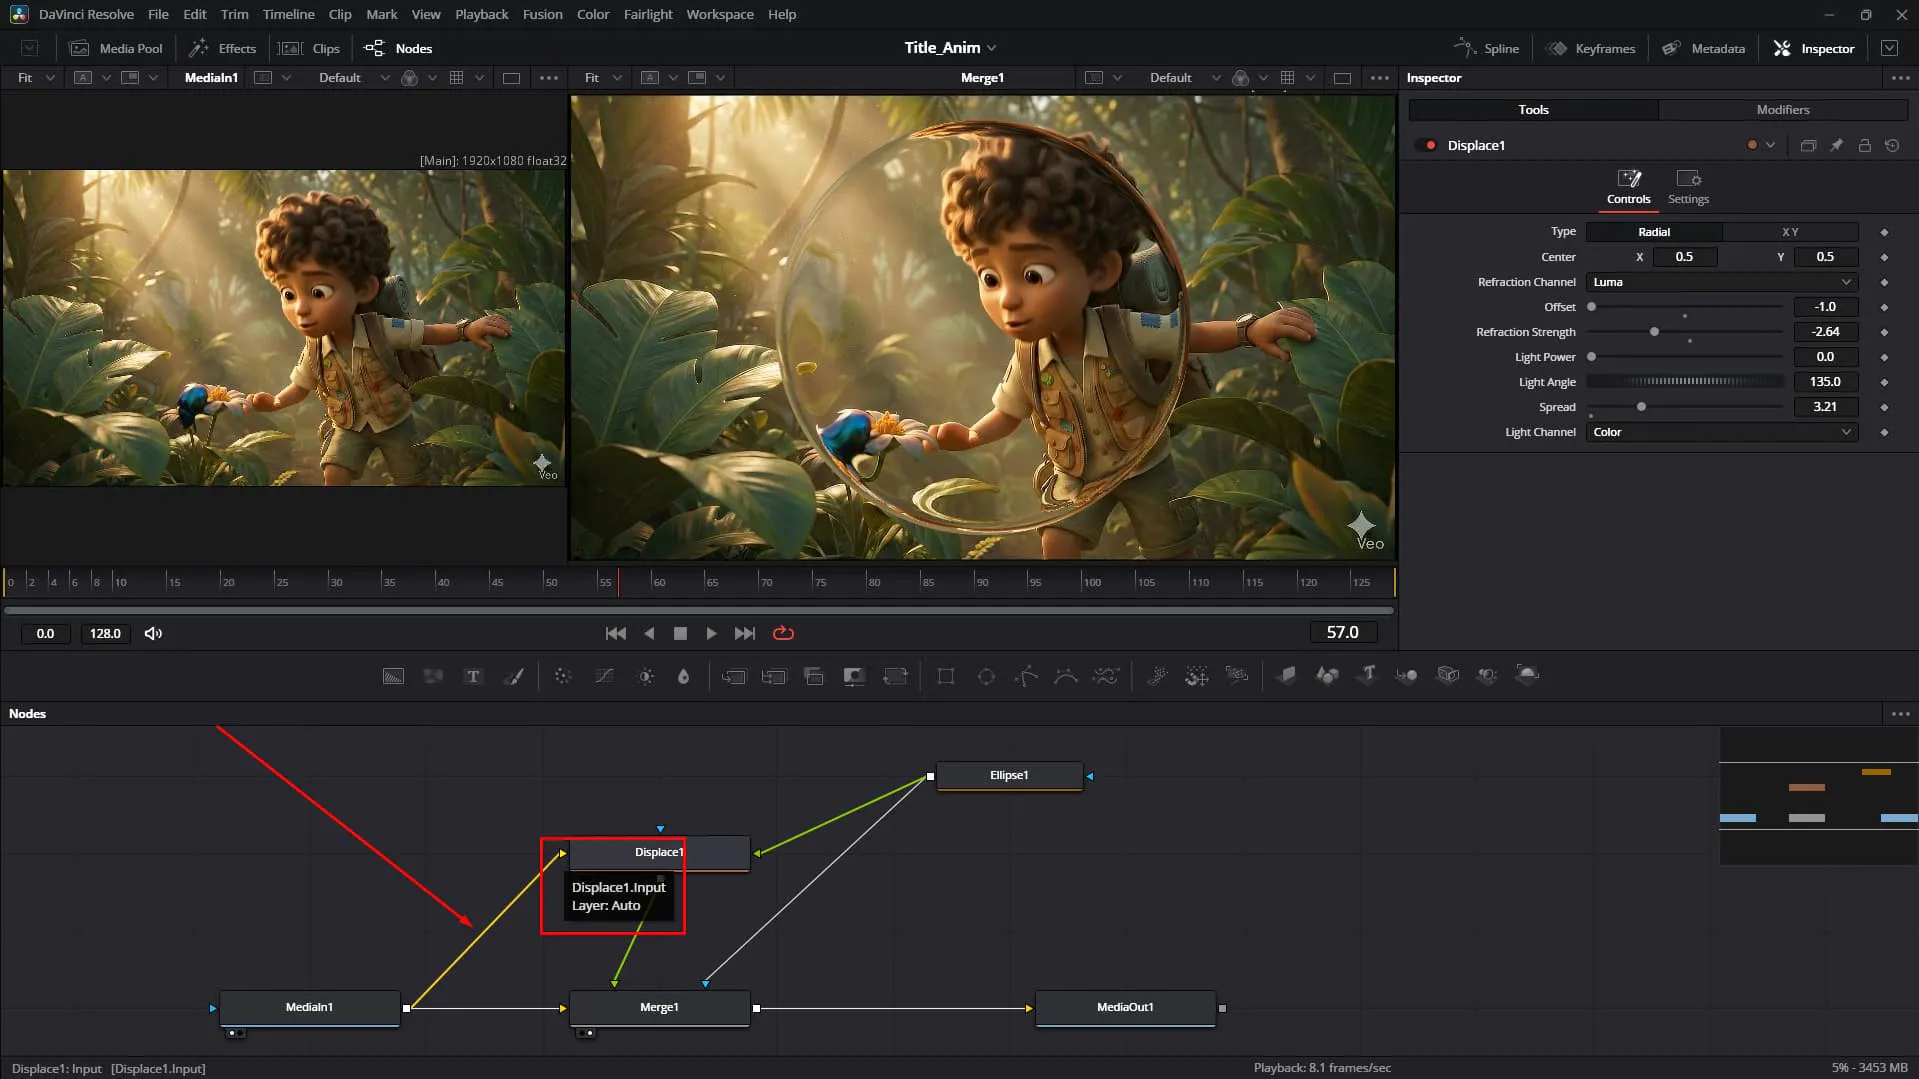
The Displace node needs something to distort! It requires an Input Source (🟡➔ Yellow Input).
Connect your MediaIn (the background footage) to the Input (yellow triangle) of the Displace Node.
Glass needs a shape. We'll create a mask that defines where the distortion happens.
7. Create the Glass Shape
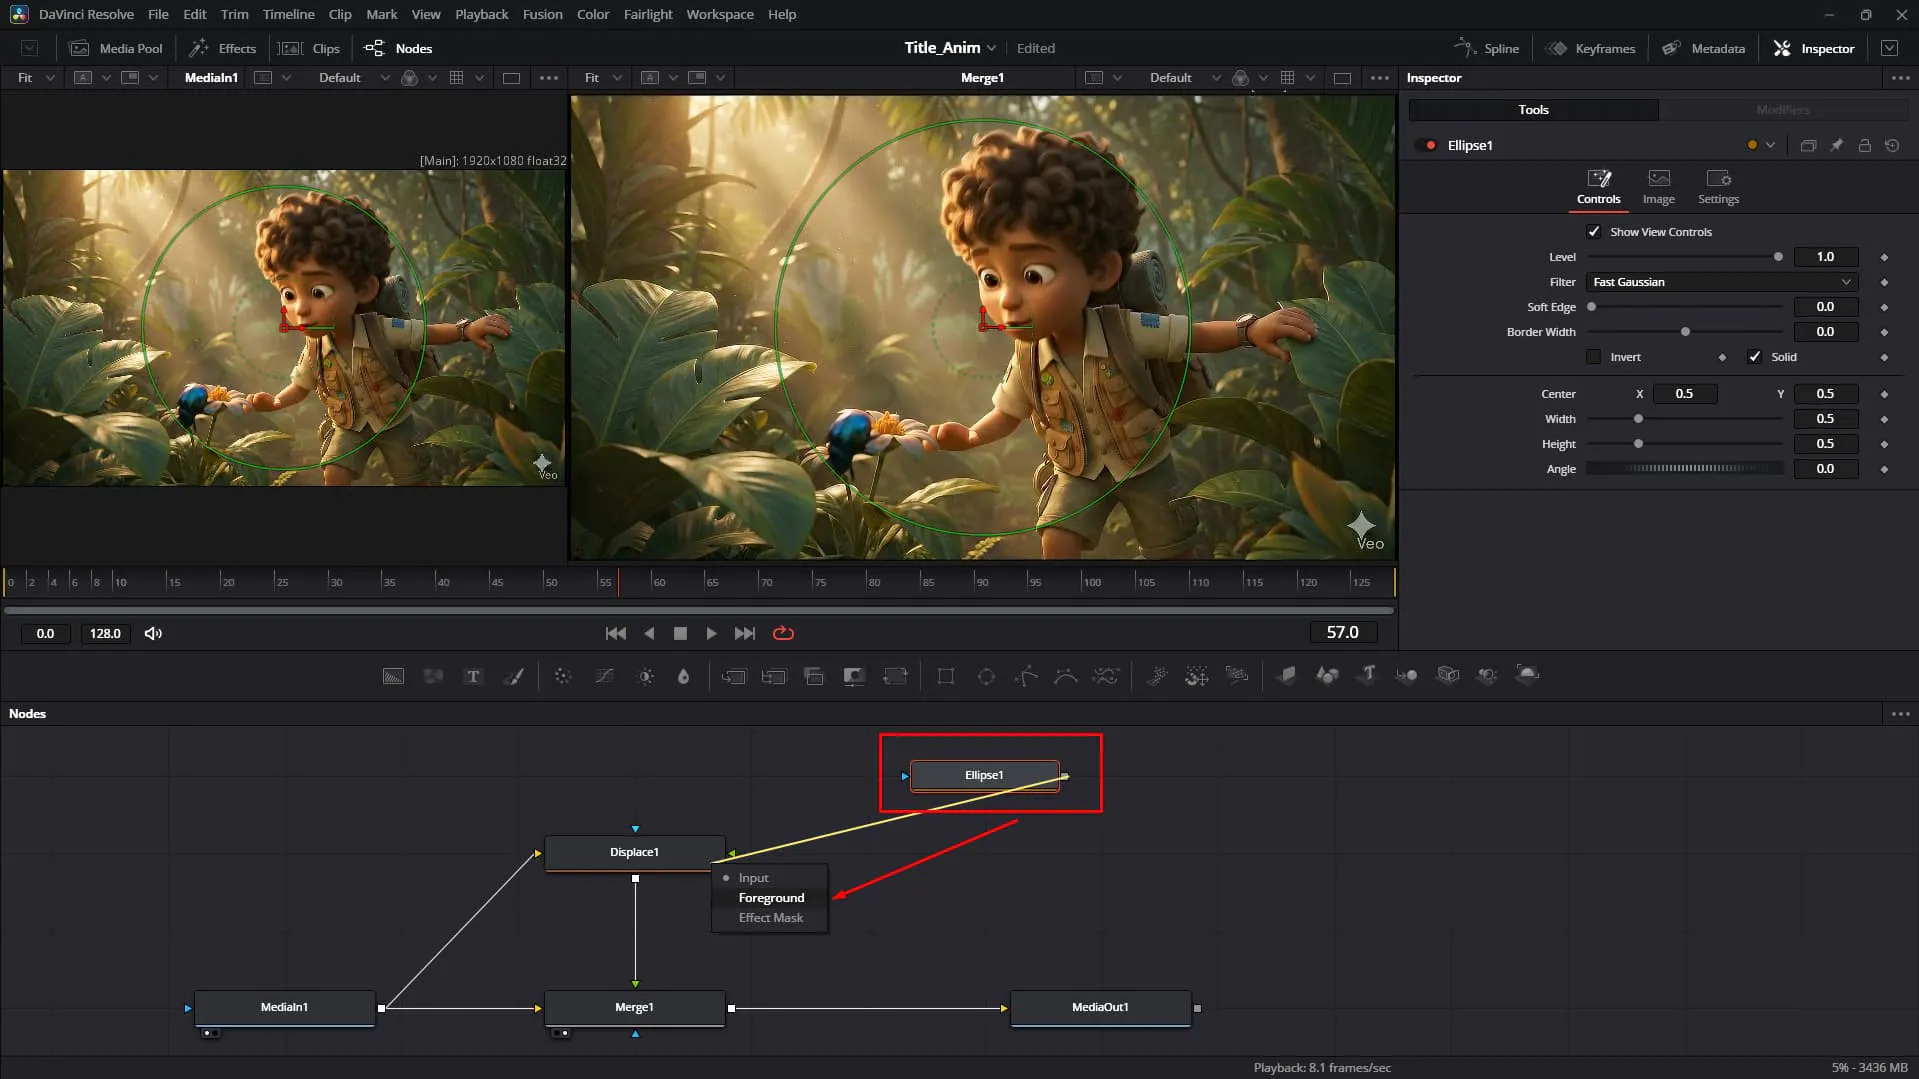
Add a shape node (like an Ellipse or Rectangle) to create your glass element. Connect this to the Foreground (green input)🟢⬅ of the Displace Node. This acts as the lens map.
Pro Tip: Not sure which input is which? Try this workflow hack: Drag the output from your Shape node towards the Displace node, but hold the
Alt(Windows) orOption(Mac) key before releasing the mouse. A menu will pop up listing all available inputs—select Foreground from the list! 🧠⚡
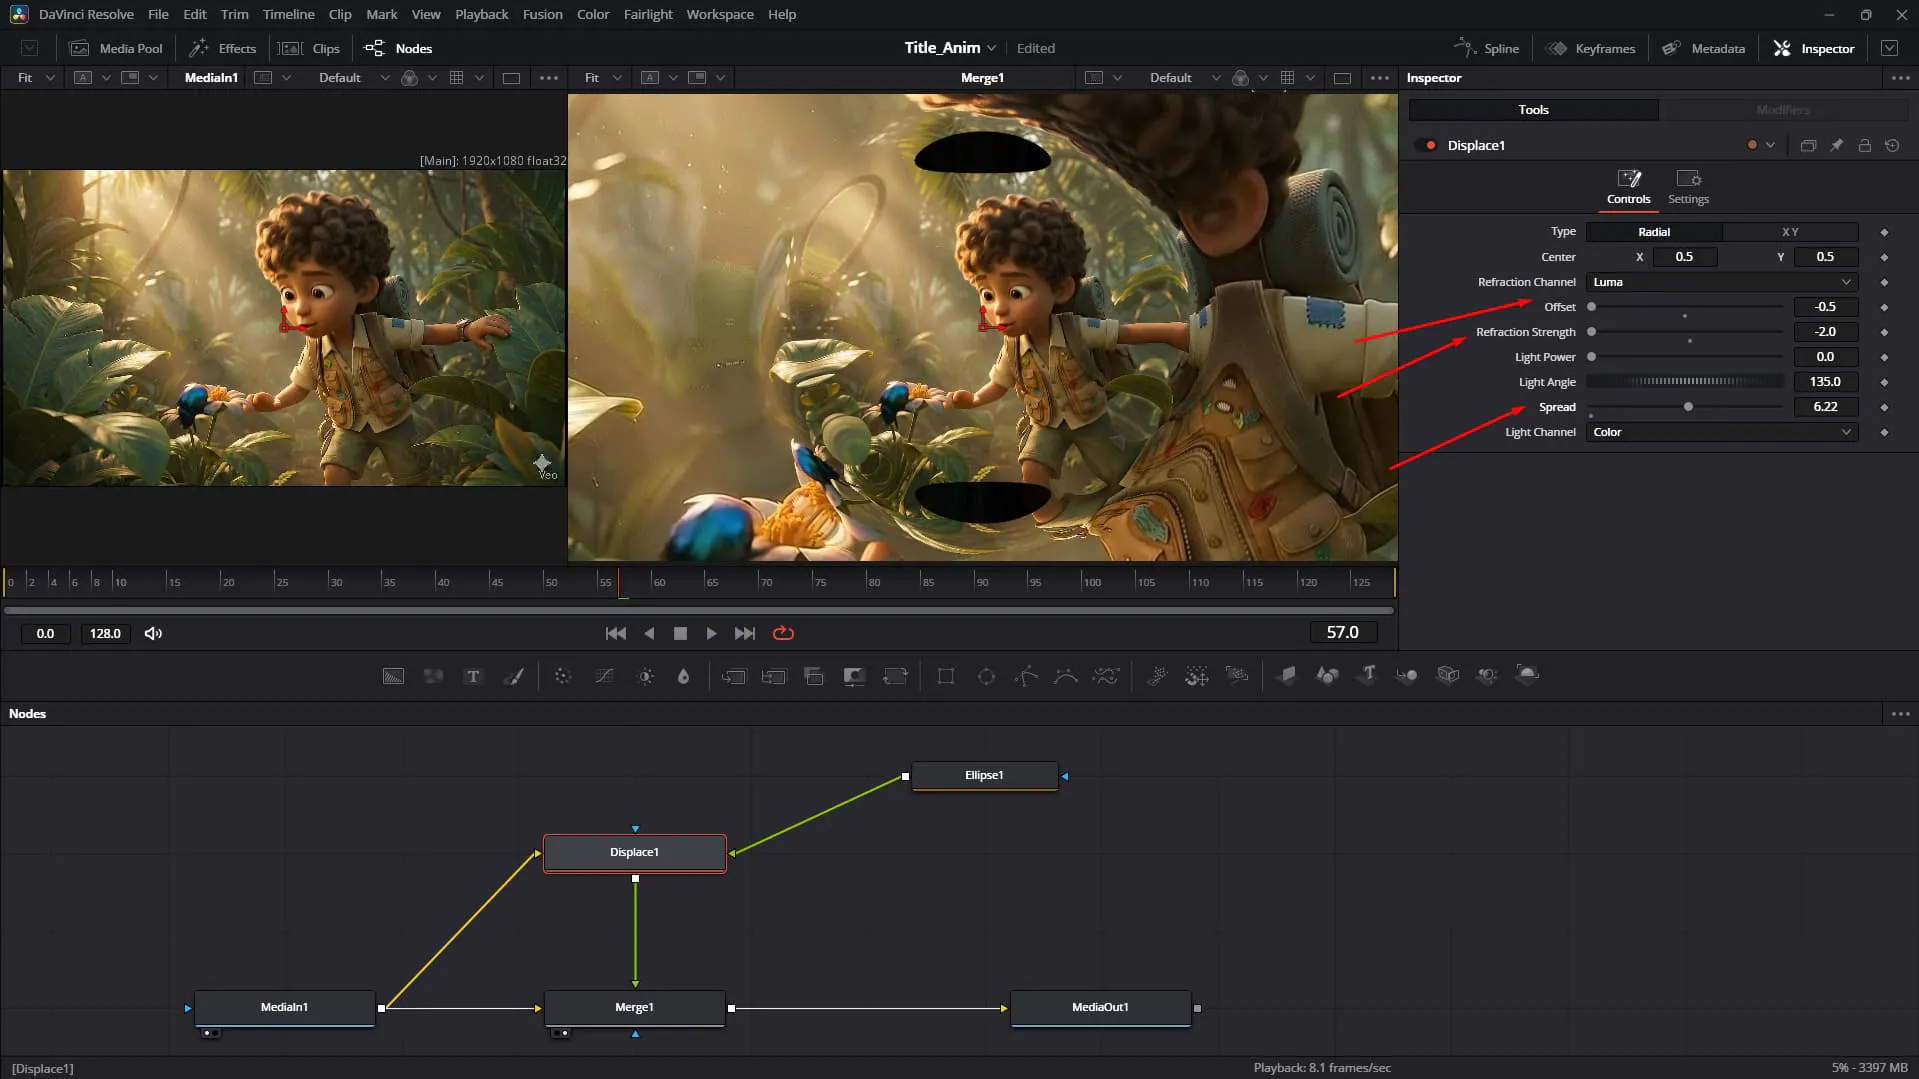
8. Configure Displacement Select the Displace Node and play with the Refraction Strength or Offset settings. You'll start to see the distortion logic kick in.
Offset - -0.5
Refraction Strength - -2.0
Spread - 6.22
9. Masking the Merge
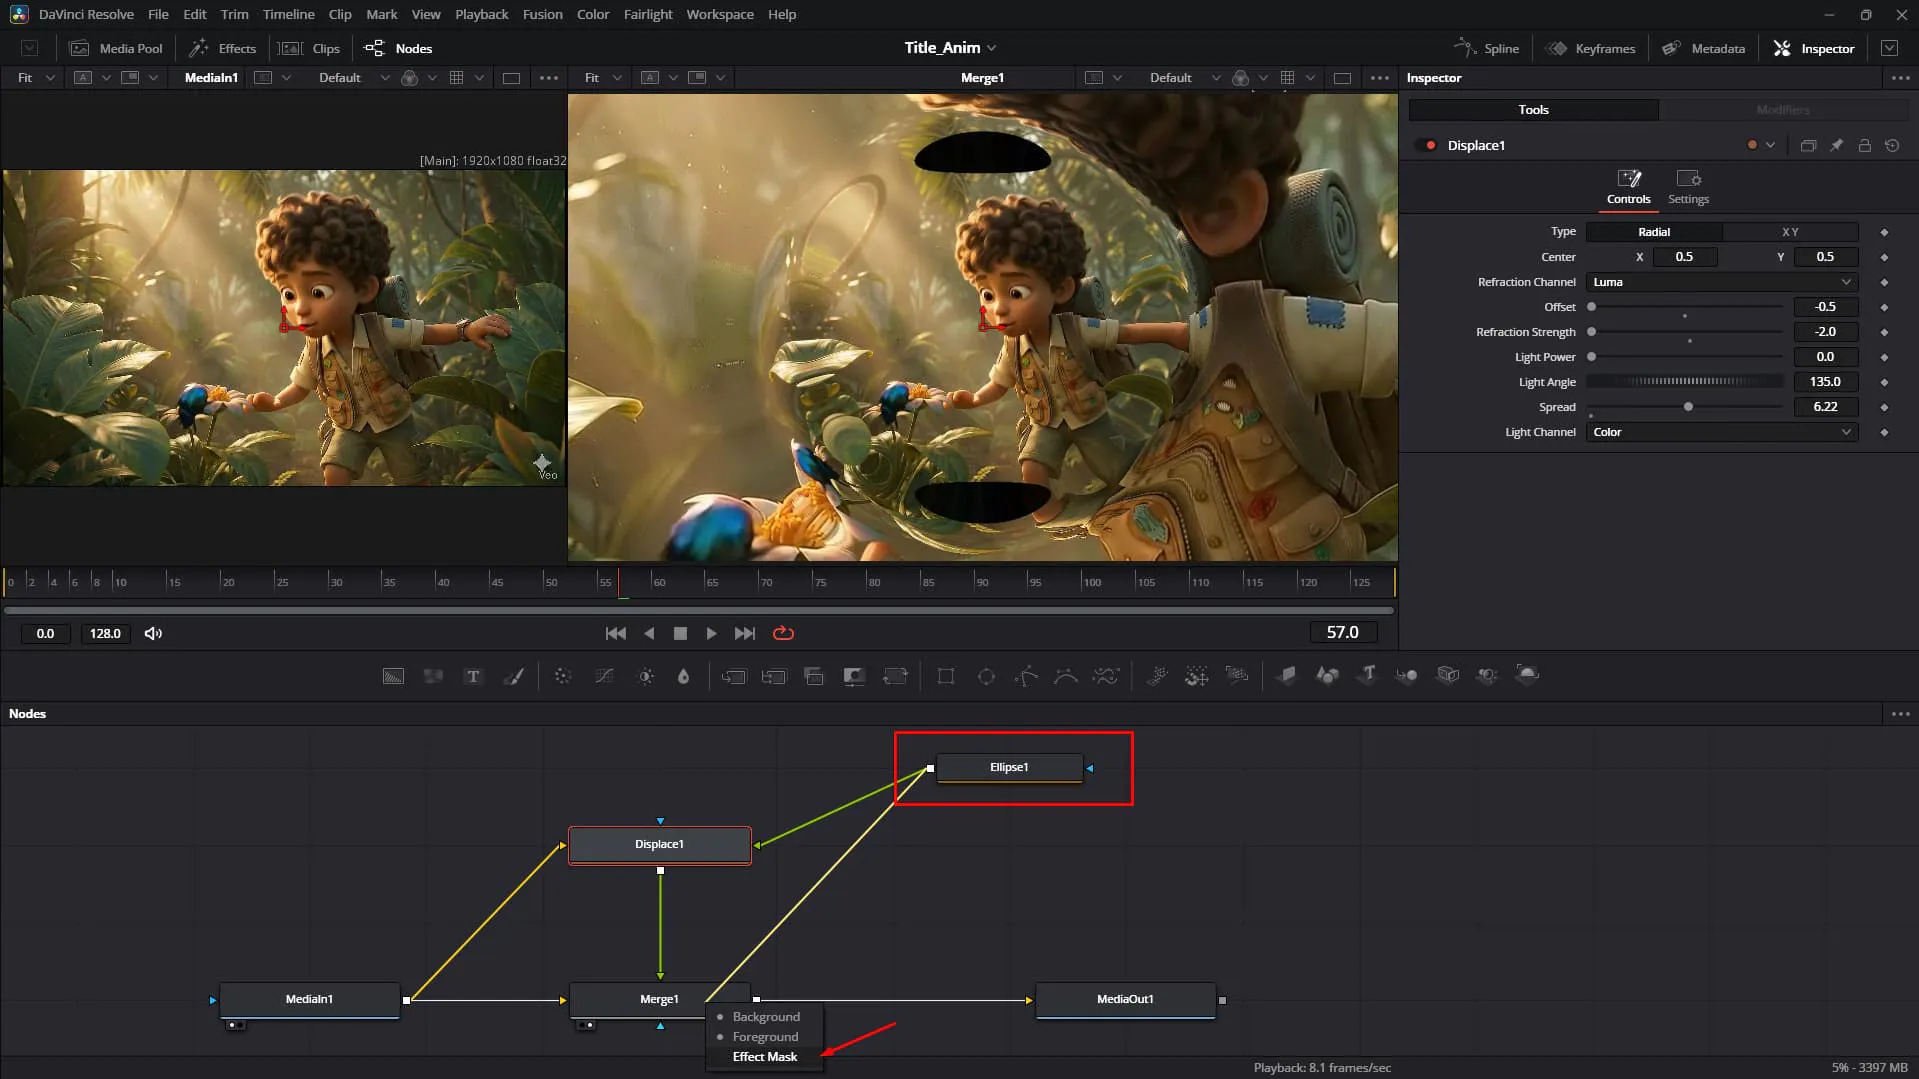
Right now the displace node will affect the whole image. To ensure the effect only appears inside our shape, use the output of your shape node to mask the Merge node that composites this effect back onto the main image.
10. Check the Result
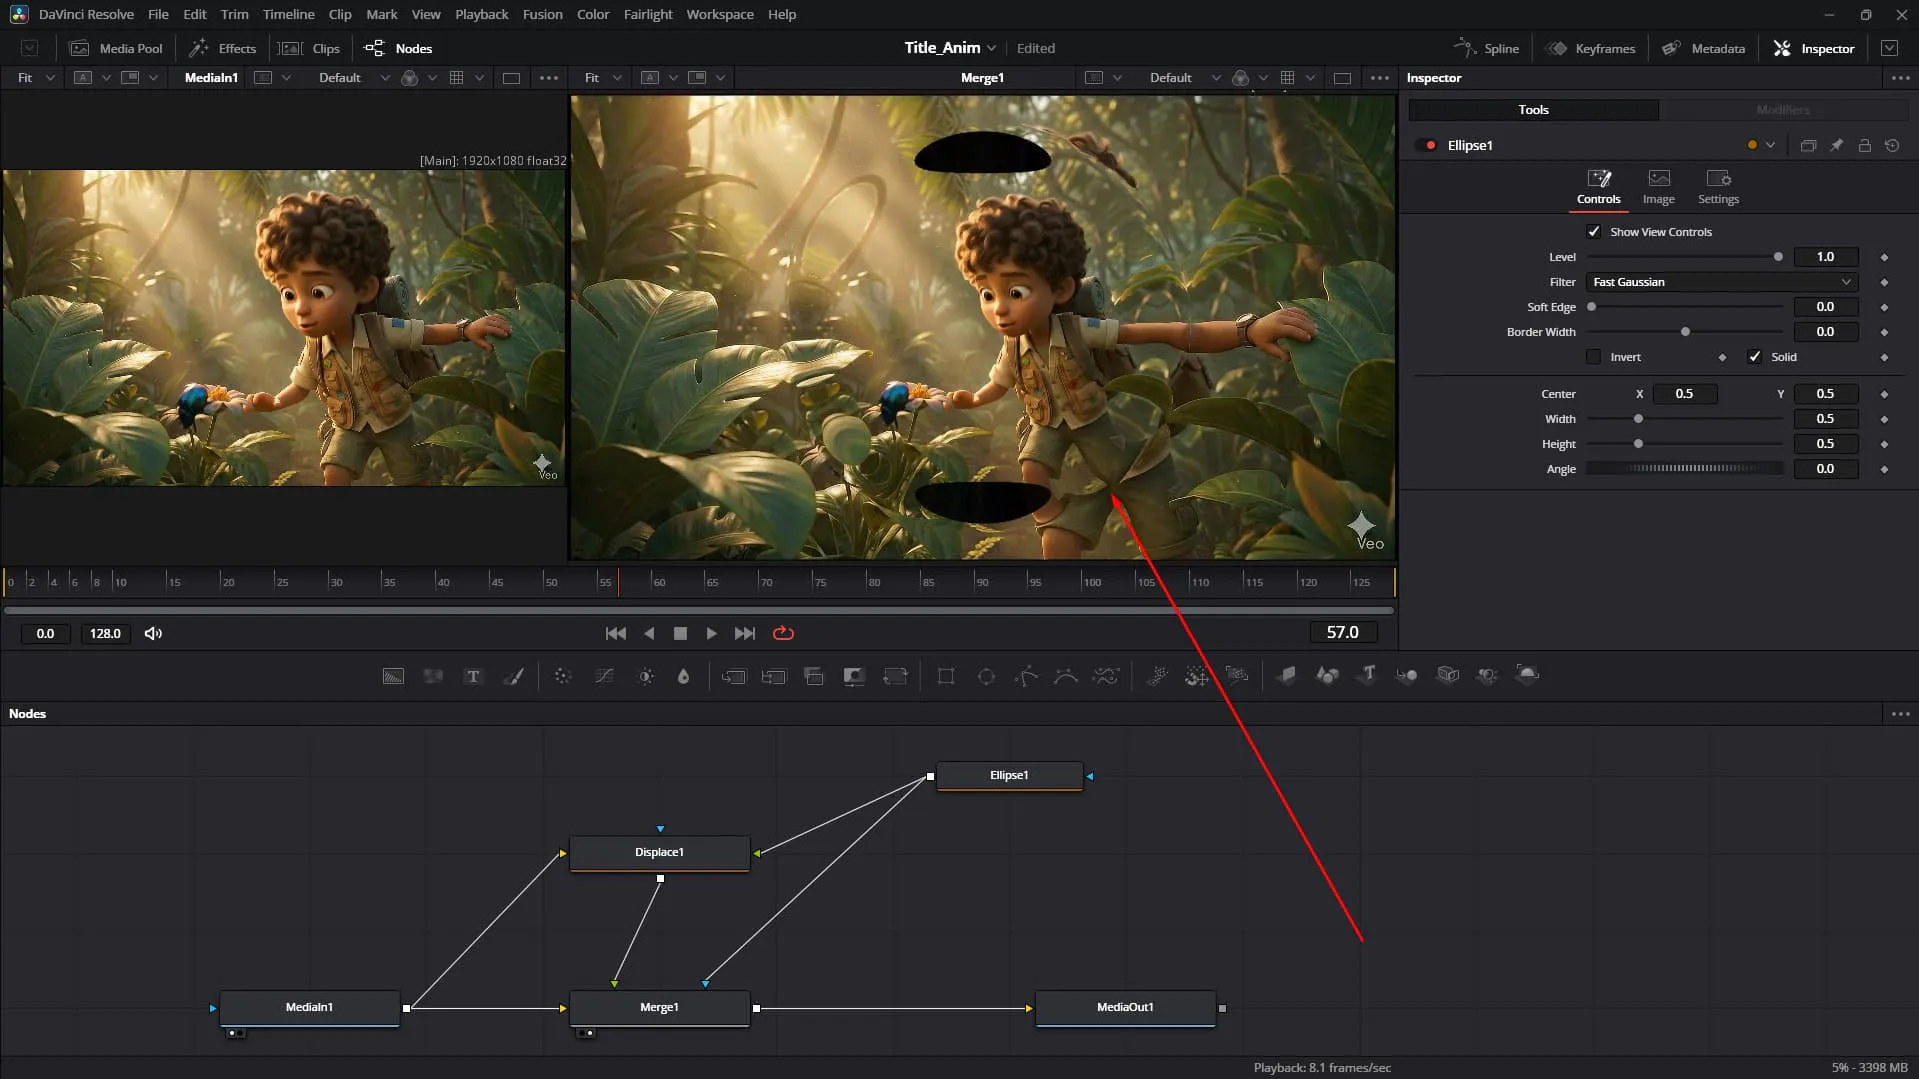
You should now see a cut-out area where the pixels are shifted. It's starting to look like a lens! 🧐
Real glass isn't perfect; it bends light in complex ways.
11. Fine-Tune Displacement
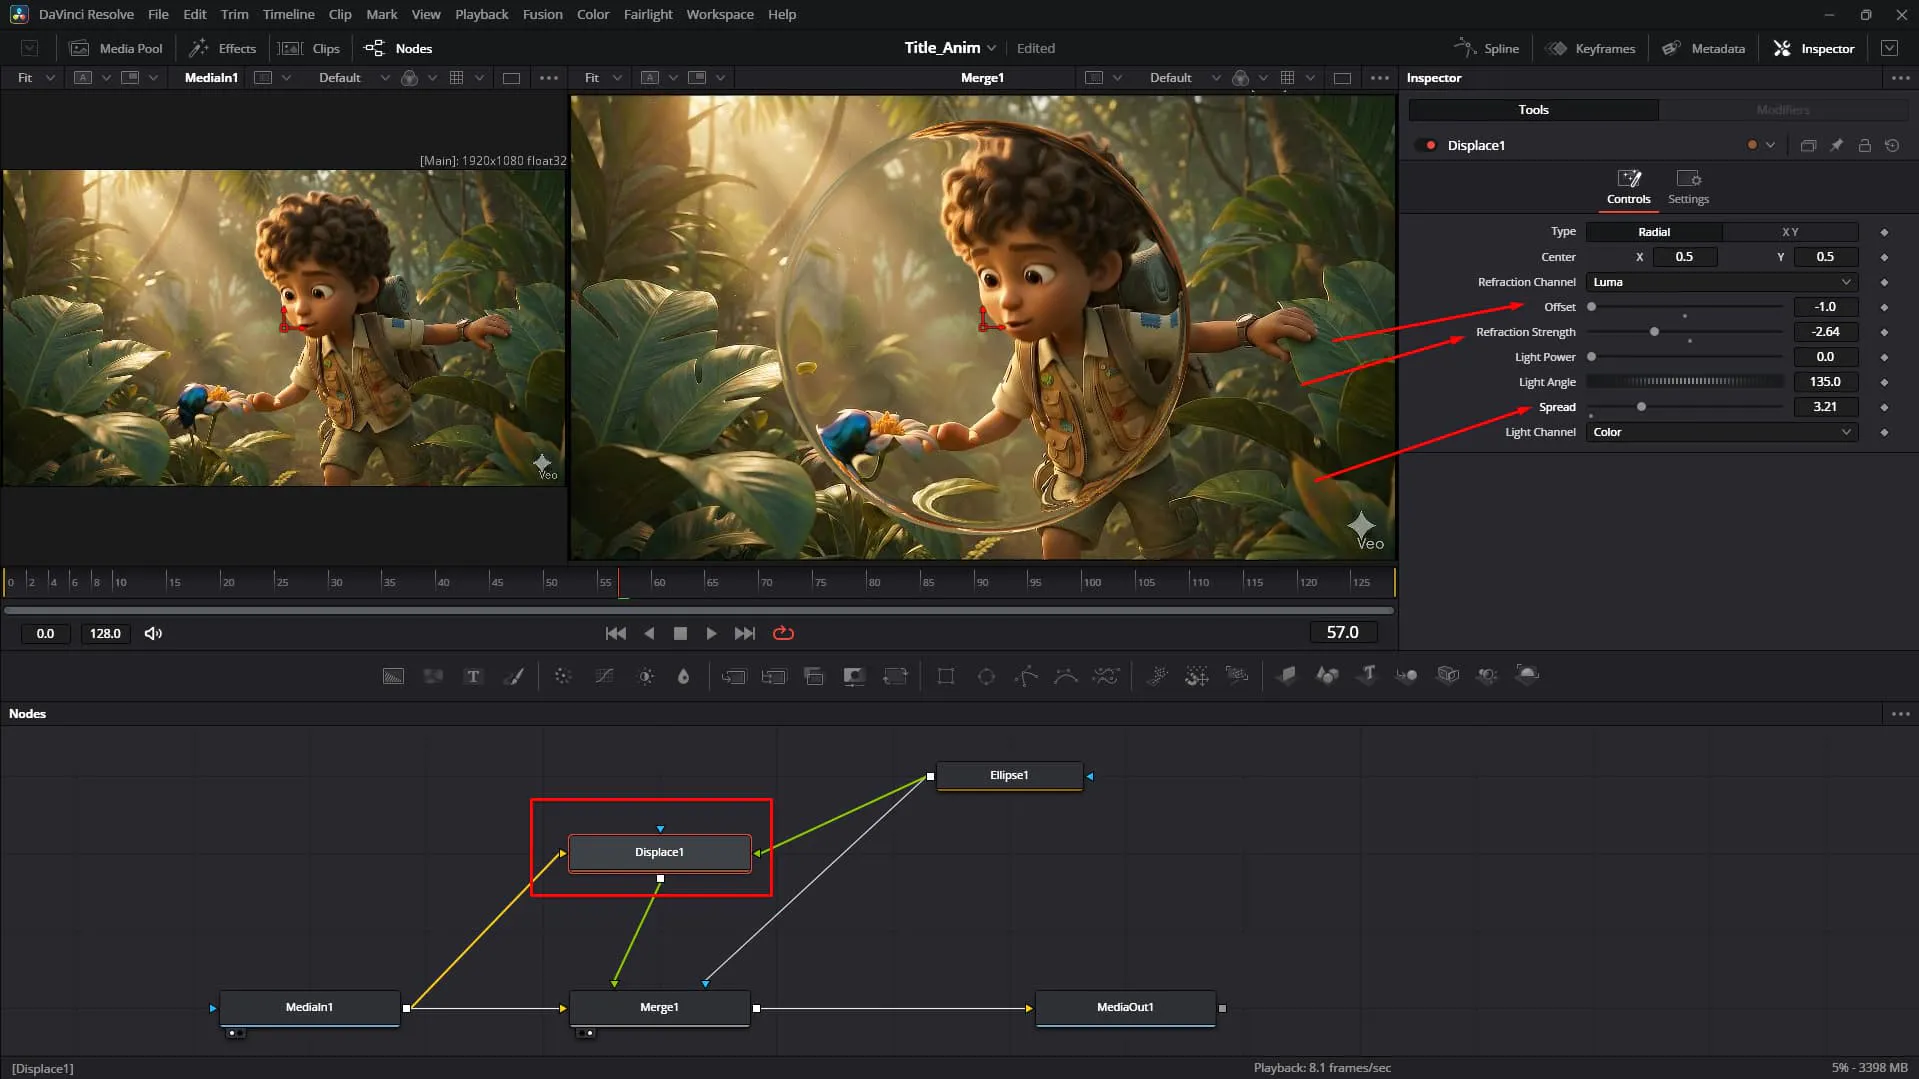
Adjust the X/Y Refraction and Light Power in the Displace node settings. This mimics the thickness and curvature of the glass.
12. Verify Input Flow
Double-check your connections. Ensure the background is flowing into the Displace node correctly so the distortion updates dynamically if the background video changes.
13. Add the "Frosted" Look (Blur)
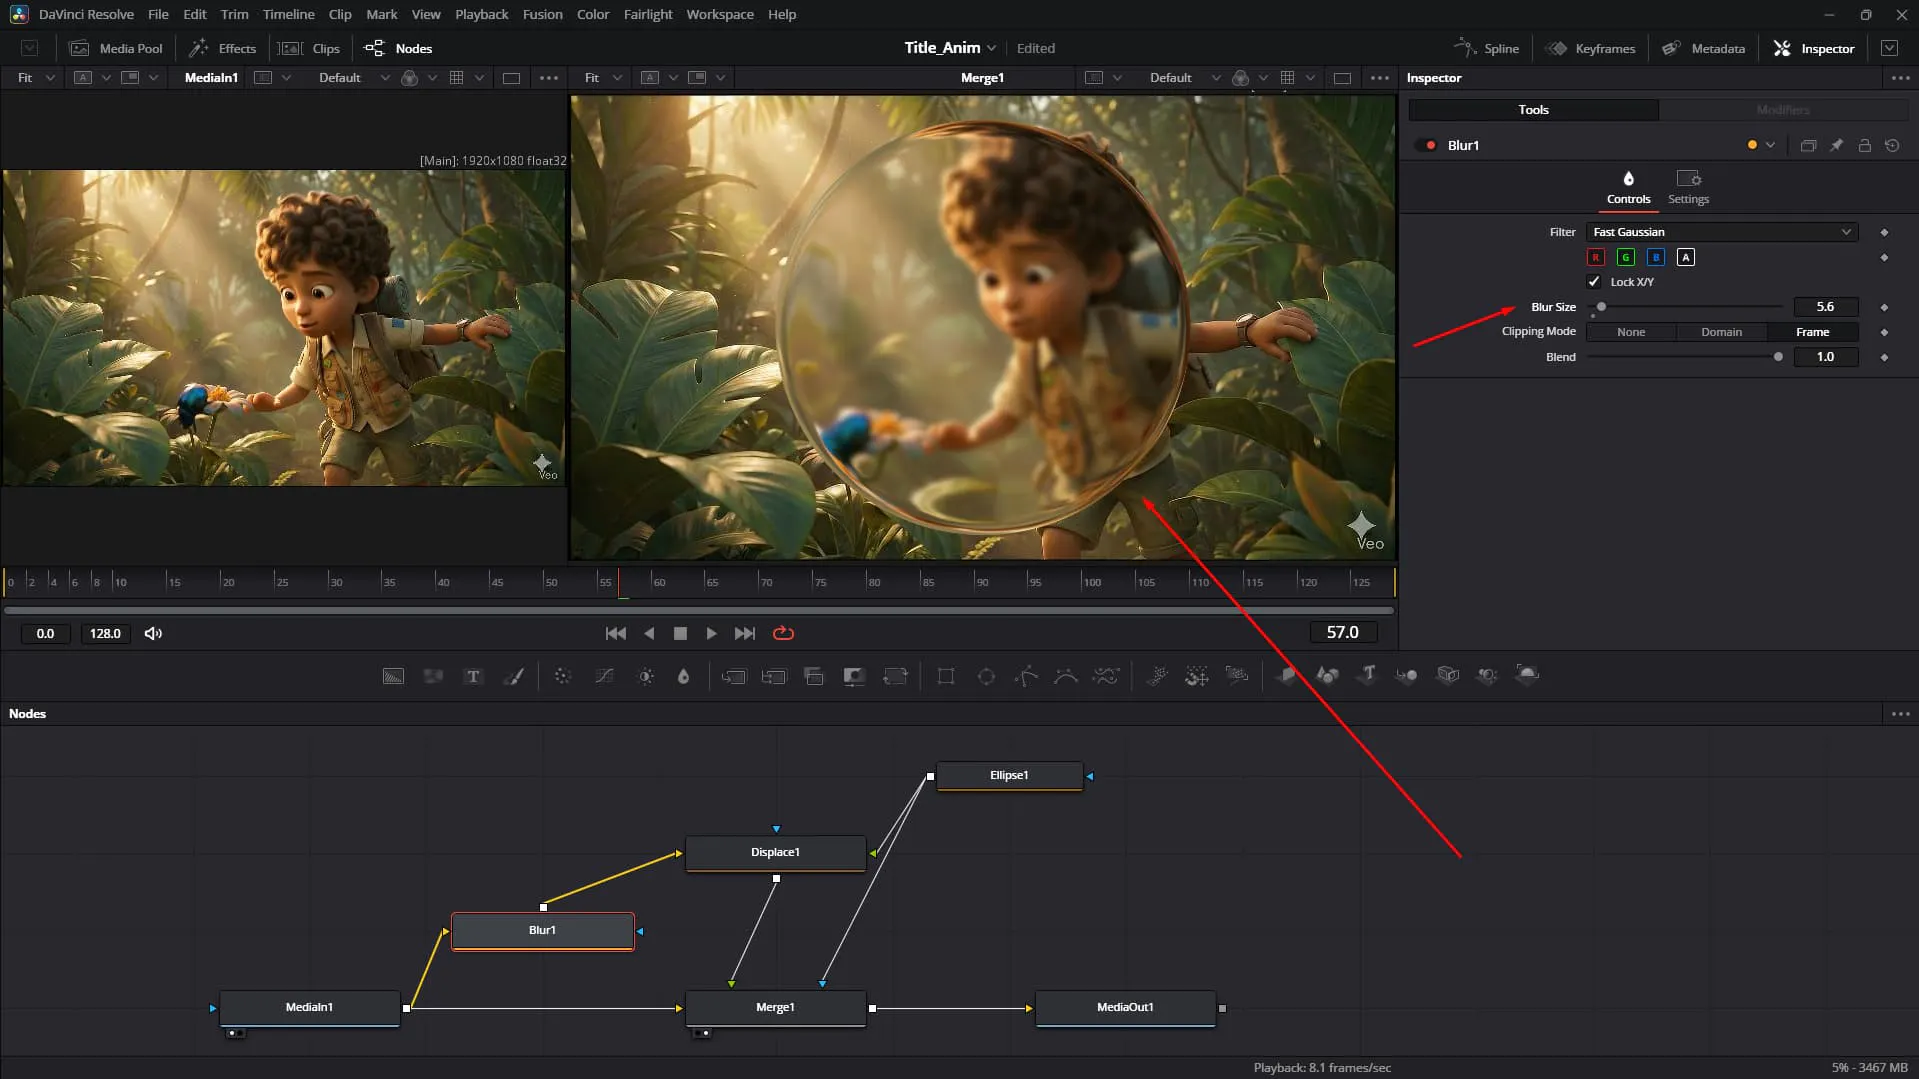
Want frosted glass? ❄️ Add a Blur Node after the MediaIn but before the Displace node (or directly on the glass branch). This softens the image seen through the glass, separating it from the sharp background.
Glass effects look amazing with floating text.
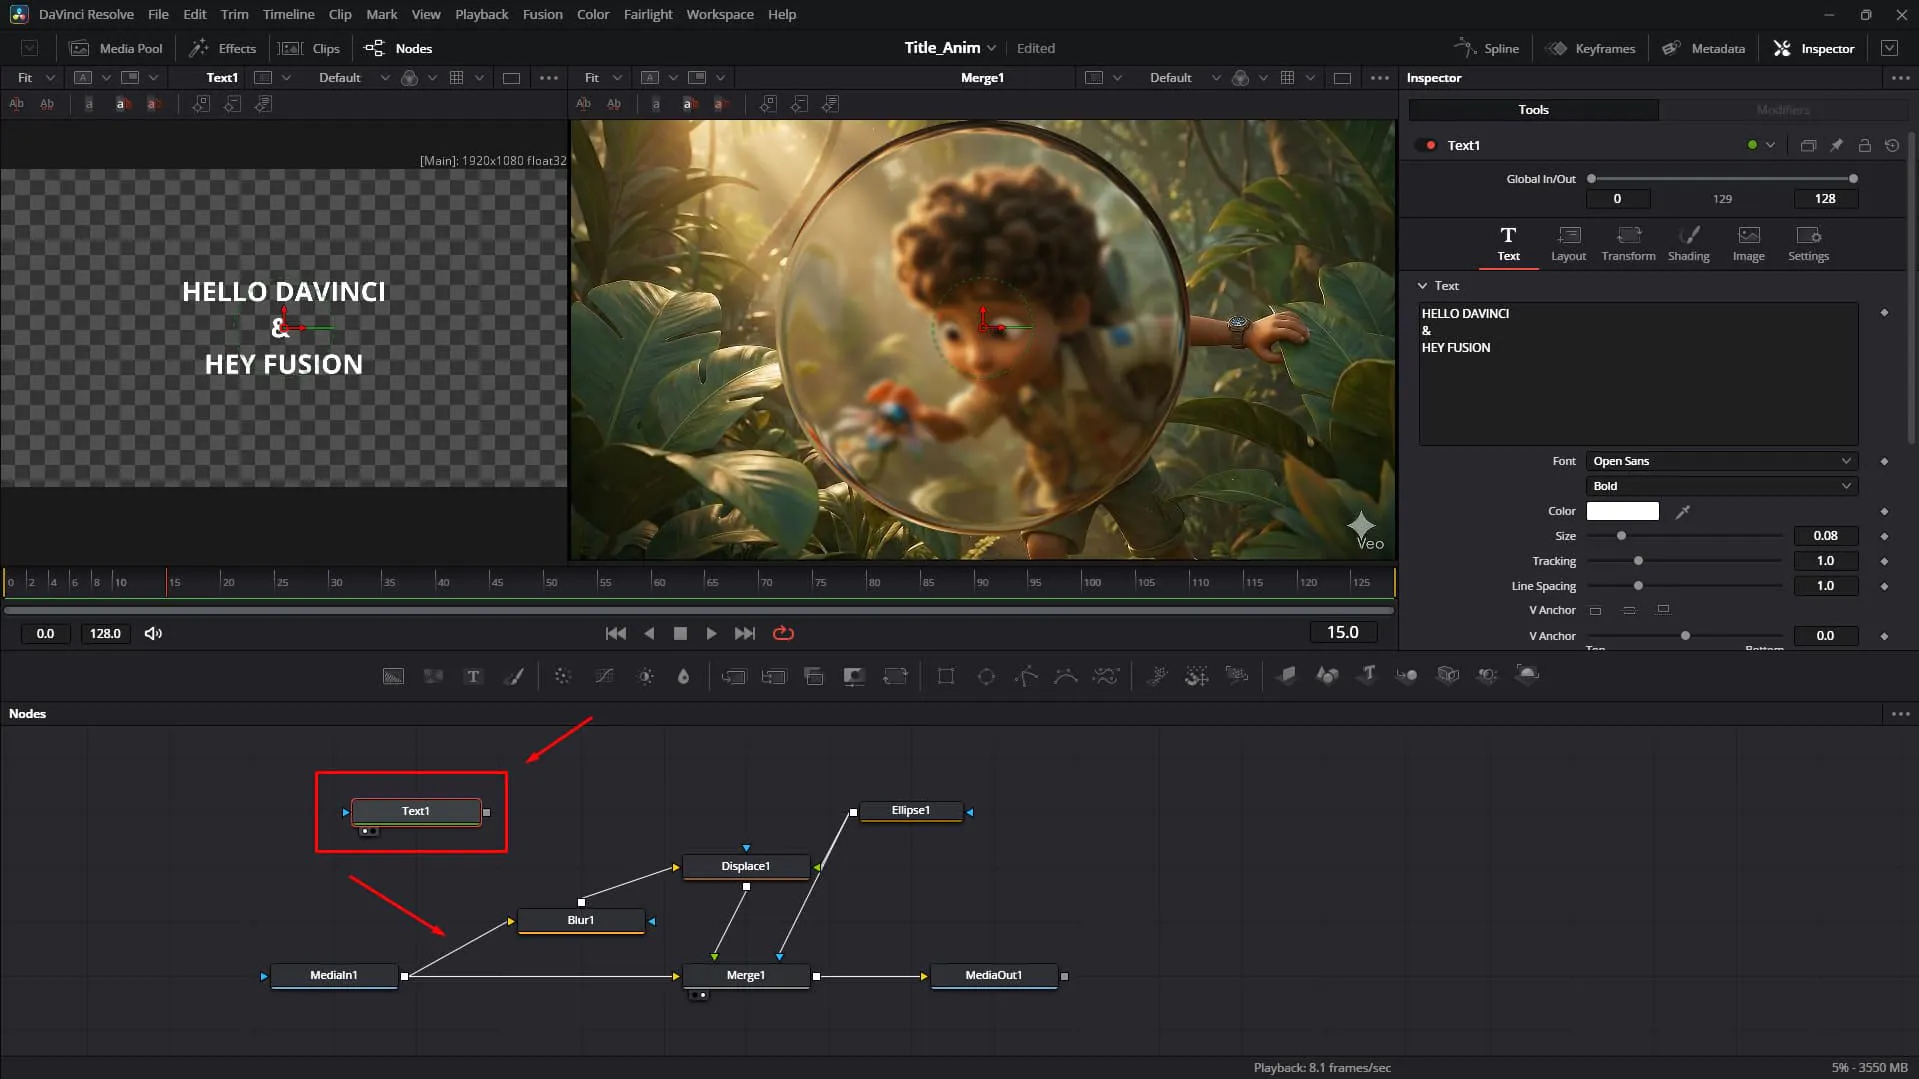
14. Create a Text Node
Add a Text+ node and type your title. Pick a bold, modern font like Inter or Montserrat for that techy vibe.
15. Merge Text with Media
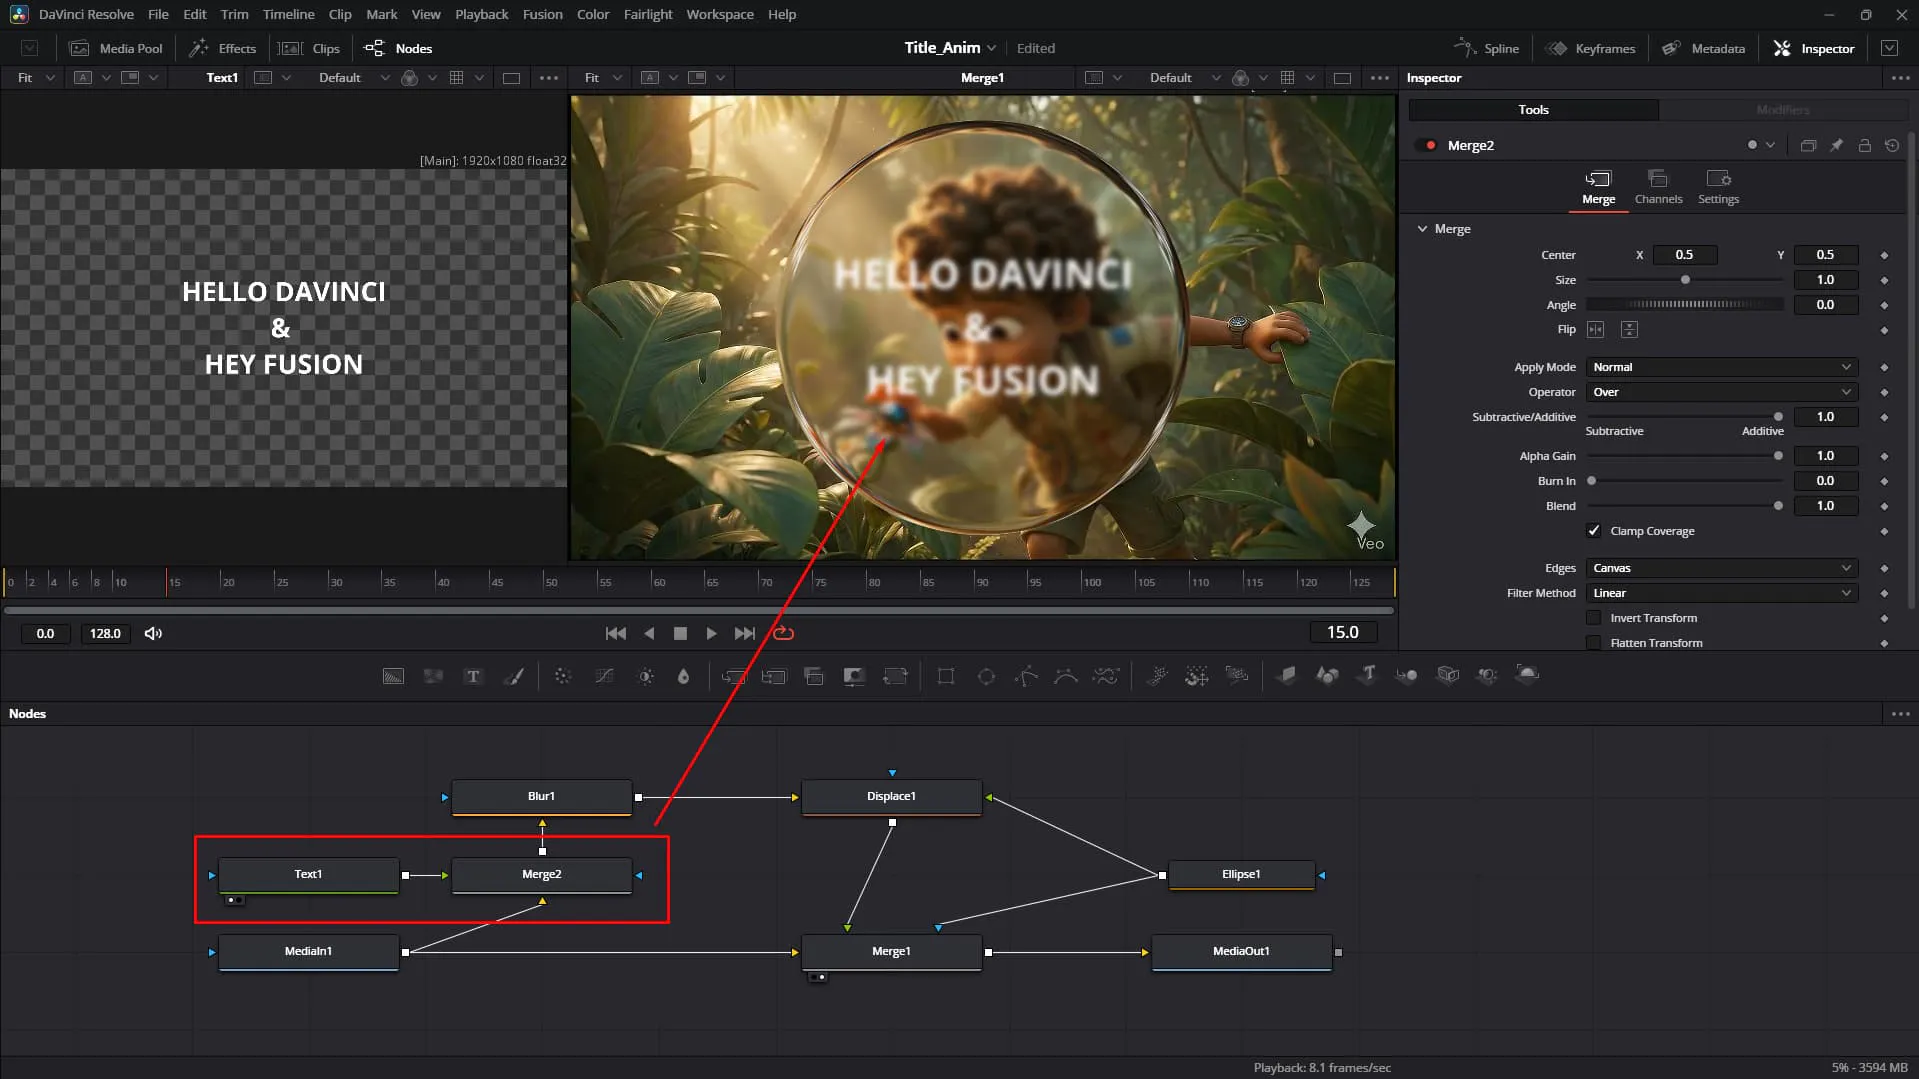
Combine the text with your media stream.
16. Manage Visibility
Use a Merge node to control where the text sits in the layer stack (Foreground vs Background).
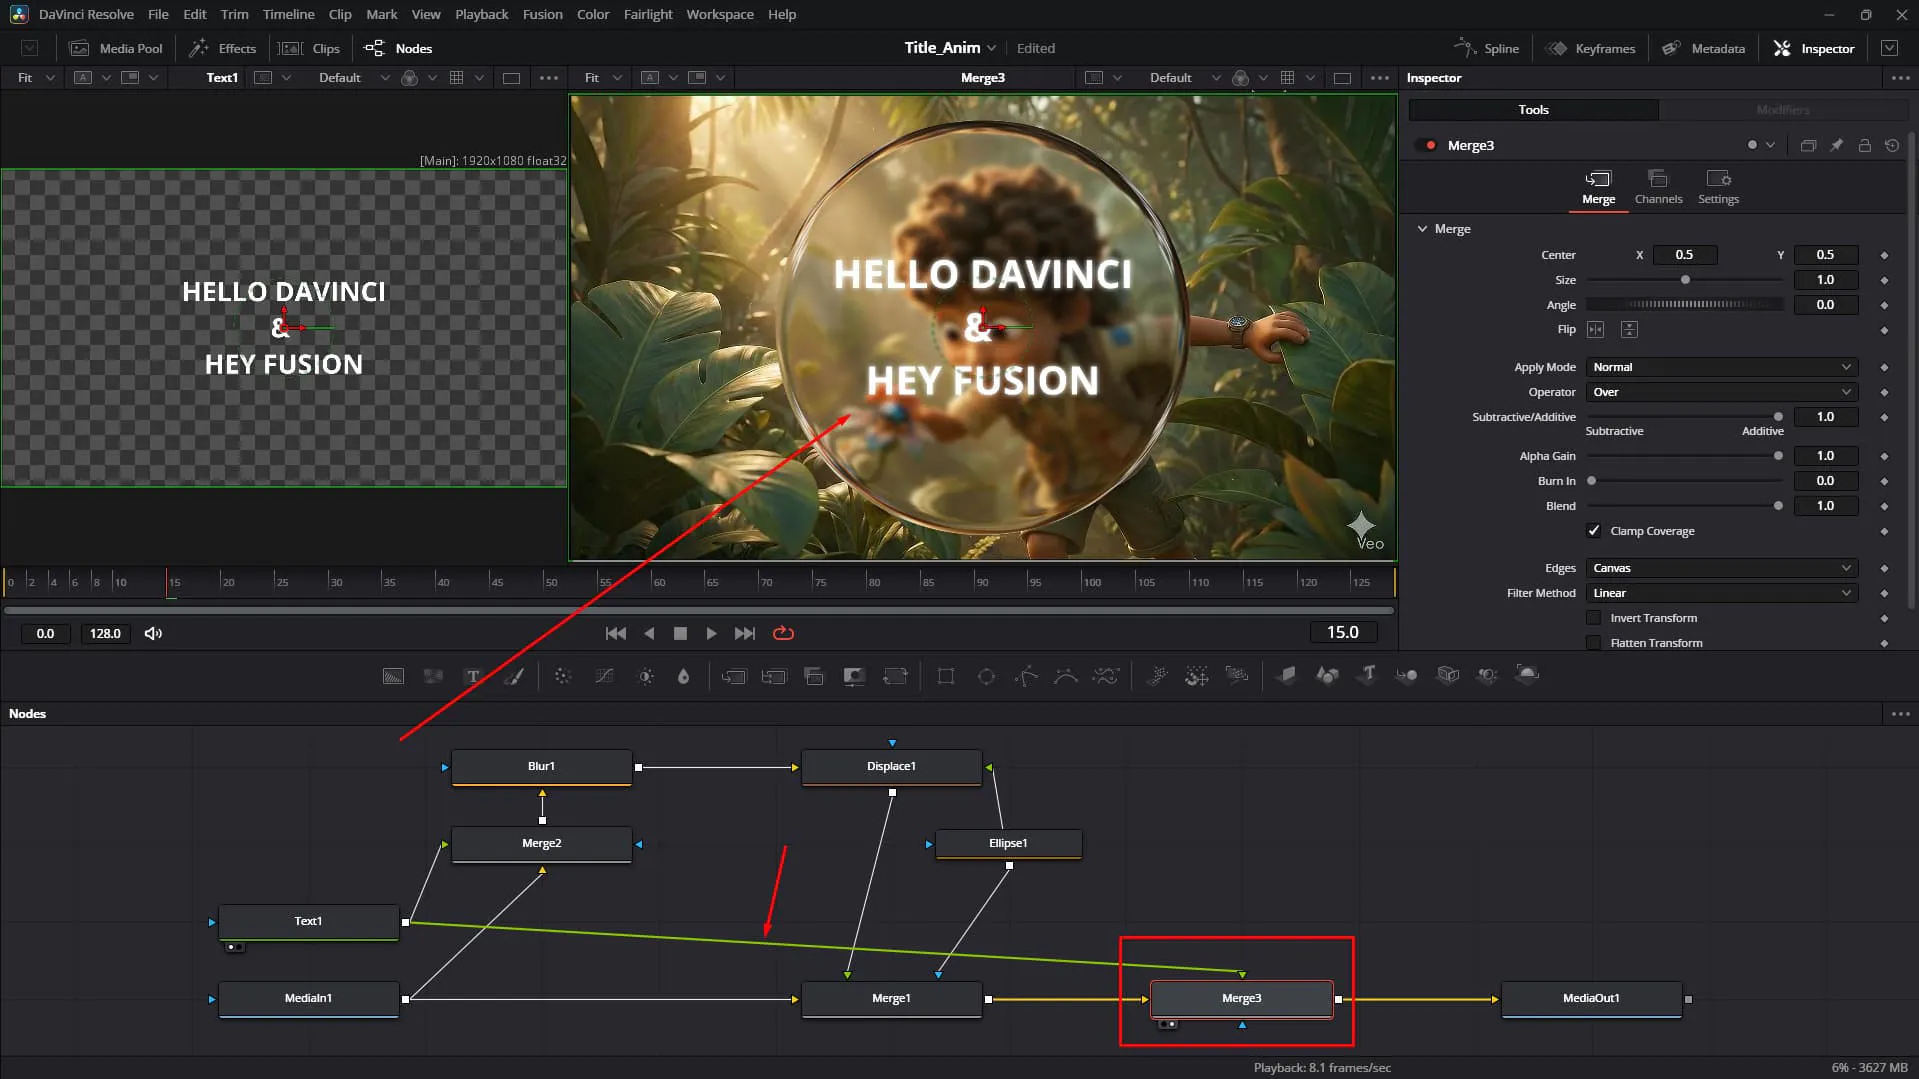
17. The "Bleed" Problem
Notice how the text might spill outside the glass area? We need to contain it. 🚫
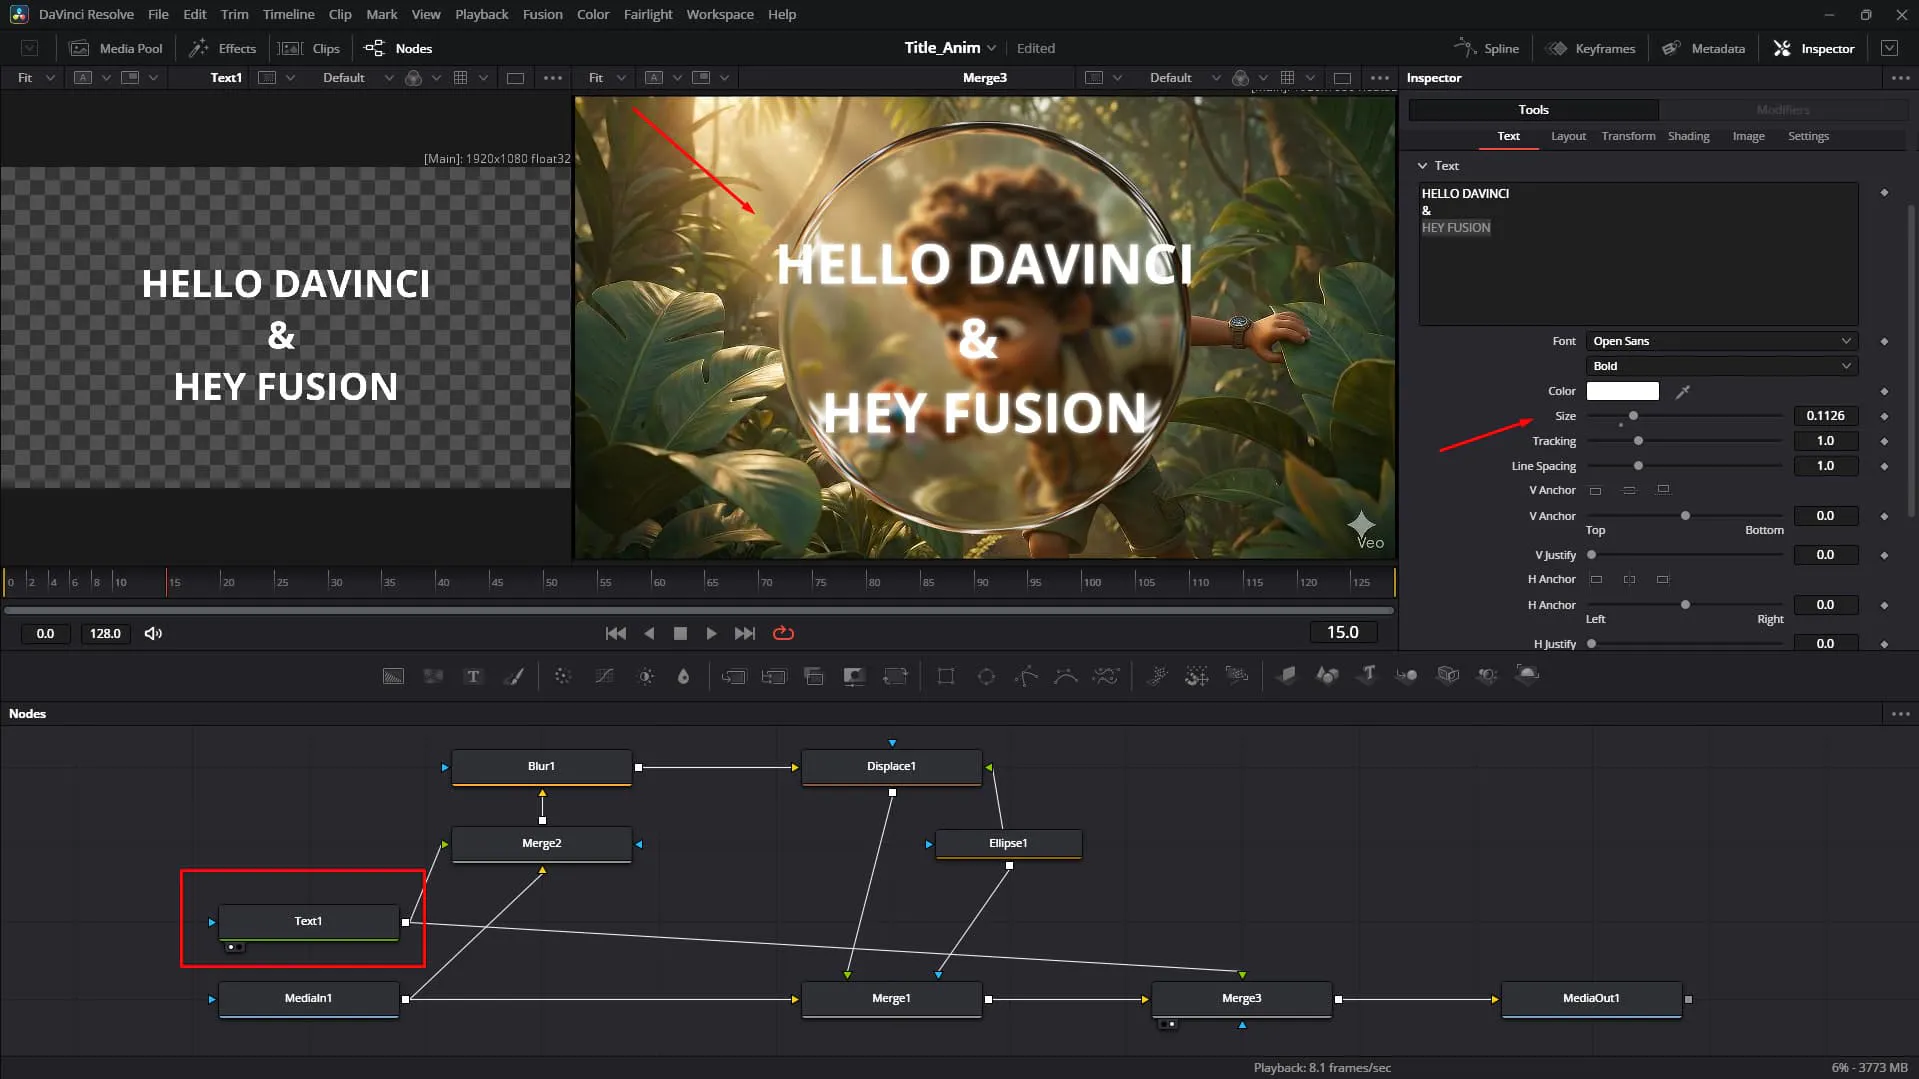
18. Constrain with Masks
Use the same shape node from Step 7 as a mask input for the text's Merge node. This ensures the text only appears "inside" or "behind" the glass.
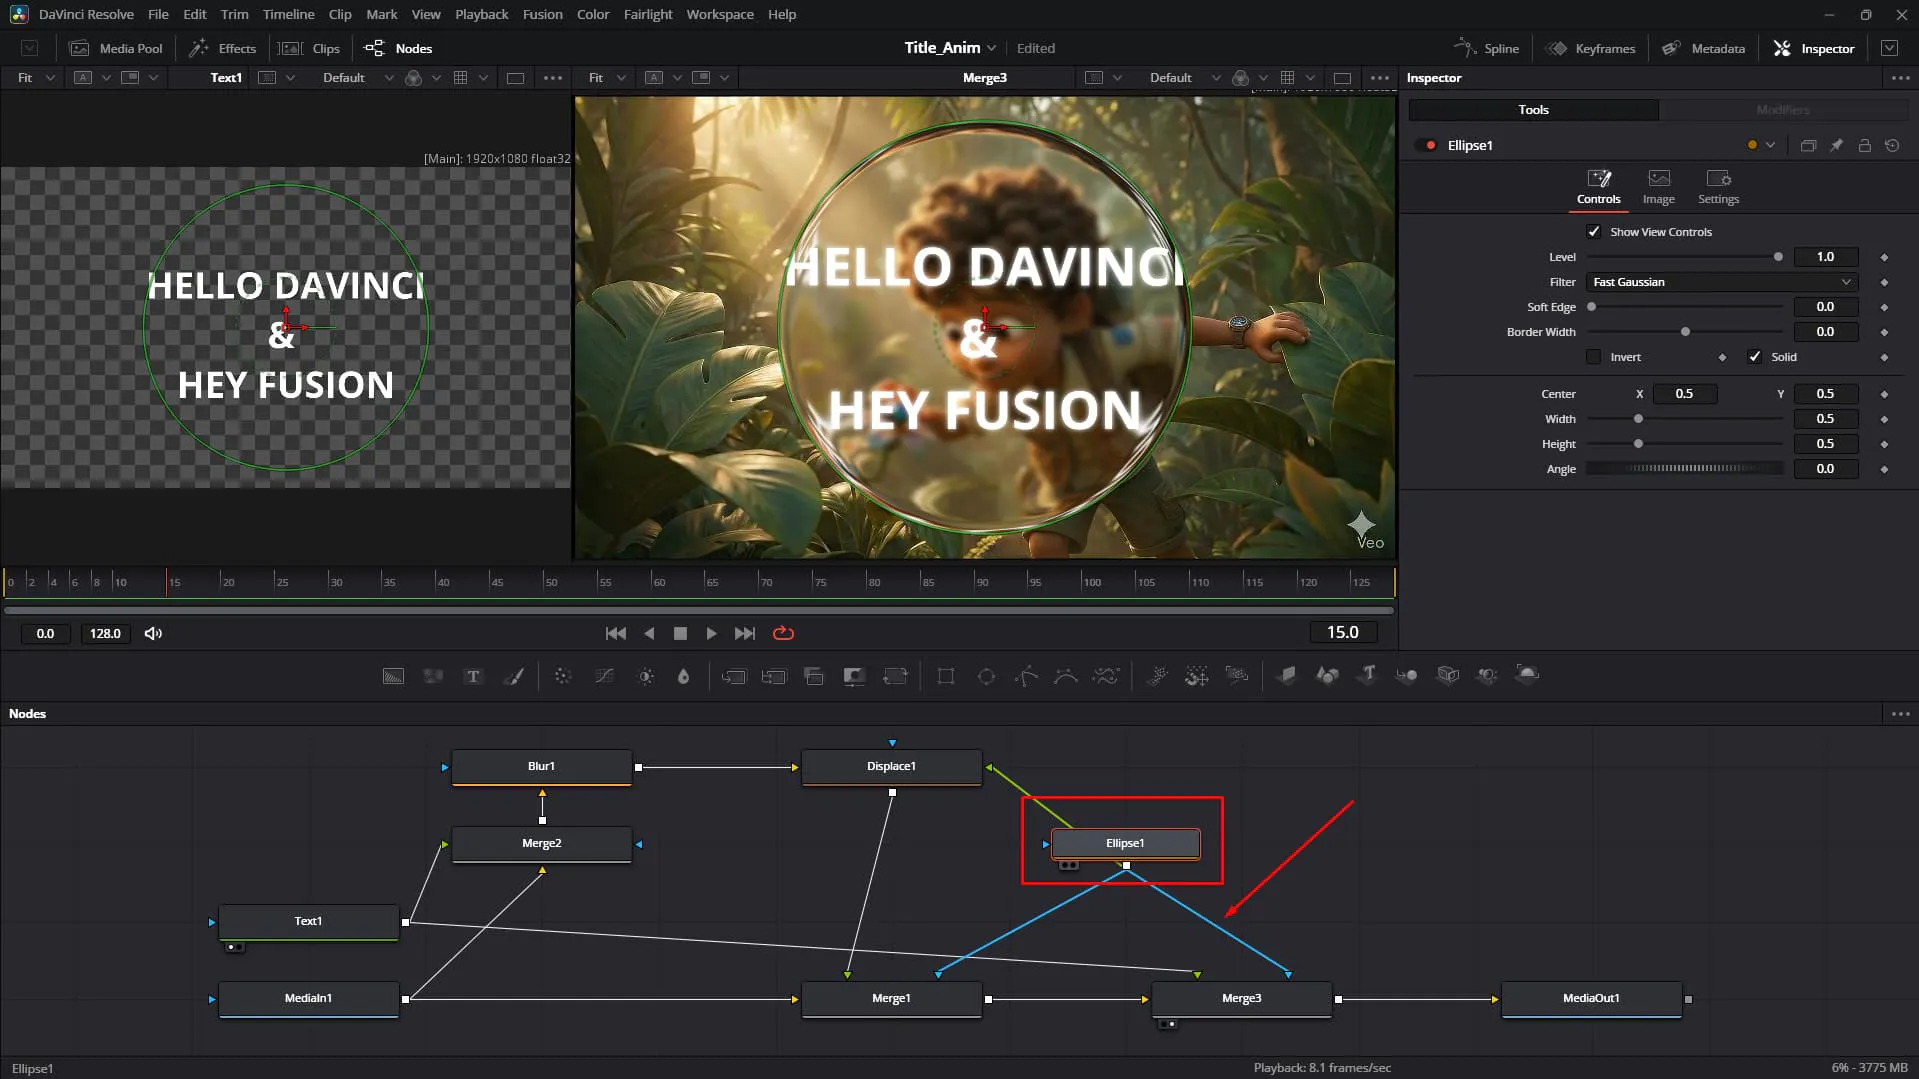
19. Final Adjustments
Go back to your Displace settings one last time. Tweaking the Spread or Softness can make the edges feel more organic.
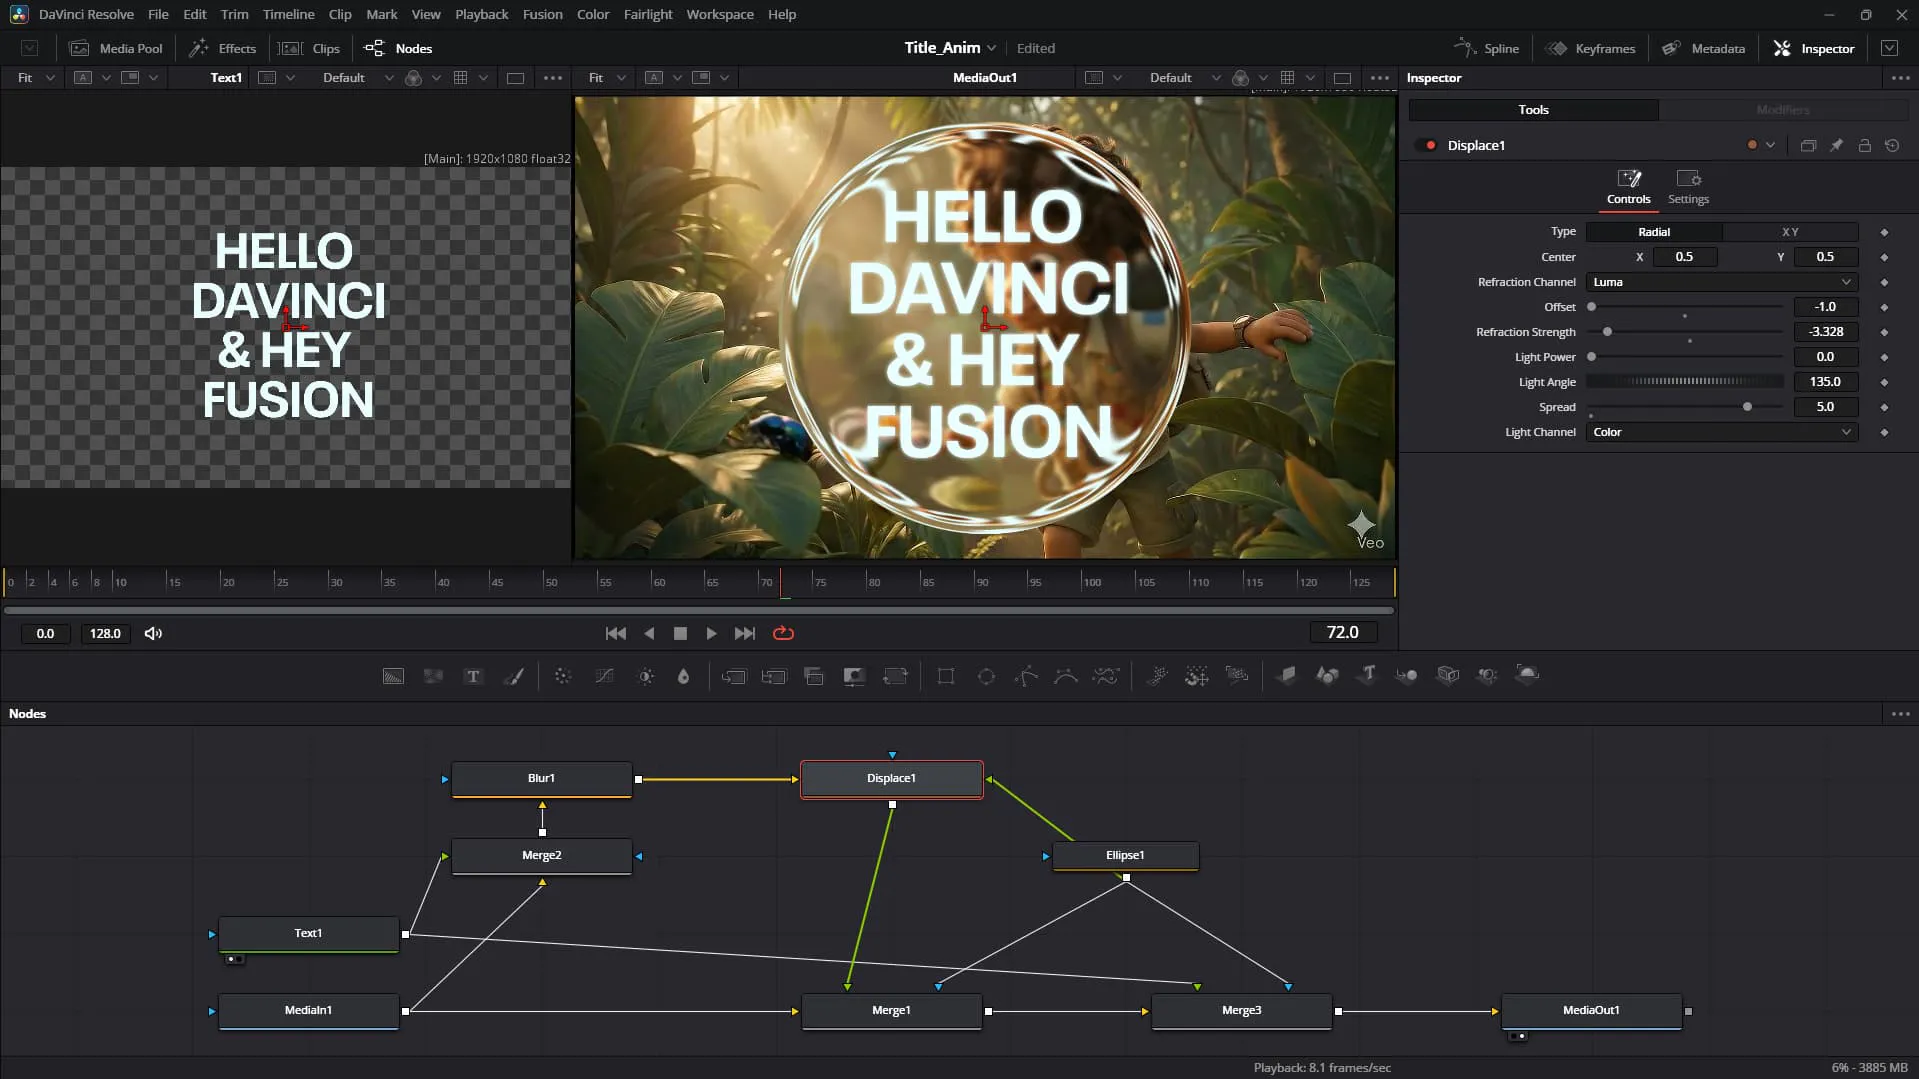
20. A/B Testing
Try disabling the text or swapping the background to start seeing how versatile this setup is.
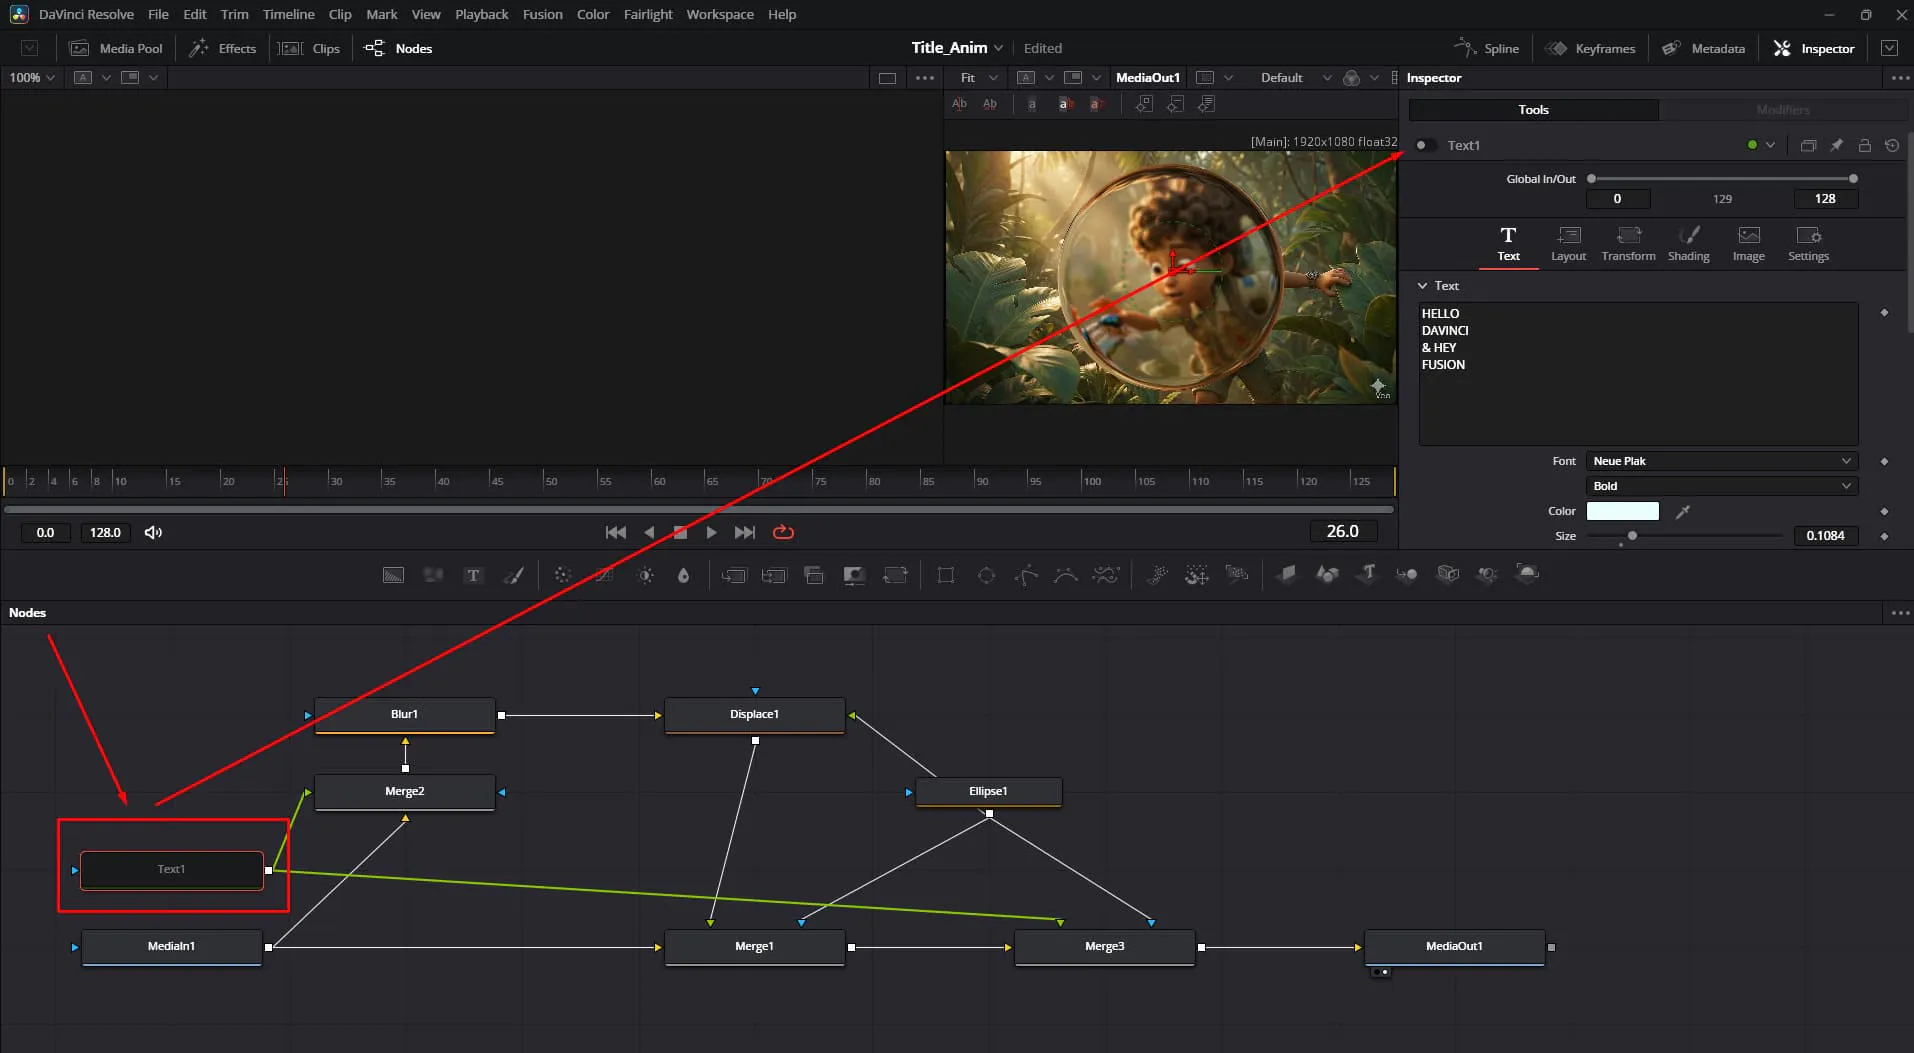
21. Dynamic Backgrounds
The best part? Because we used MediaIn (Background), you can swap the video clip on the timeline track below, and your glass effect will instantly update to distort the new footage! 🤯
And there you have it! You've successfully built a procedural, dynamic glass displacement effect in Fusion. This technique is incredibly powerful for:
Keep experimenting with different shapes and displacement maps. The possibilities are endless in DaVinci Resolve! Happy editing! 🎬✂️
Discover how to group your controls into neat, drop-down accordion sections in DaVinci Resolve Fusion. Stop scrolling and start organizing today
Learn how to create dynamic, character-by-character text animations in DaVinci Resolve Fusion using the Follower modifier, Path keys, and Spline tool
Stop sharing raw .setting files! Discover the professional way to bundles your DaVinci Resolve transitions, effects, and titles into a single, easy-to-install .drfx file