DaVinci Resolve Using Underlying Footage as the input source in Fusion
Ever wanted to create a title, a graphic, or a visual effect in DaVinci Resolve that you could easily drop onto any clip on your timeline and have it automatically interact with the footage underneath?
🤔 It’s a common workflow for creating reusable effects, and it's surprisingly easy to set up.
The secret lies in a powerful feature within the Fusion page: setting a MediaIn node's source to pull directly from the timeline.
This tells your Fusion composition to use whatever video clip is directly below it as the input.
Let's walk through how to do it step-by-step! 🚀
Follow these simple steps to create a dynamic and reusable effect.
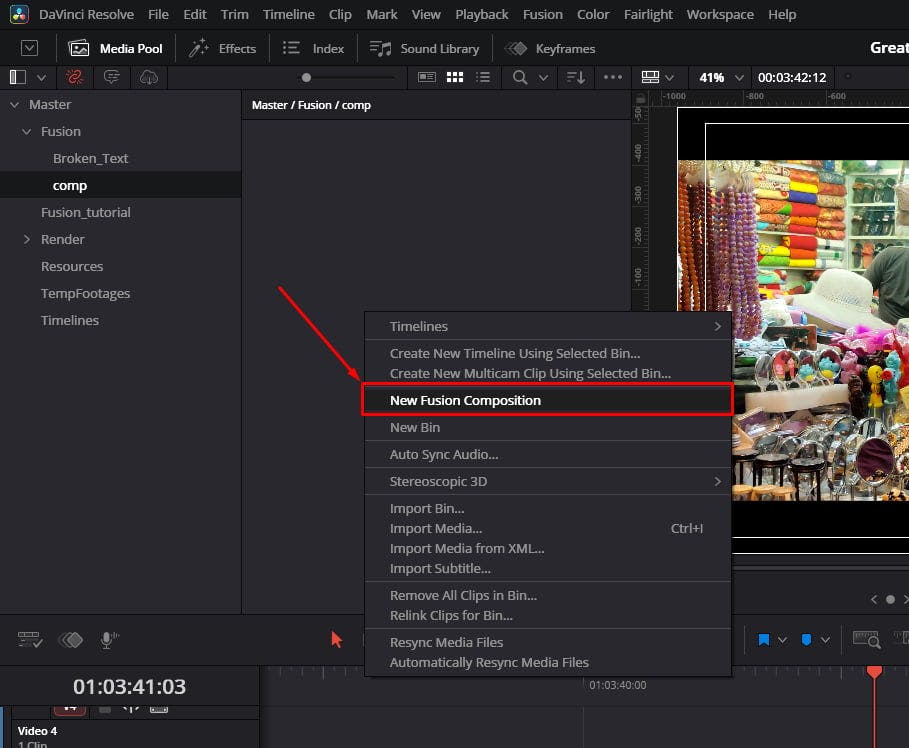
First, head over to the Media Pool panel on the Edit page & Right-click to create a new New Fusion Composition.
Drag it onto your timeline, placing it on a video track above the footage you want to affect.
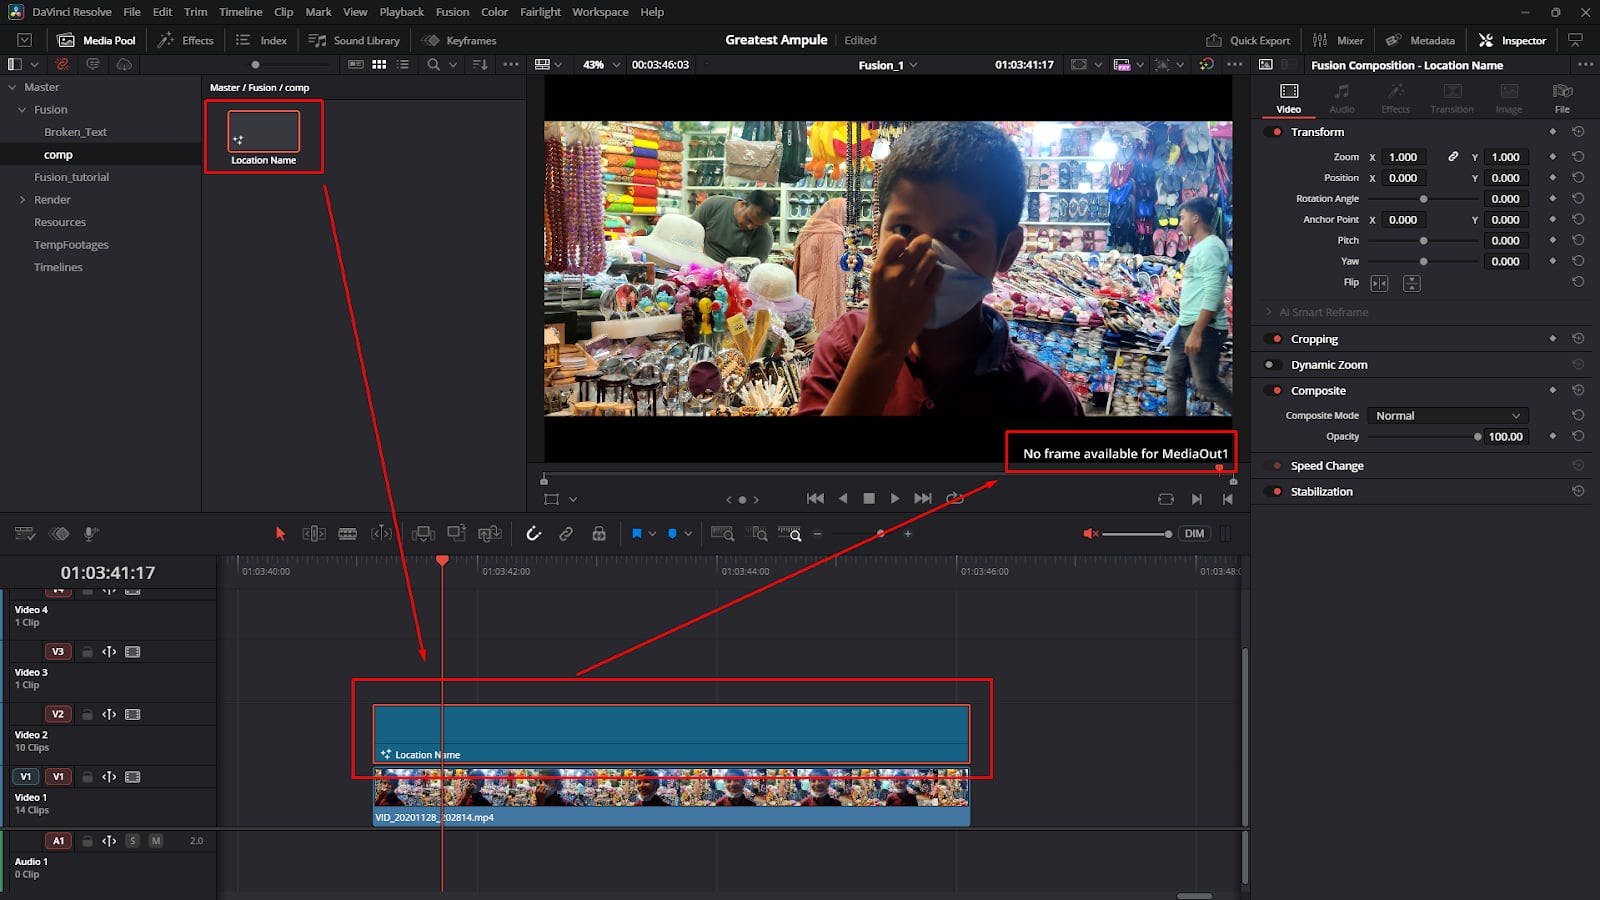
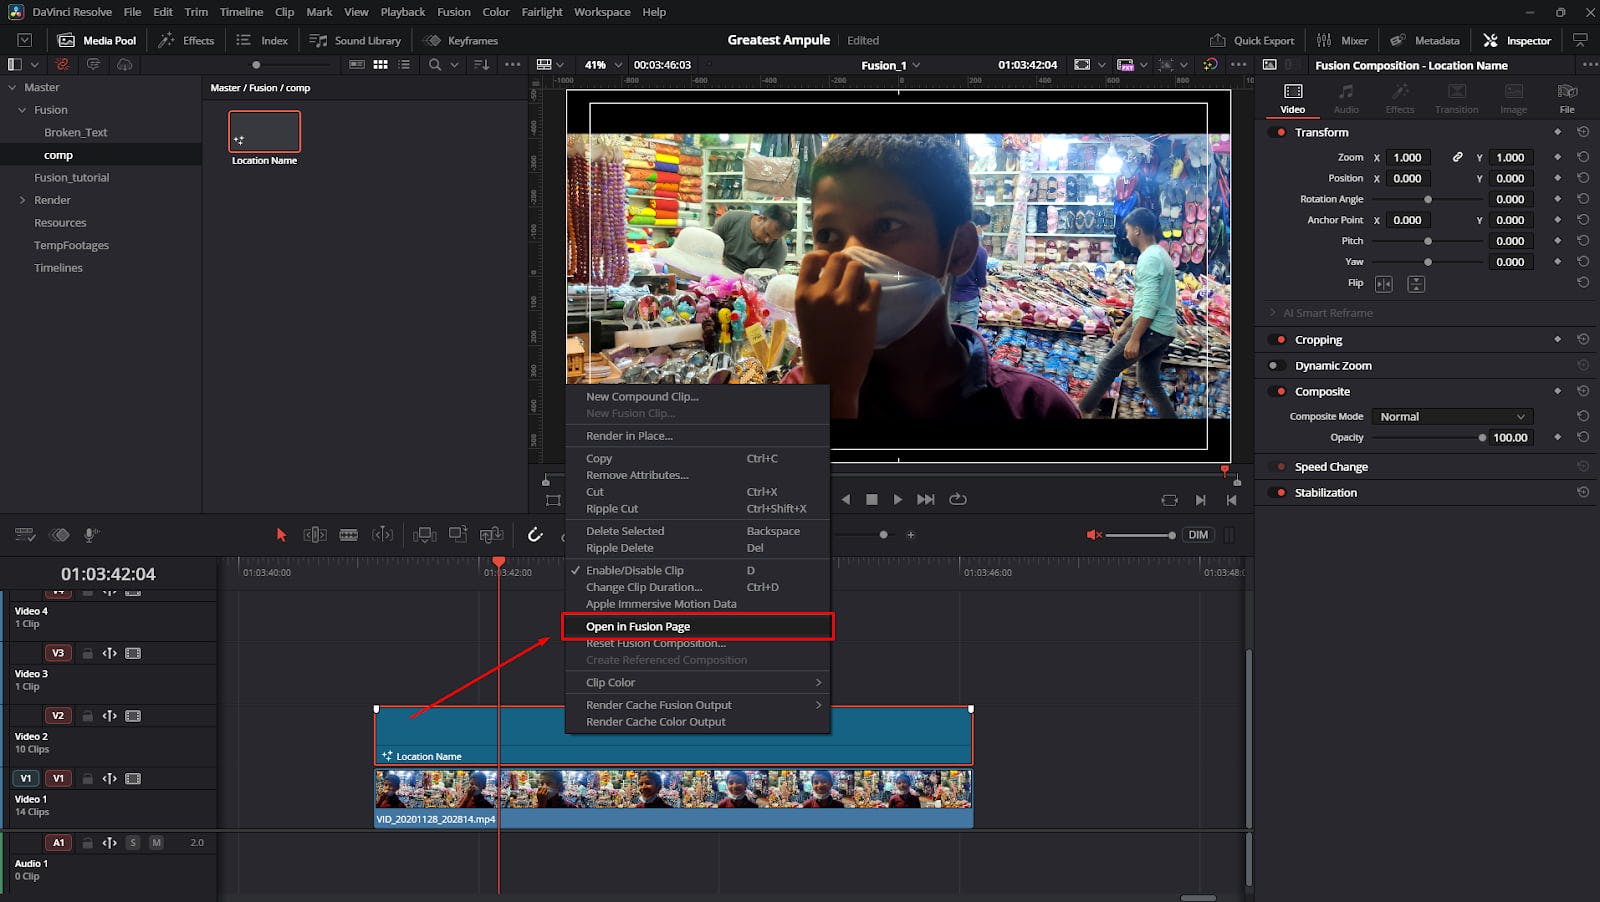
With the new Fusion Composition clip selected on your timeline, navigate to the Fusion page at the bottom of the screen. You'll be greeted with a simple node graph containing only a MediaOut node.
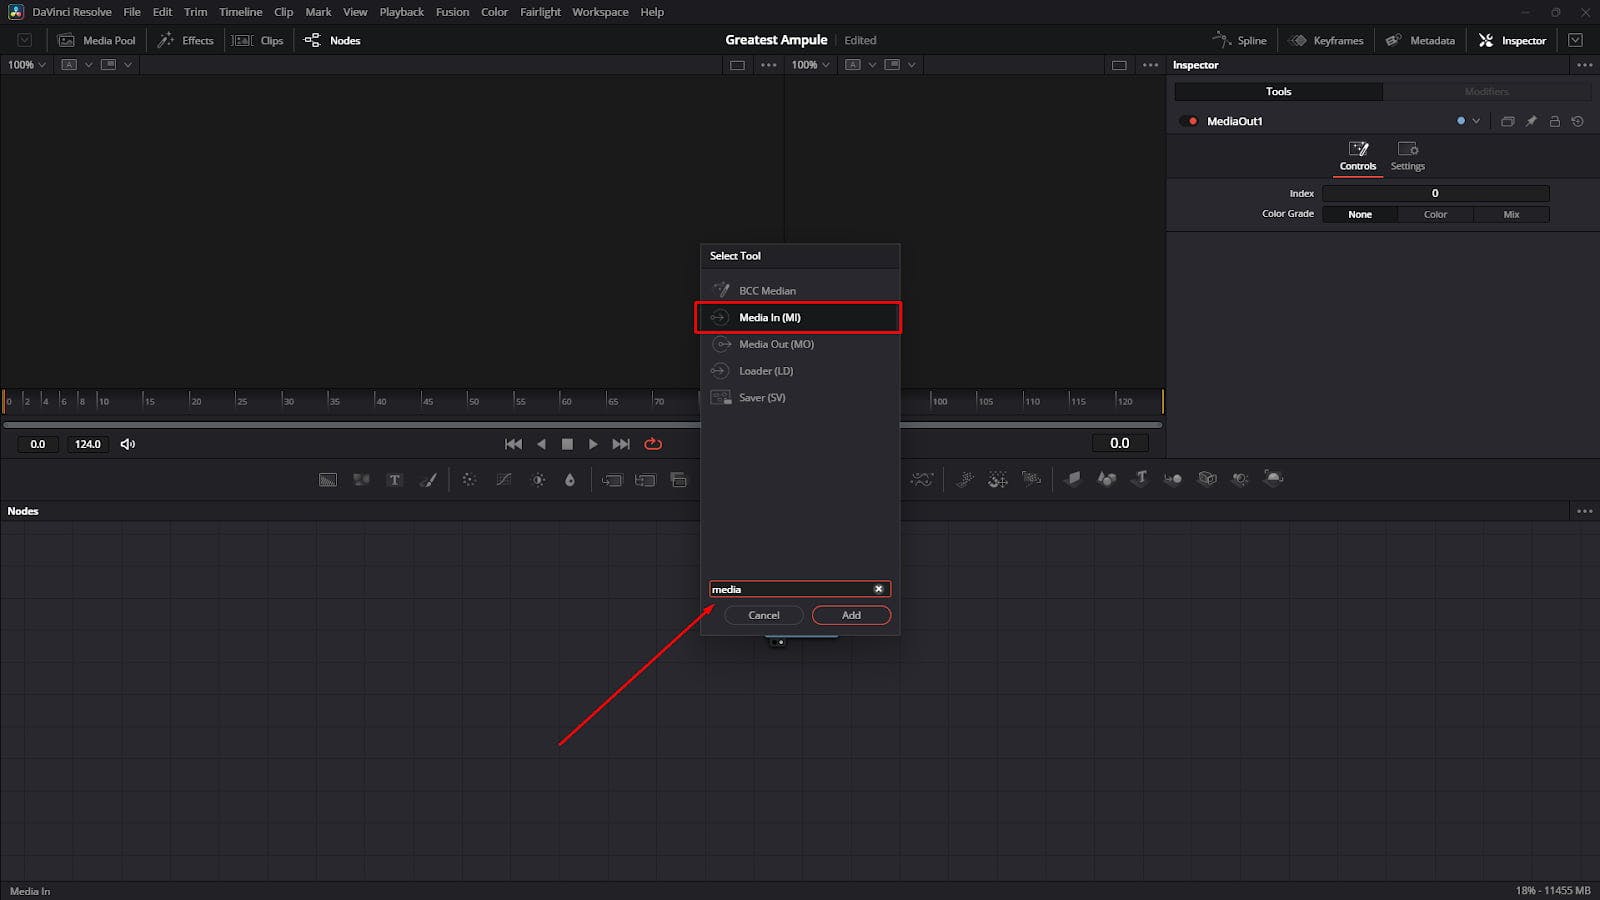
MediaIn NodeThis is the most important step! ✨
MediaIn. Add it to your node graph.
MediaIn1 node and look at the Inspector panel on the right.None to Background.
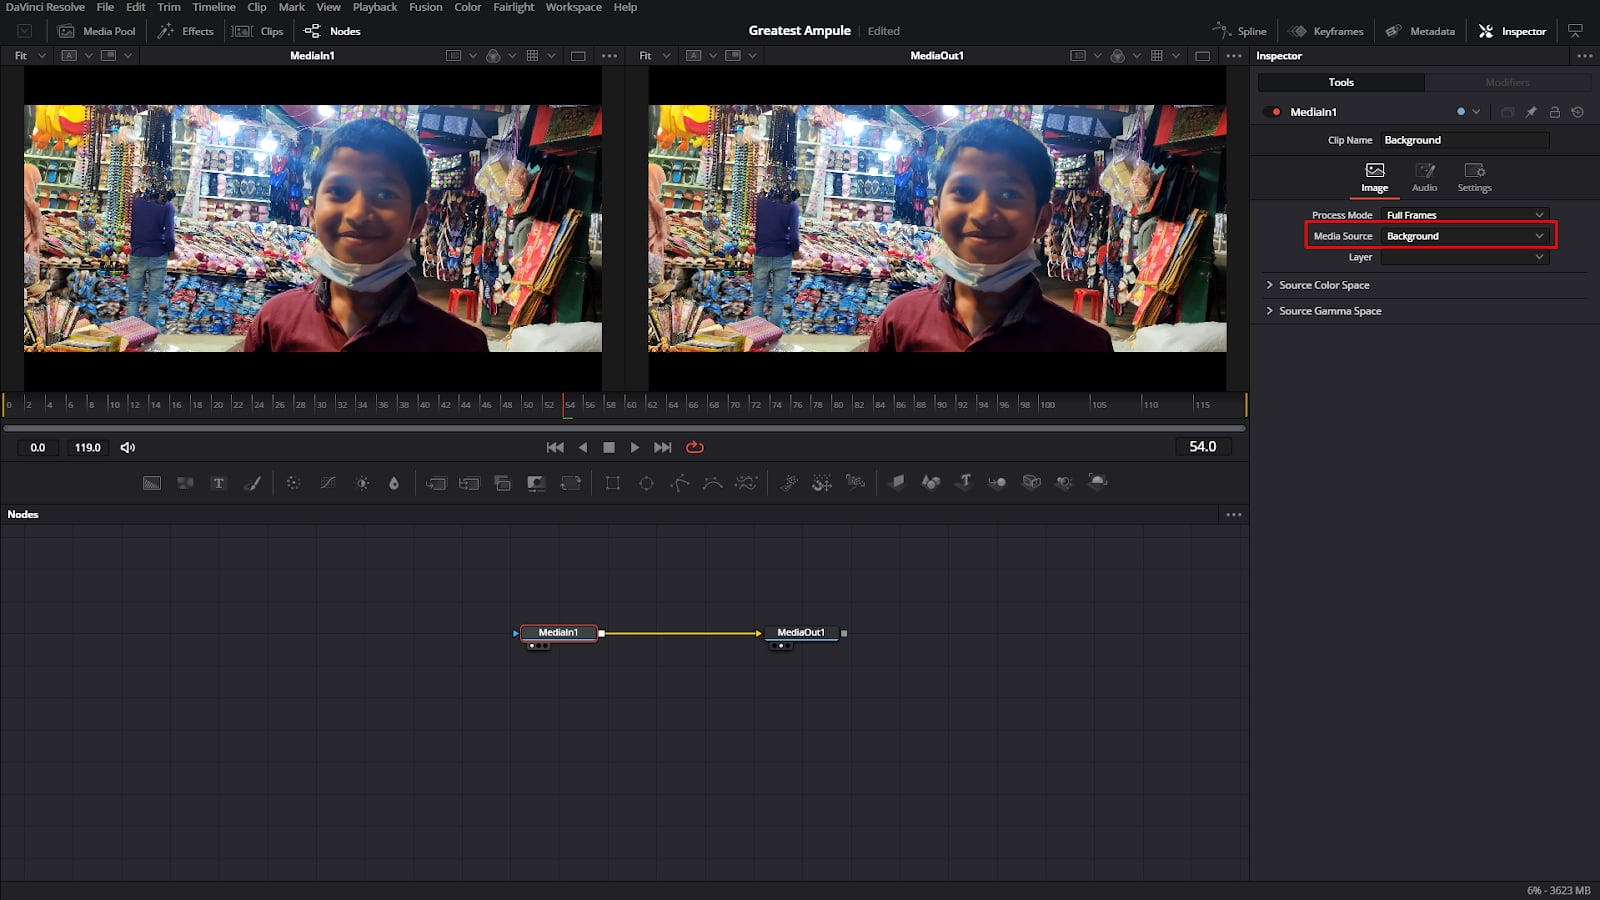
MediaIn1 node to the input of the MediaOut1 node.The moment you set the source to Background, the viewer will display the video footage from the track directly beneath your Fusion Composition on the Edit page. Magic! 🧙♂️
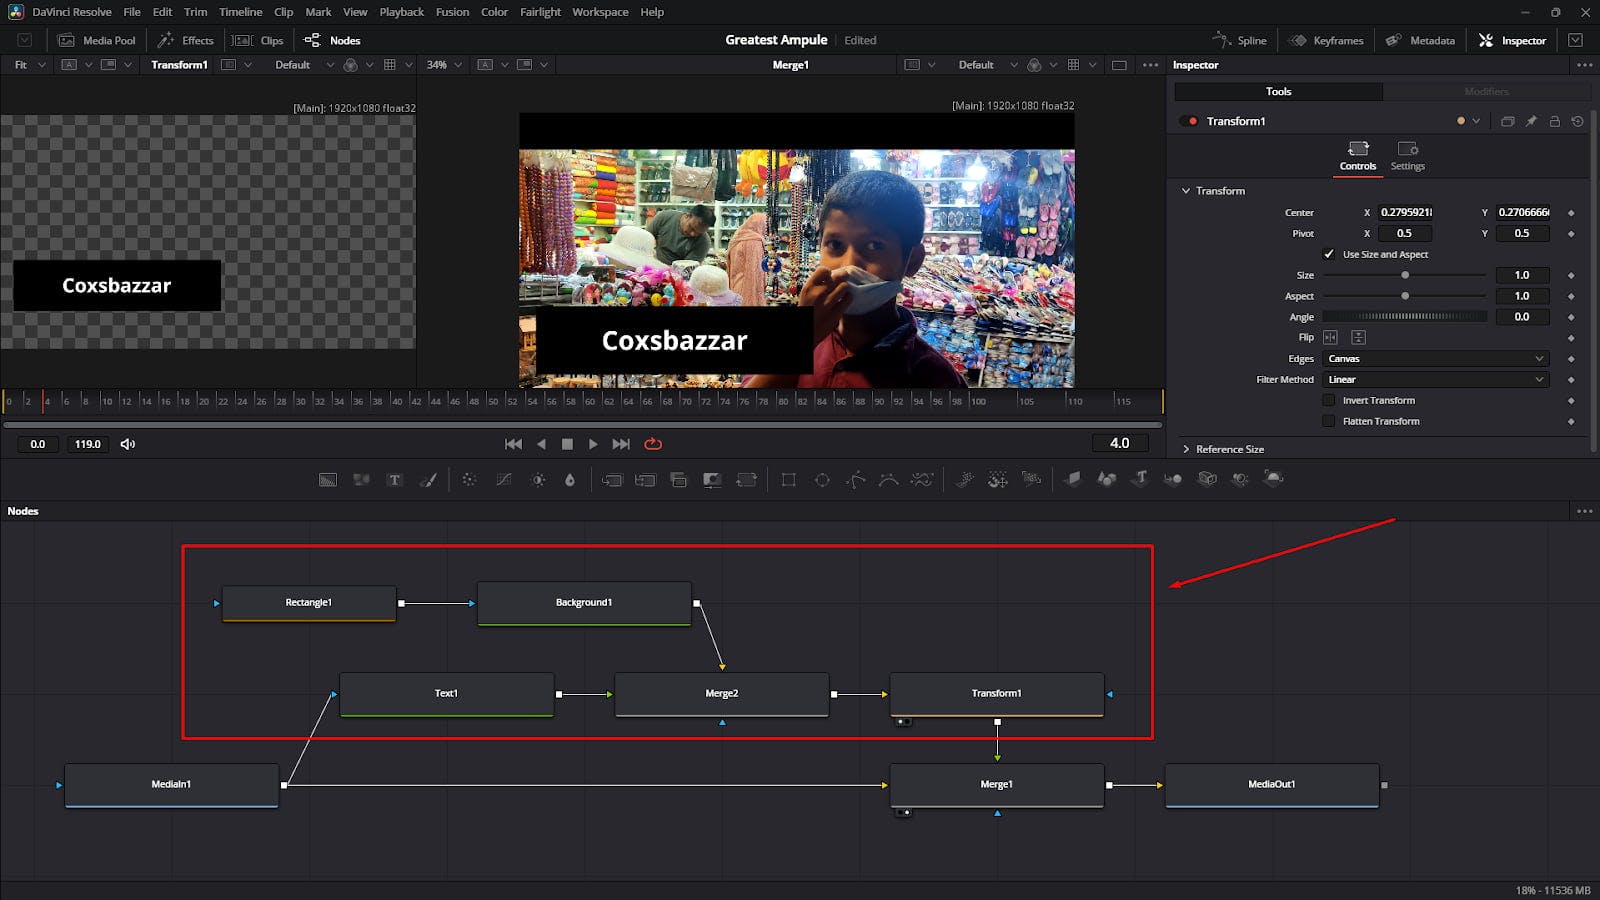
Now the fun begins! You can add any number of tools and effect nodes between your MediaIn1 and MediaOut1 nodes. For example, you could add a Color Corrector node, a Text+ node for titles, or a Glow effect. Whatever you add will now directly affect the background footage coming from your timeline.
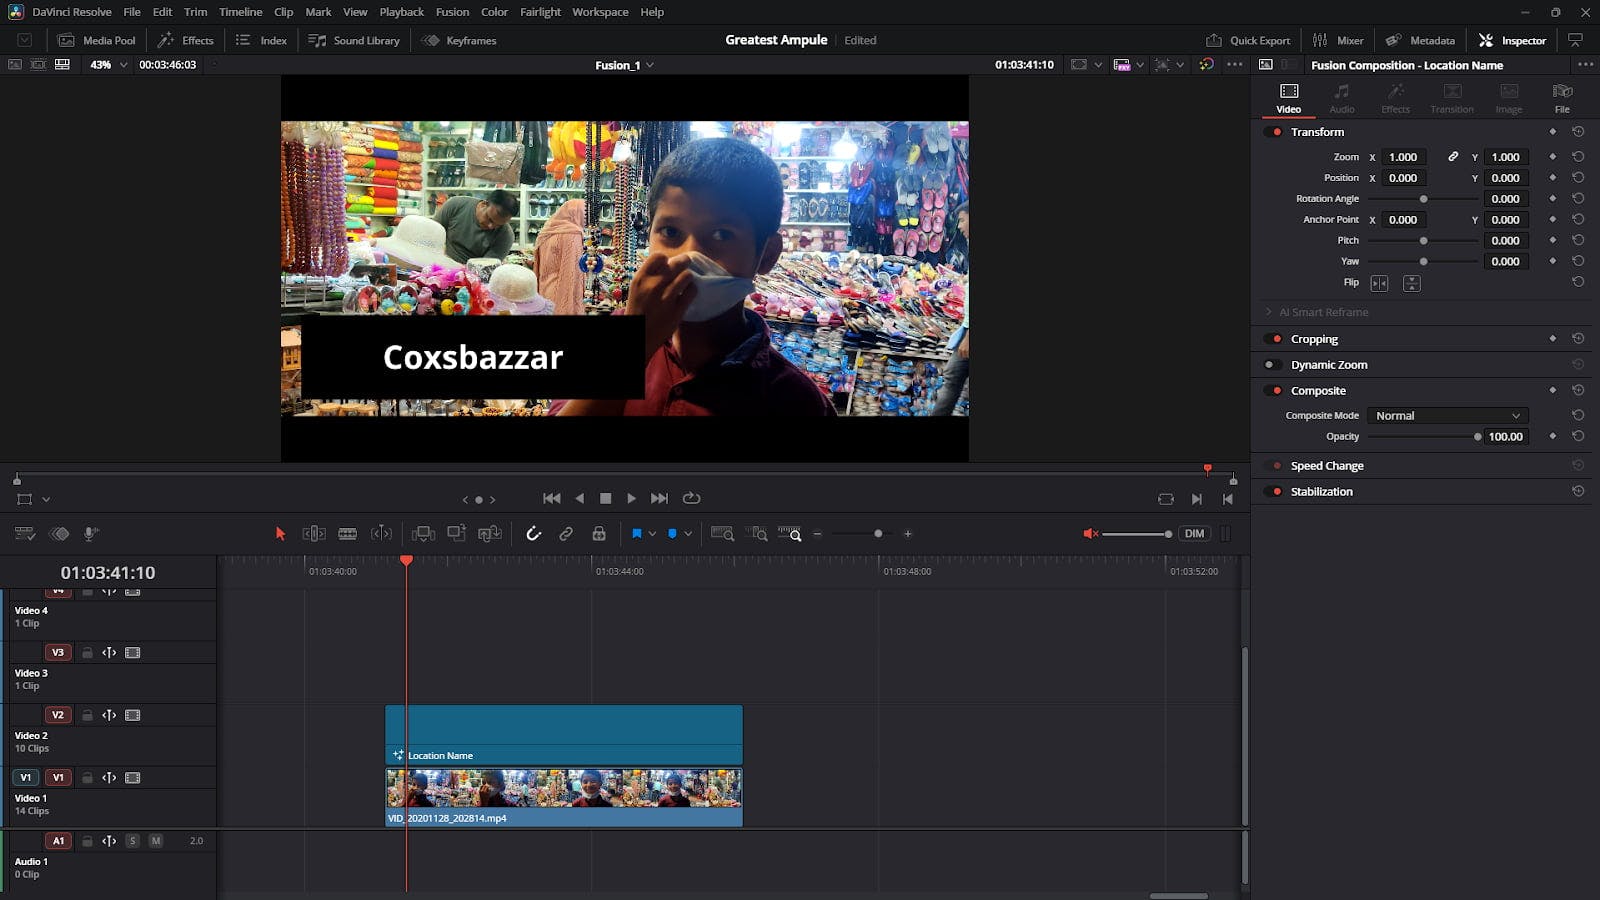
Switch back to the Edit page. You'll now see your effect applied directly to the video clip. The Fusion Composition is acting as a powerful, self-contained adjustment layer. ✅
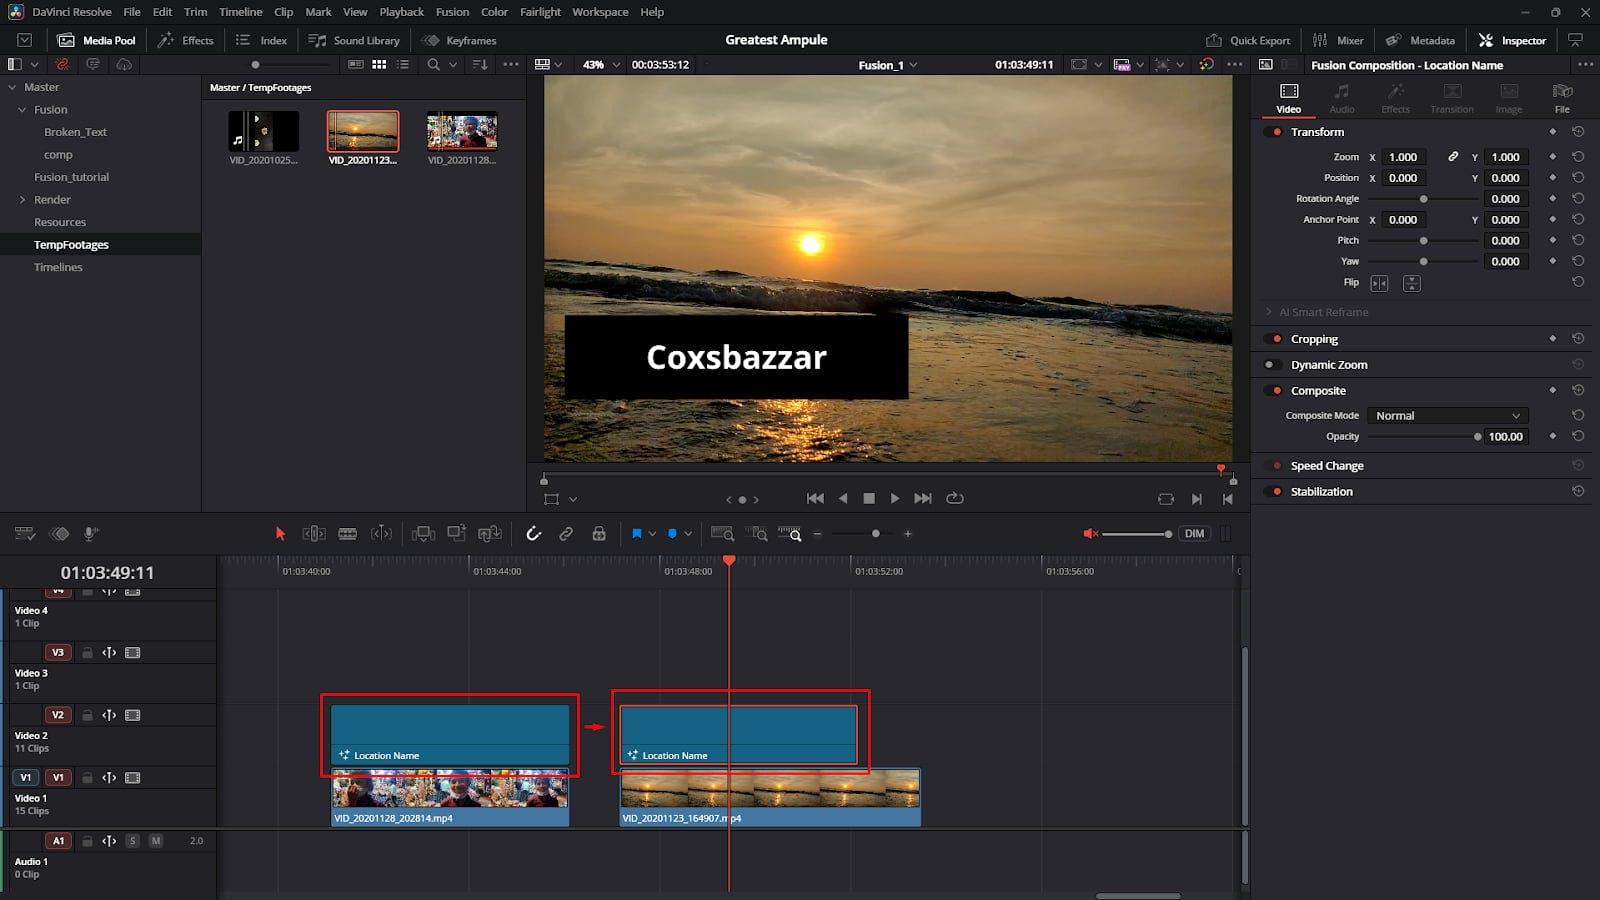
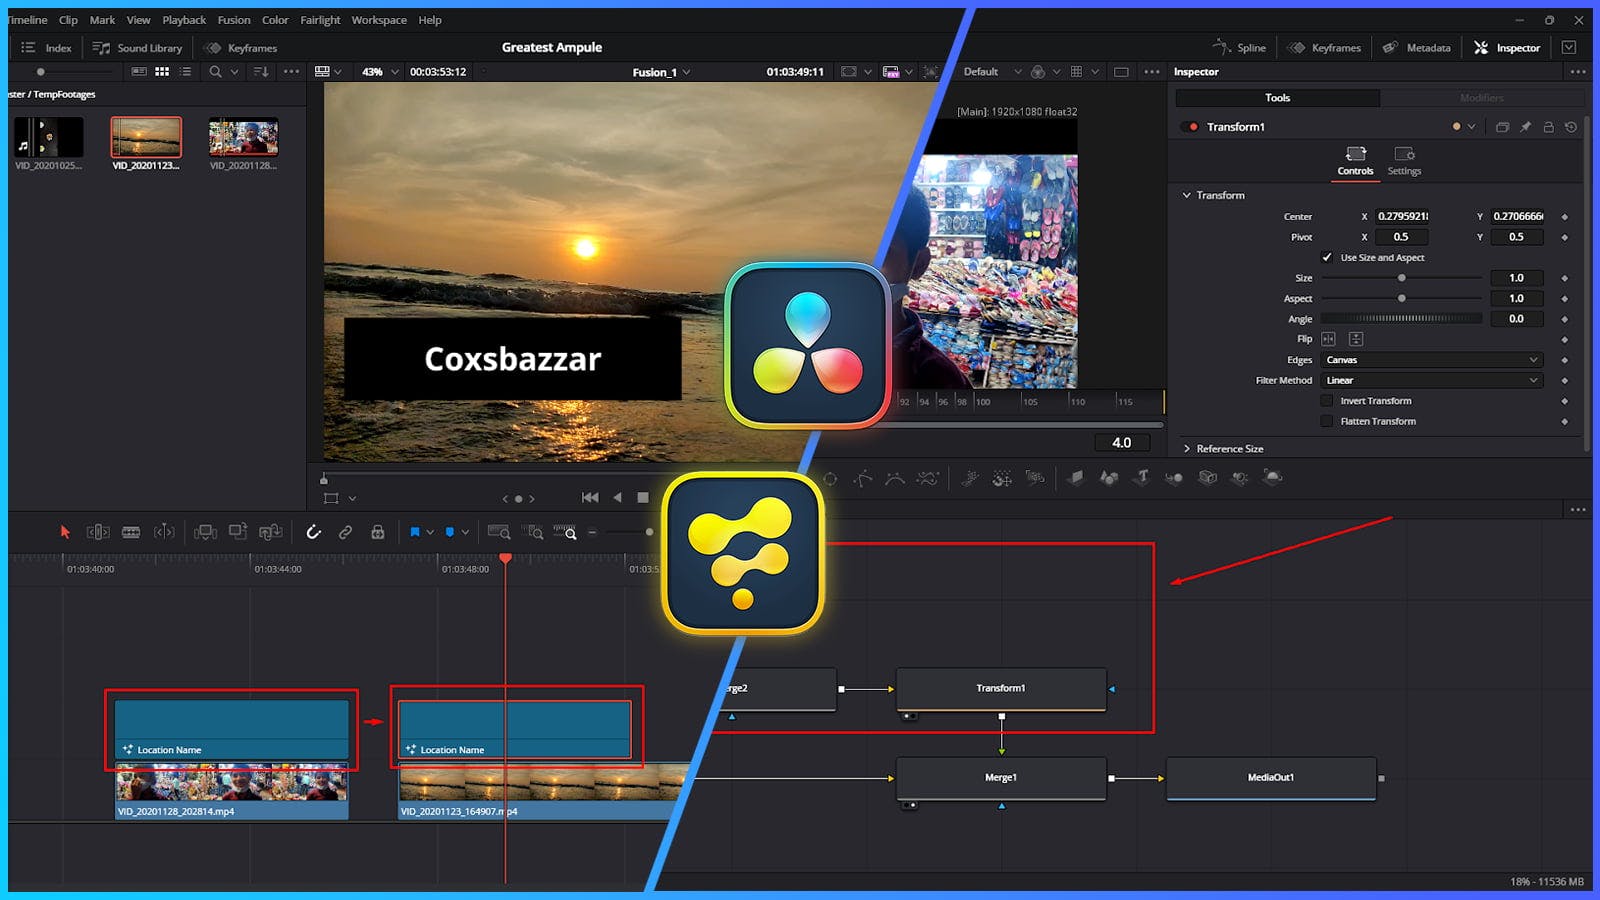
The best part about this technique is that your effect is now completely portable. You can copy and paste this Fusion Composition clip anywhere on your timeline, place it over any other piece of footage, and the same graphics and effects will be applied to the new underlying clip.
This is perfect for creating custom titles, lower thirds, or unique transition effects that you can save and reuse across all your projects.
By mastering this simple workflow, you can significantly speed up your editing process and create more complex, professional-looking effects in DaVinci Resolve.
Happy editing! 🎬

Discover how to group your controls into neat, drop-down accordion sections in DaVinci Resolve Fusion. Stop scrolling and start organizing today

Learn how to create dynamic, character-by-character text animations in DaVinci Resolve Fusion using the Follower modifier, Path keys, and Spline tool

Stop sharing raw .setting files! Discover the professional way to bundles your DaVinci Resolve transitions, effects, and titles into a single, easy-to-install .drfx file