The Most Accurate Markerless Mocap Tutorial with QuickMagic AI
Ready to bring your 3D characters to life without expensive motion capture suits? 🤯
QuickMagic AI offers an accessible and affordable solution, using AI to translate human movement from video footage—markerless!
Follow this guide for a step-by-step process to generate professional-quality motion capture data and seamlessly import it into Blender or any other 3d software.
At its core, QuickMagic AI is a revolutionary, browser-based motion capture service.
Instead of relying on physical markers or sensors, it uses advanced artificial intelligence to analyze video and extract intricate human motion data.
The result? A highly detailed motion capture animation file that you can download and apply to your own 3D models.
This provides high-quality motion capture data without requiring any physical markers on the actor.
The process is designed to be intuitive and fast. Here’s a breakdown of the steps to get you from a simple video clip to a ready-to-use animation file.
Once you're on the QuickMagic website, the first thing you'll do is upload your video footage.
For best results, use a video with a clear view of the subject against a clean background.
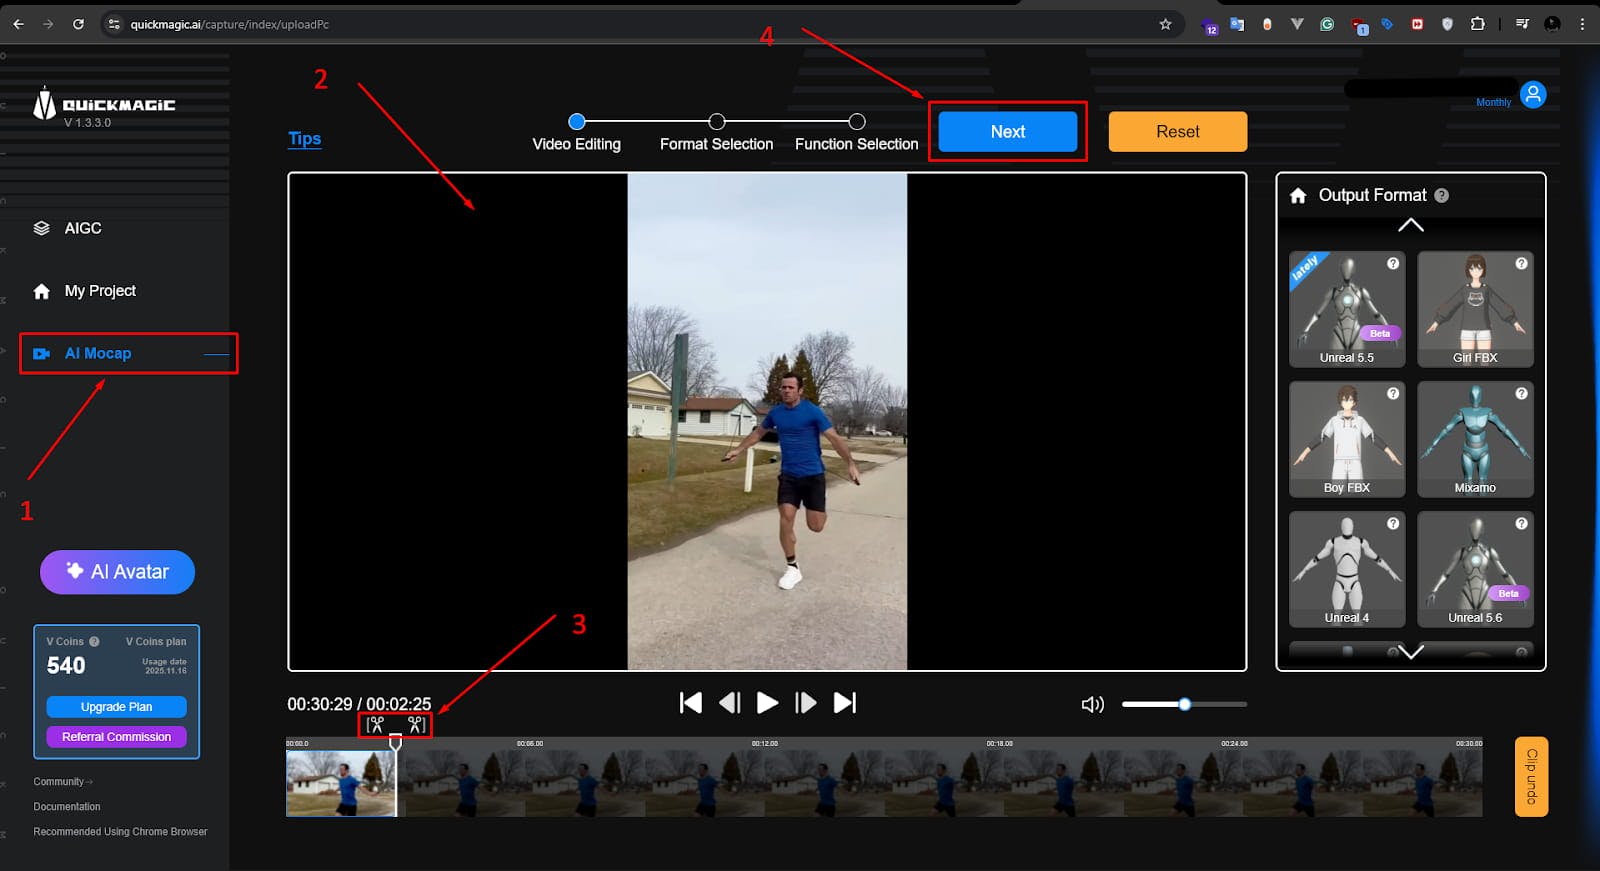
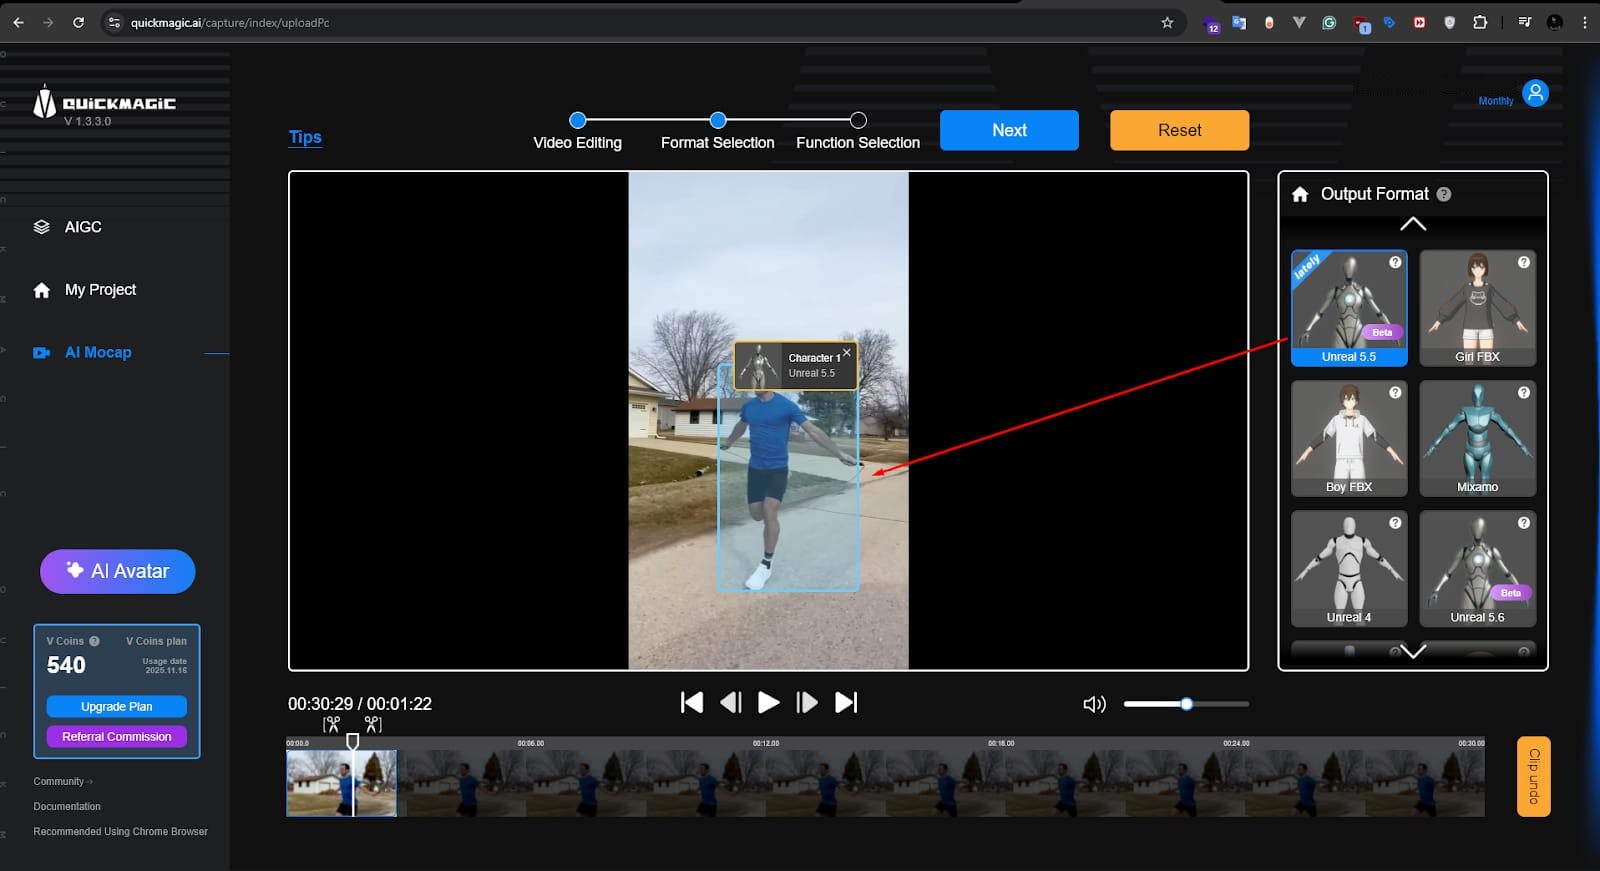
After the initial upload, you'll have a chance to fine-tune your settings.
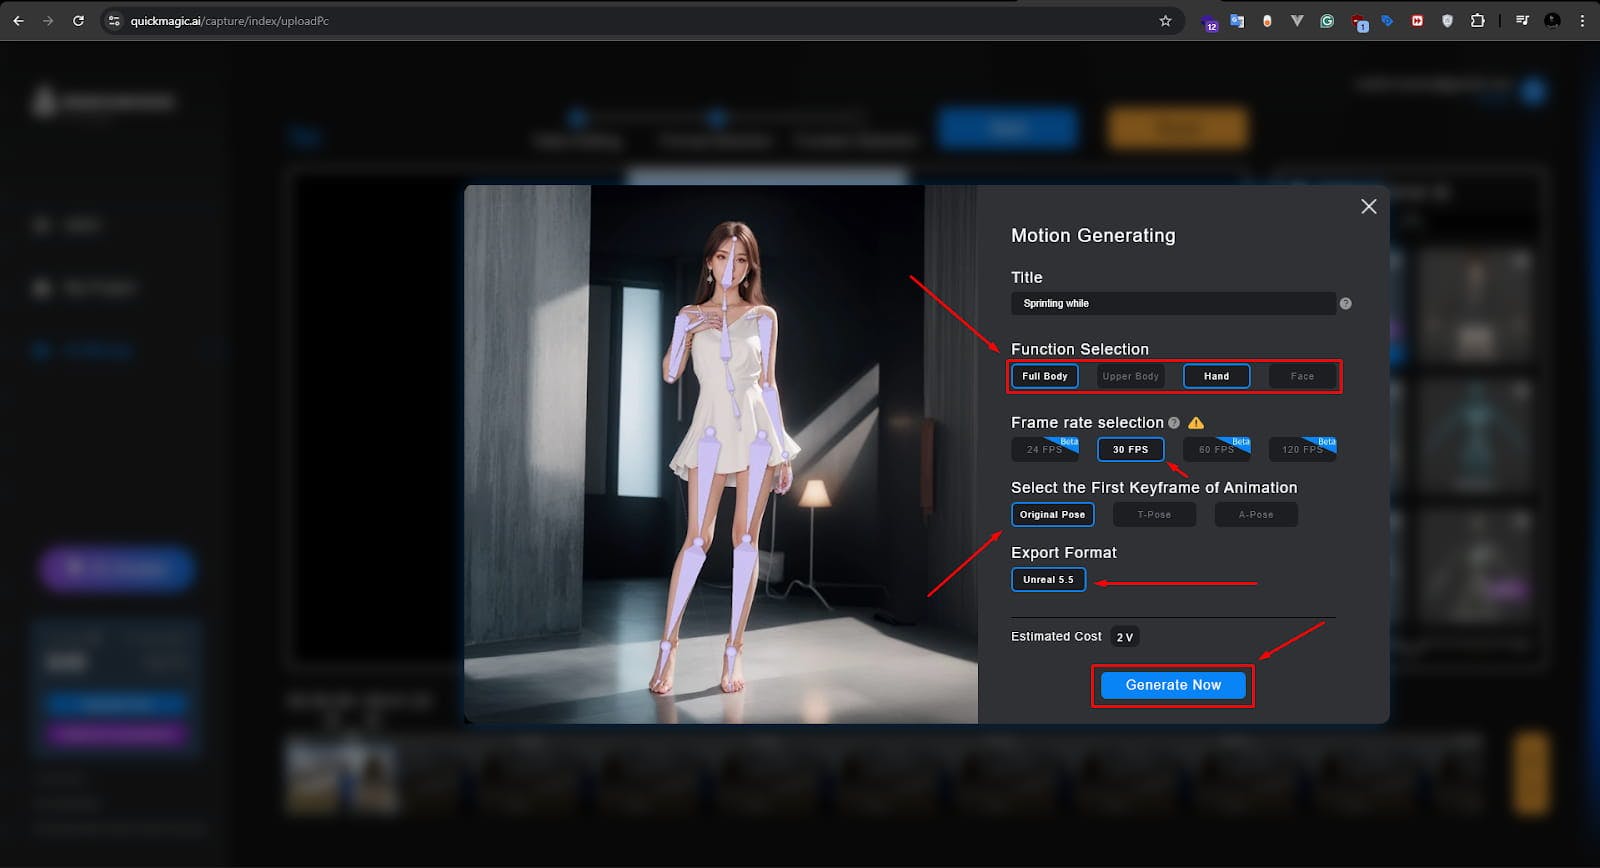
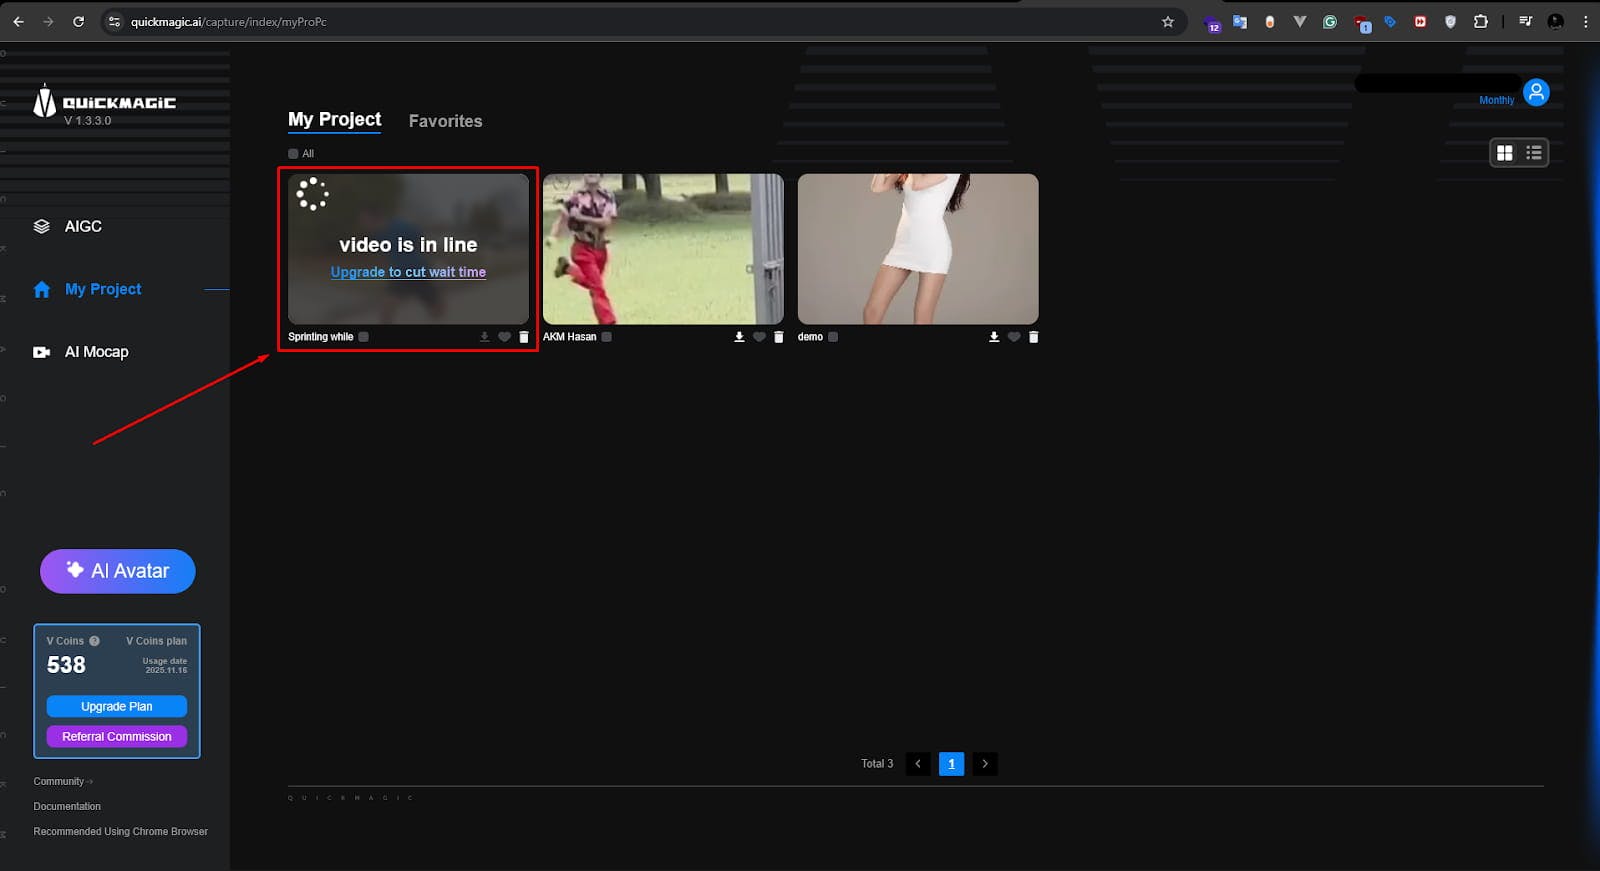
Once the generation is complete, it's time to review and download your file.
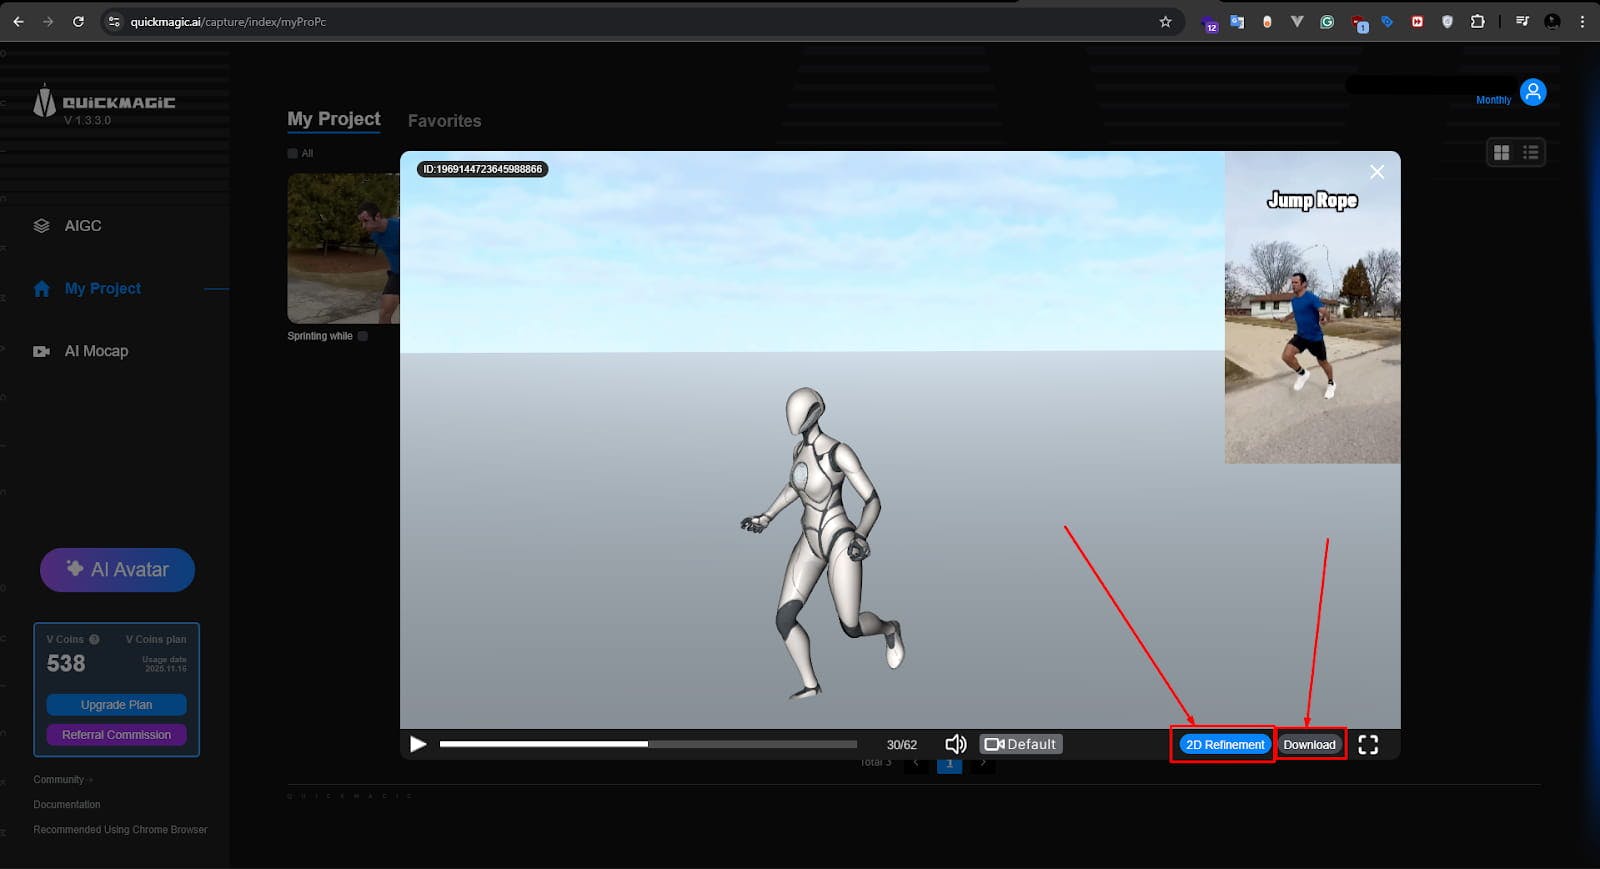
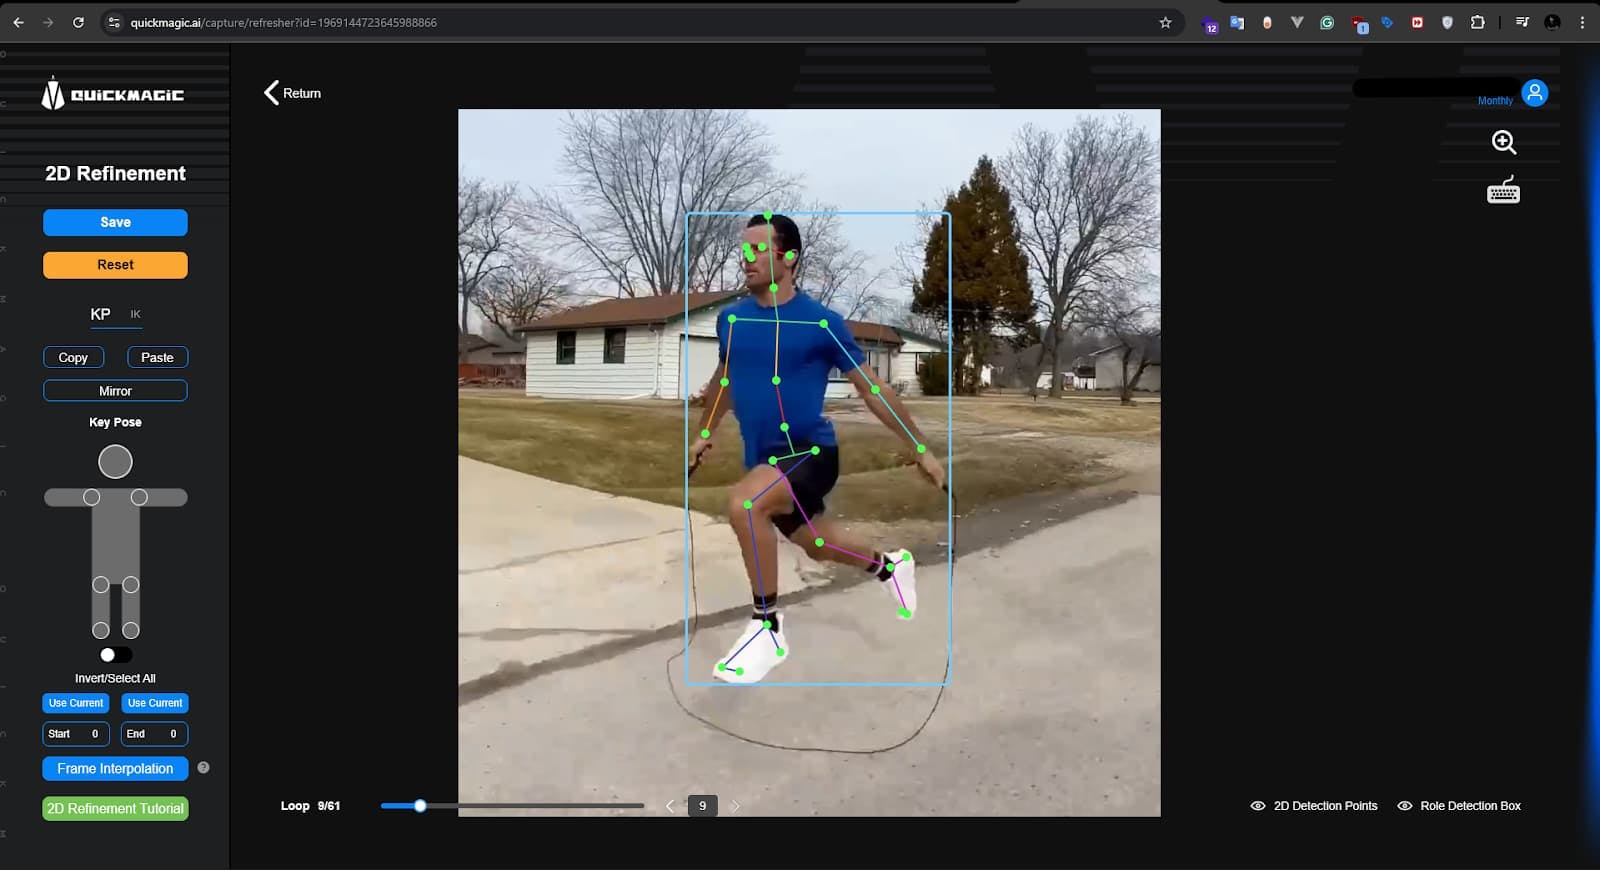
.fbx file, a standard format for 3D models and animations.2D Refinement tool to improve the animation. For example, if a limb movement is slightly off, this tool allows for manual adjustments to keyframes.
.fbx file.With your refined .fbx file in hand, the final step is to bring it into Blender.
File > Import > FBX (.fbx).
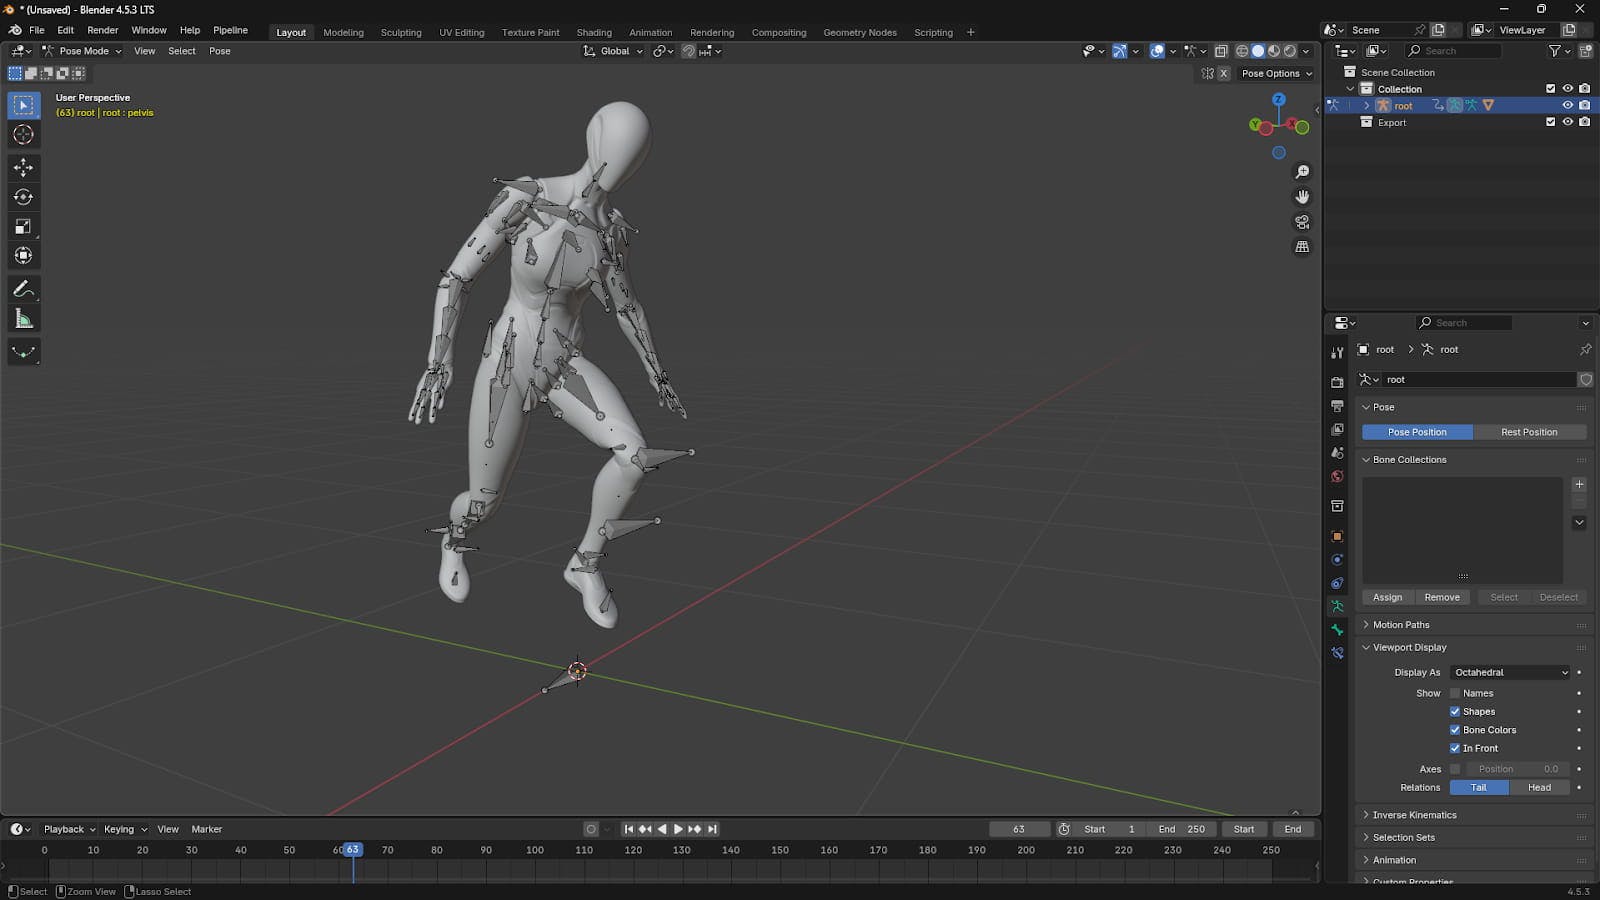
This streamlined workflow, from recording a simple video to importing a polished animation into Blender, demonstrates the incredible power of AI in modern 3D content creation. It's a testament to how technology is making professional-level tools more accessible than ever before.

Learn to manipulate background layers through a custom glass shape in Fusion. Perfect for title sequences and abstract motion design. Free tutorial inside
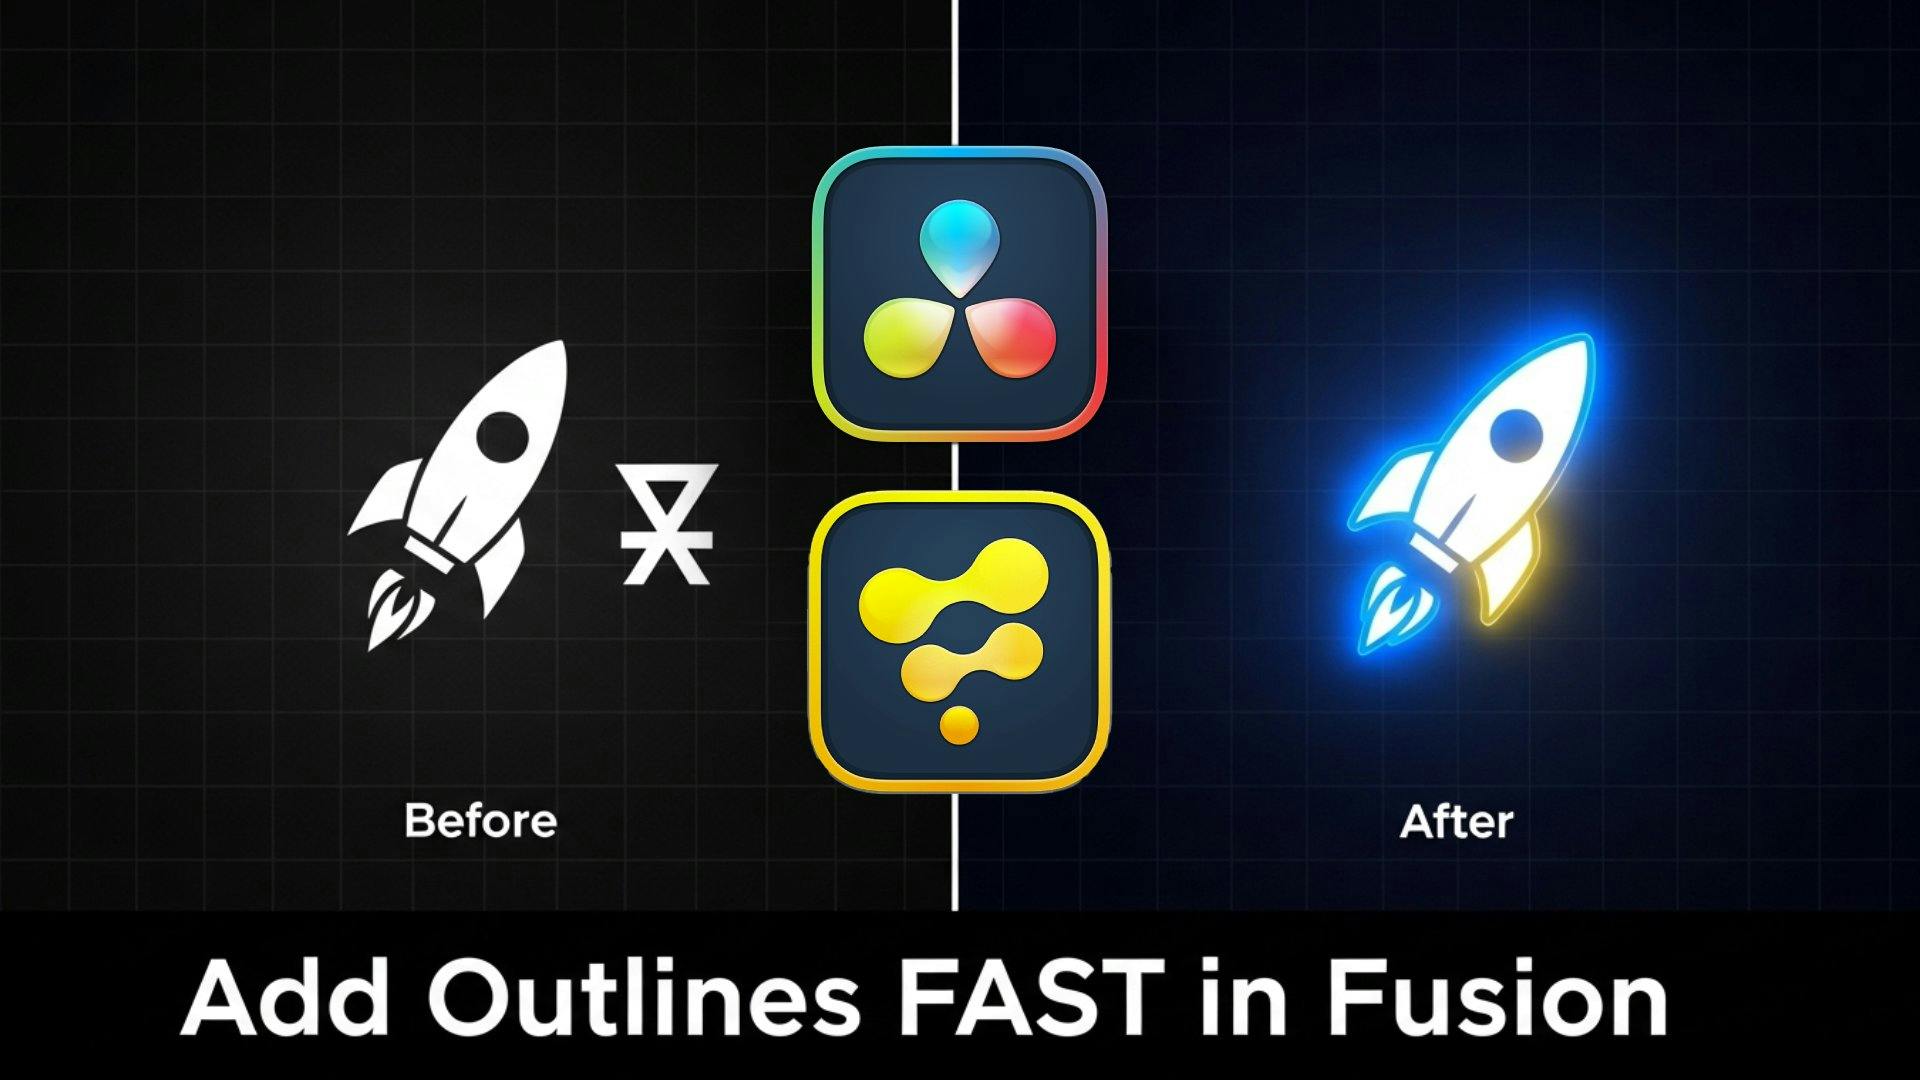
Learn a quick trick to add a clean, procedural outline to any image with an alpha channel in DaVinci Resolve Fusion using the Delta Keyer
Elevate your video editing. Discover a simple trick in DaVinci Resolve to create powerful Fusion compositions that work on any clip in your timeline.