How to Add Google Analytics to Gumroad

Have you ever wondered exactly how customers interact with your Gumroad products? 🤔 Tracking page views, add-to-carts, and conversions is the secret sauce for any creator looking to scale their digital empire.
Whether you're launching your very first digital product or managing an extensive library of premium offerings, setting up analytics only takes a few minutes. Here is an expert, step-by-step guide to get you tracking in no time!
~5-10 minutes
You will seamlessly connect Google Analytics 4 (GA4) to your Gumroad store. By the end of this guide, you'll be able to track user behavior, page views, and shopping cart events—all without writing a single line of code!
If you're new to the data game, you'll need to create a Google Analytics account. It's totally free and incredibly powerful.
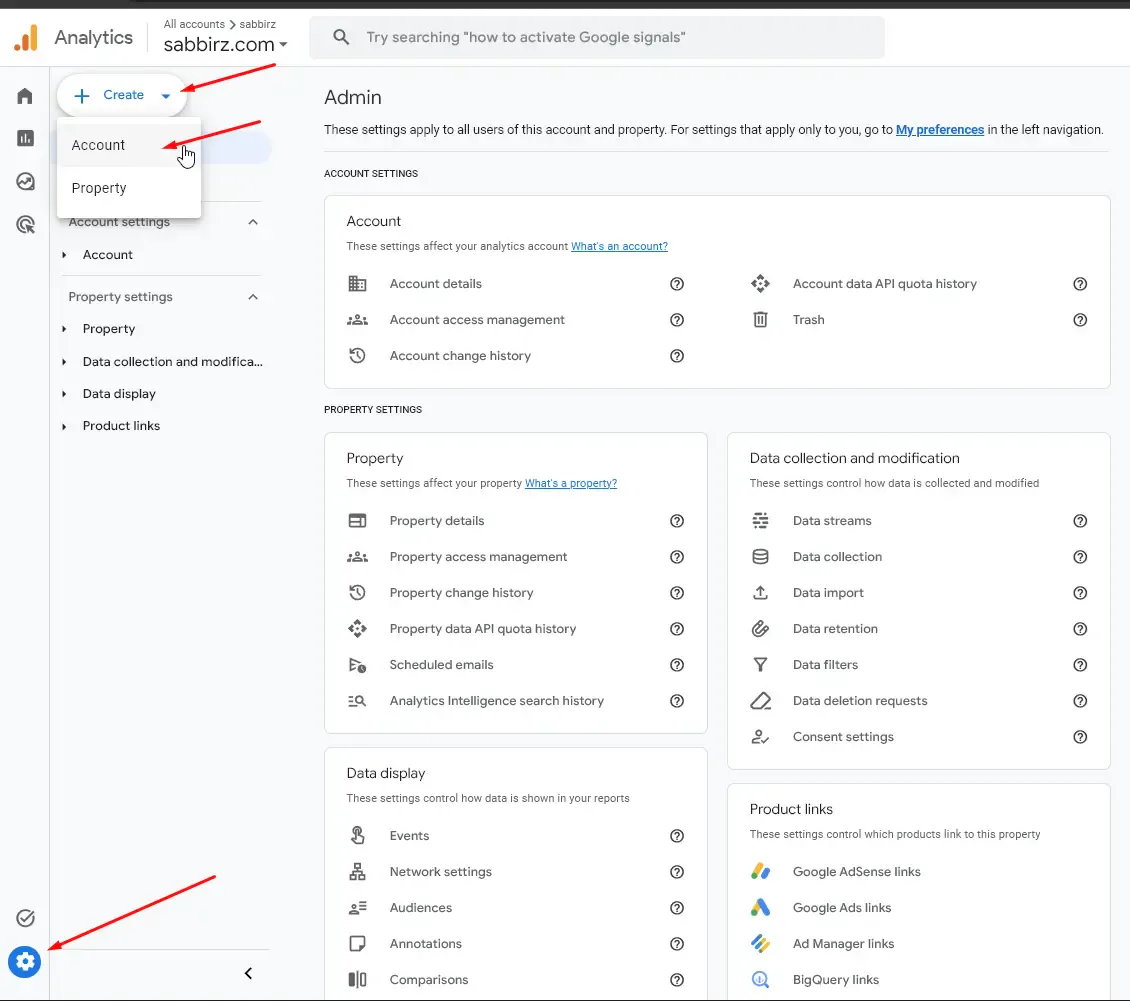
Head over to Google Analytics and click on Create Account.
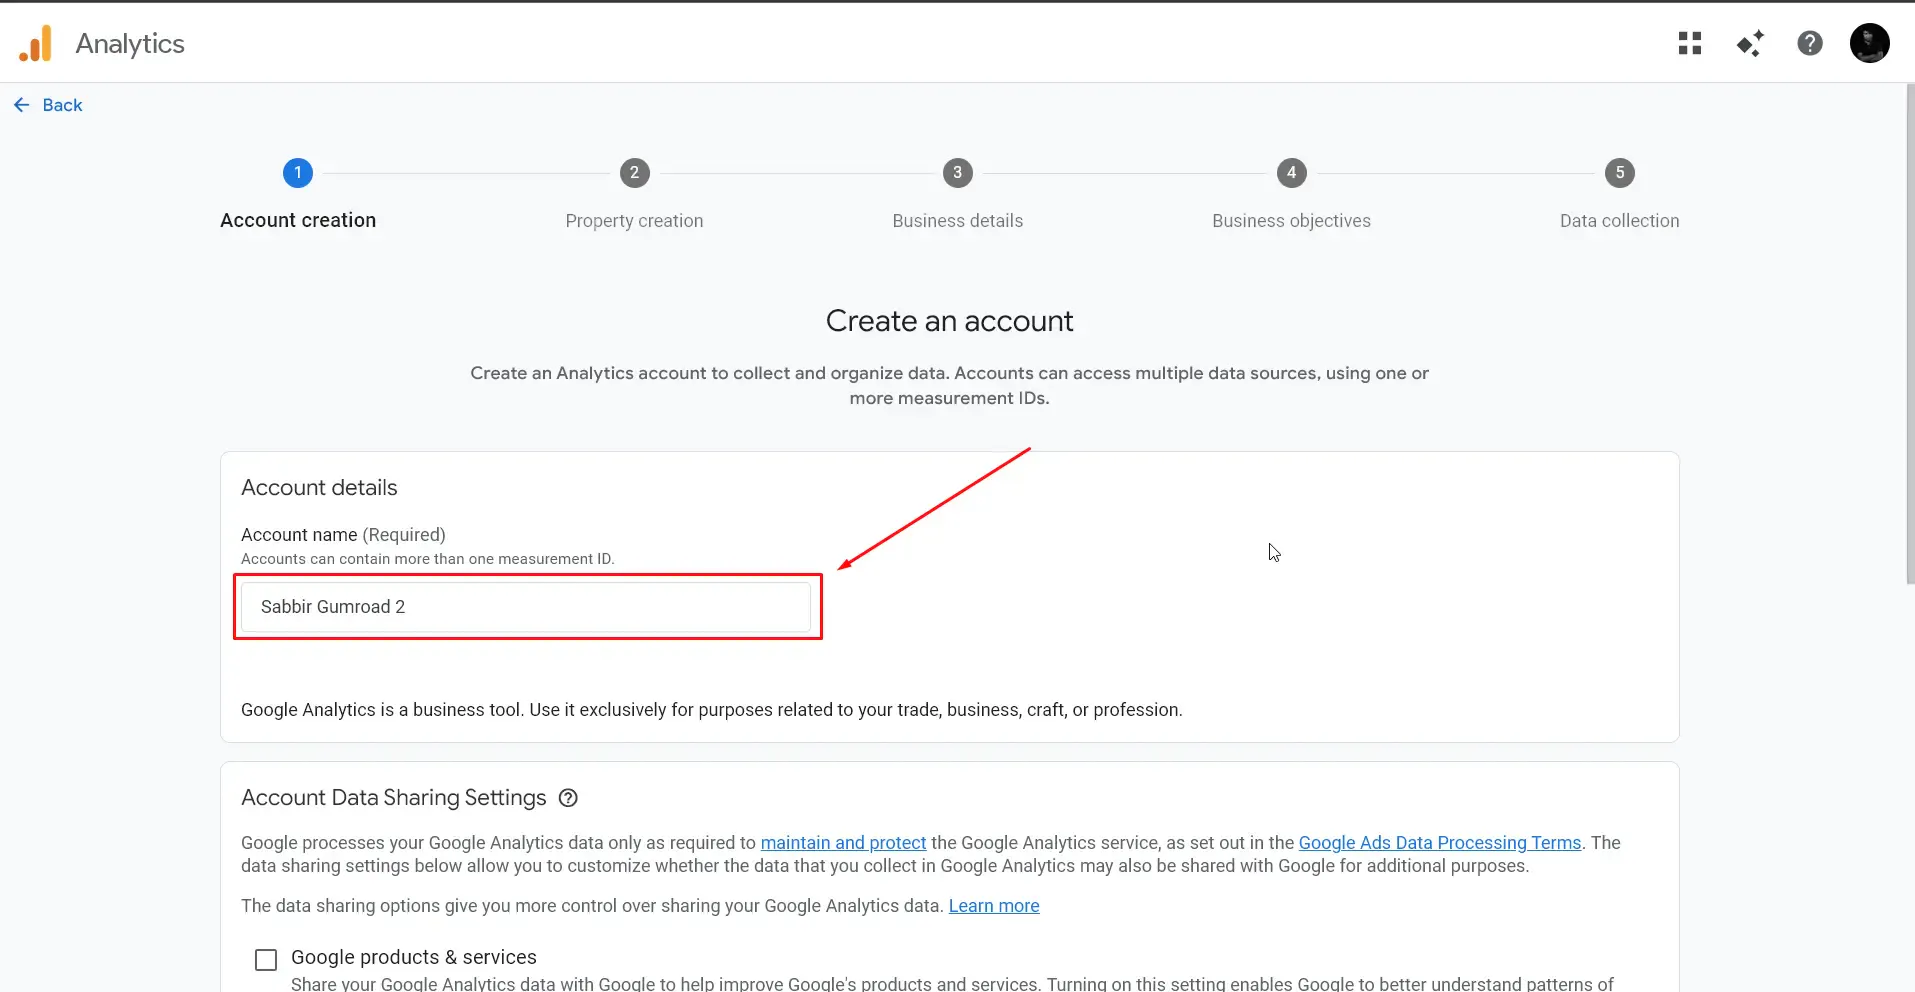
Enter a descriptive account name (e.g., "Gumroad Analytics") and adjust your data sharing settings to your preference.
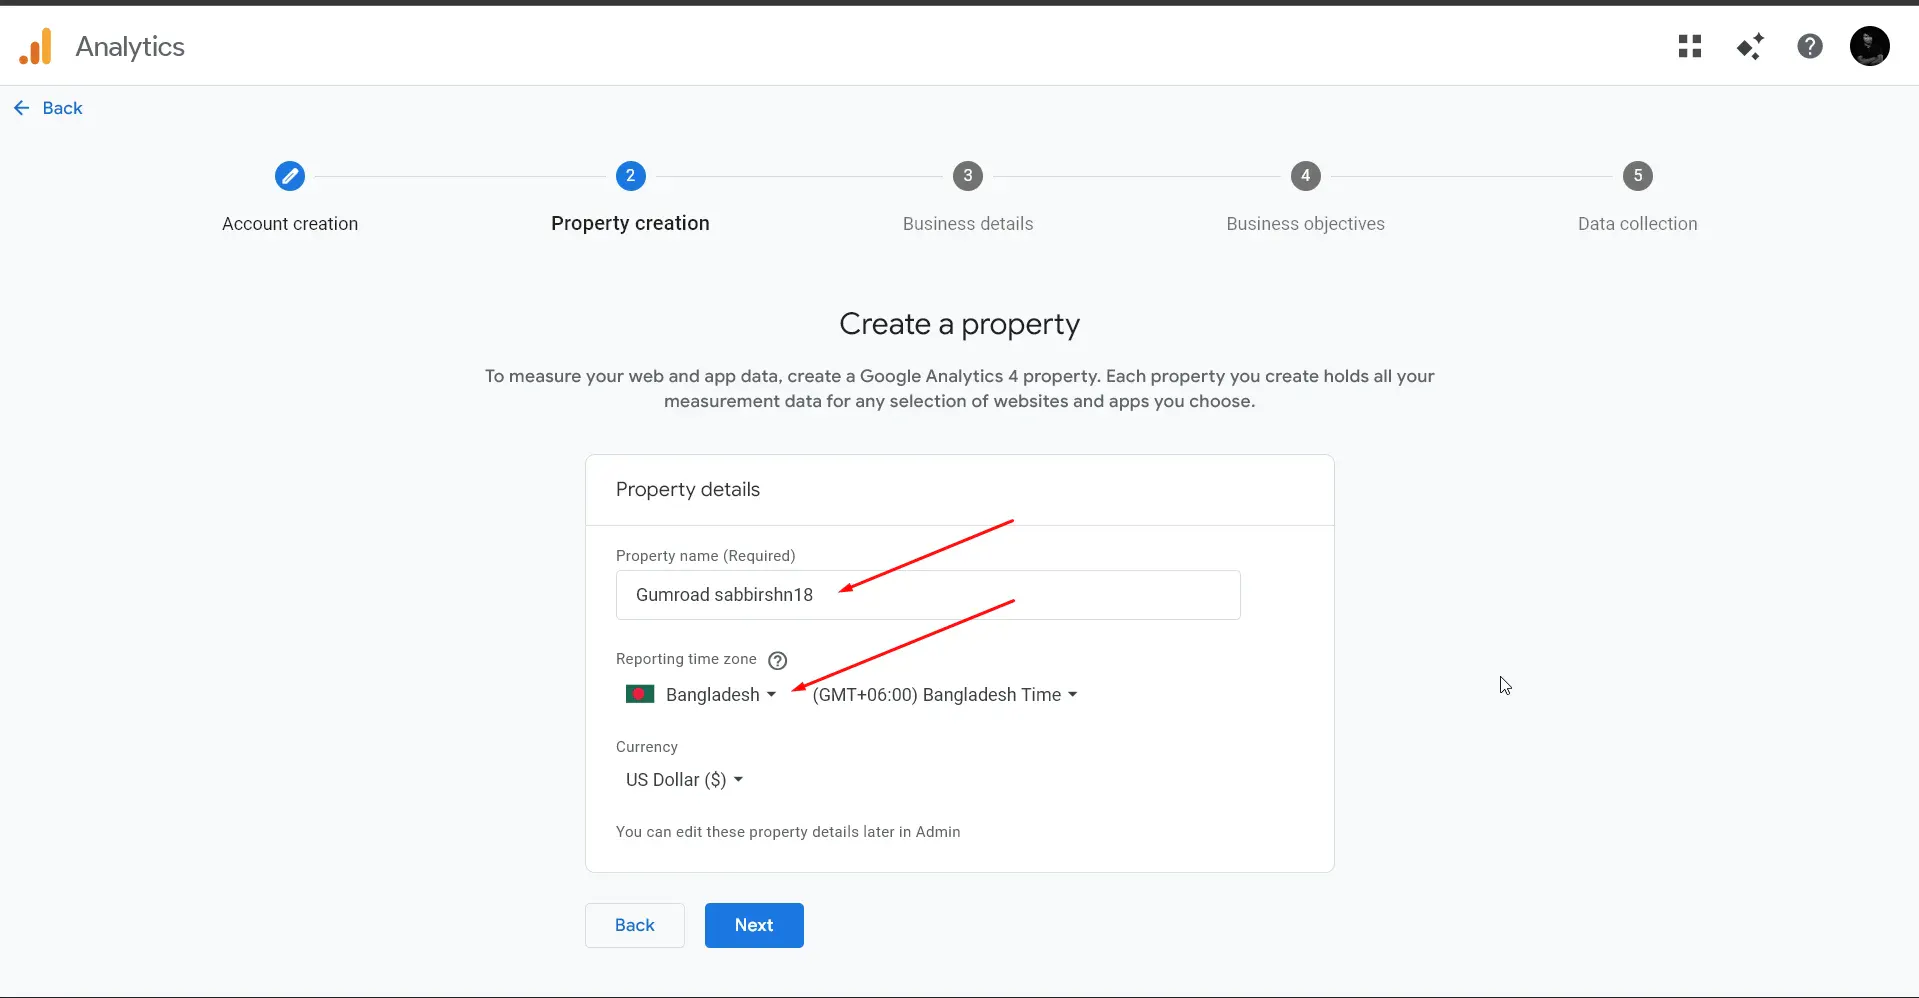
Next, name your property, select your local time zone, and choose your preferred currency.
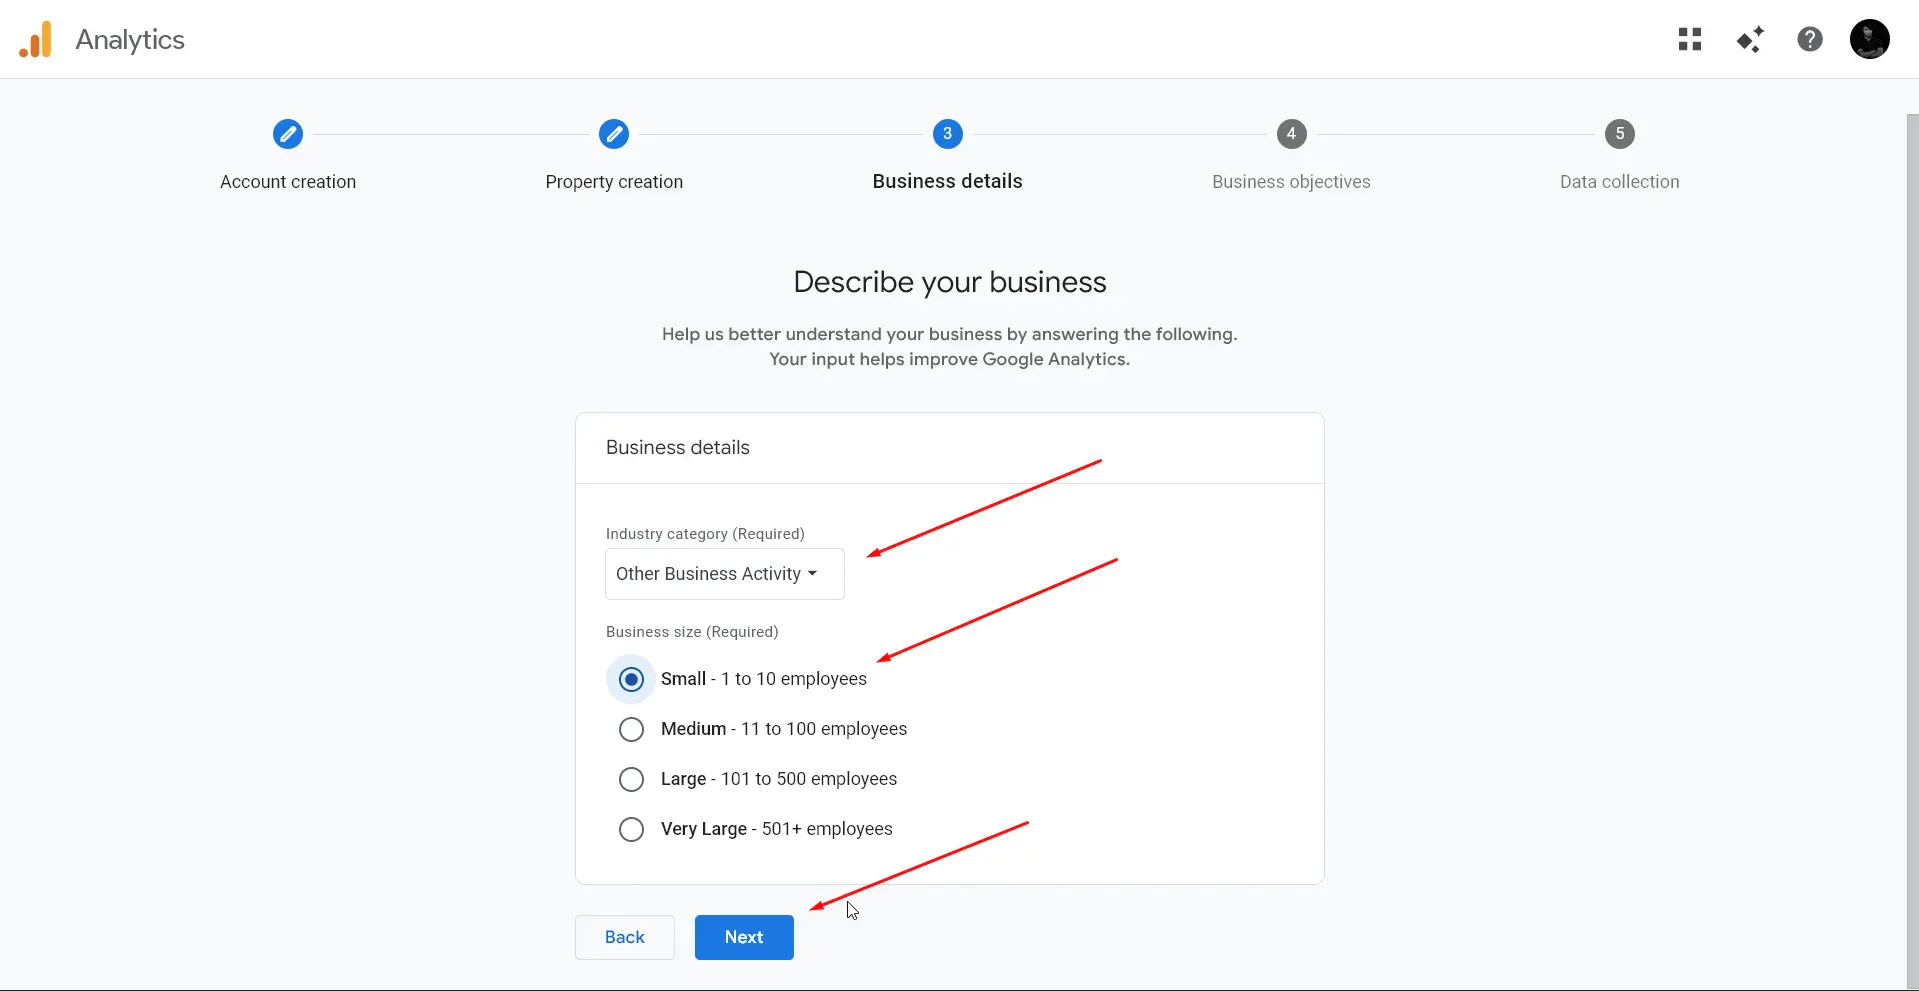
Input your business details, like your industry category and business size.
Choose your primary business objectives. Selecting "Examine user behavior" is a fantastic starting point for creators who want to see exactly how buyers navigate their storefront.
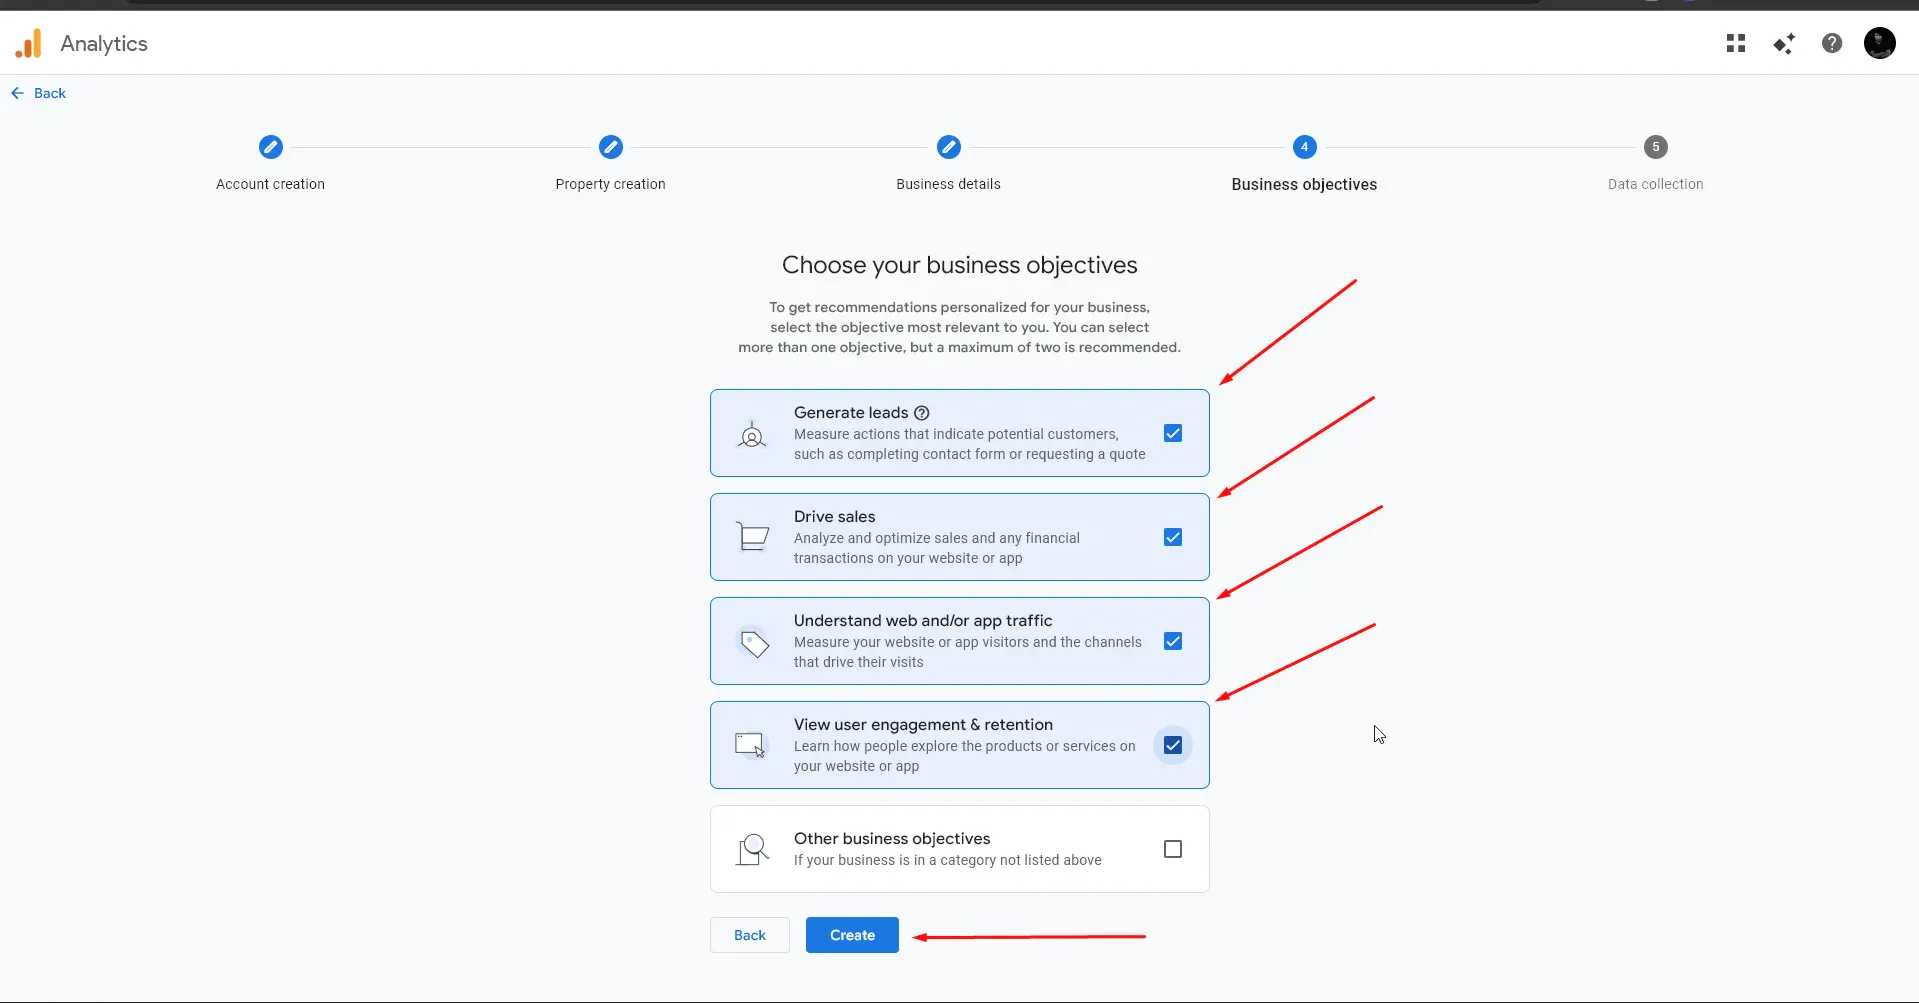
Finally, accept the Google Analytics Terms of Service to finalize your property creation.
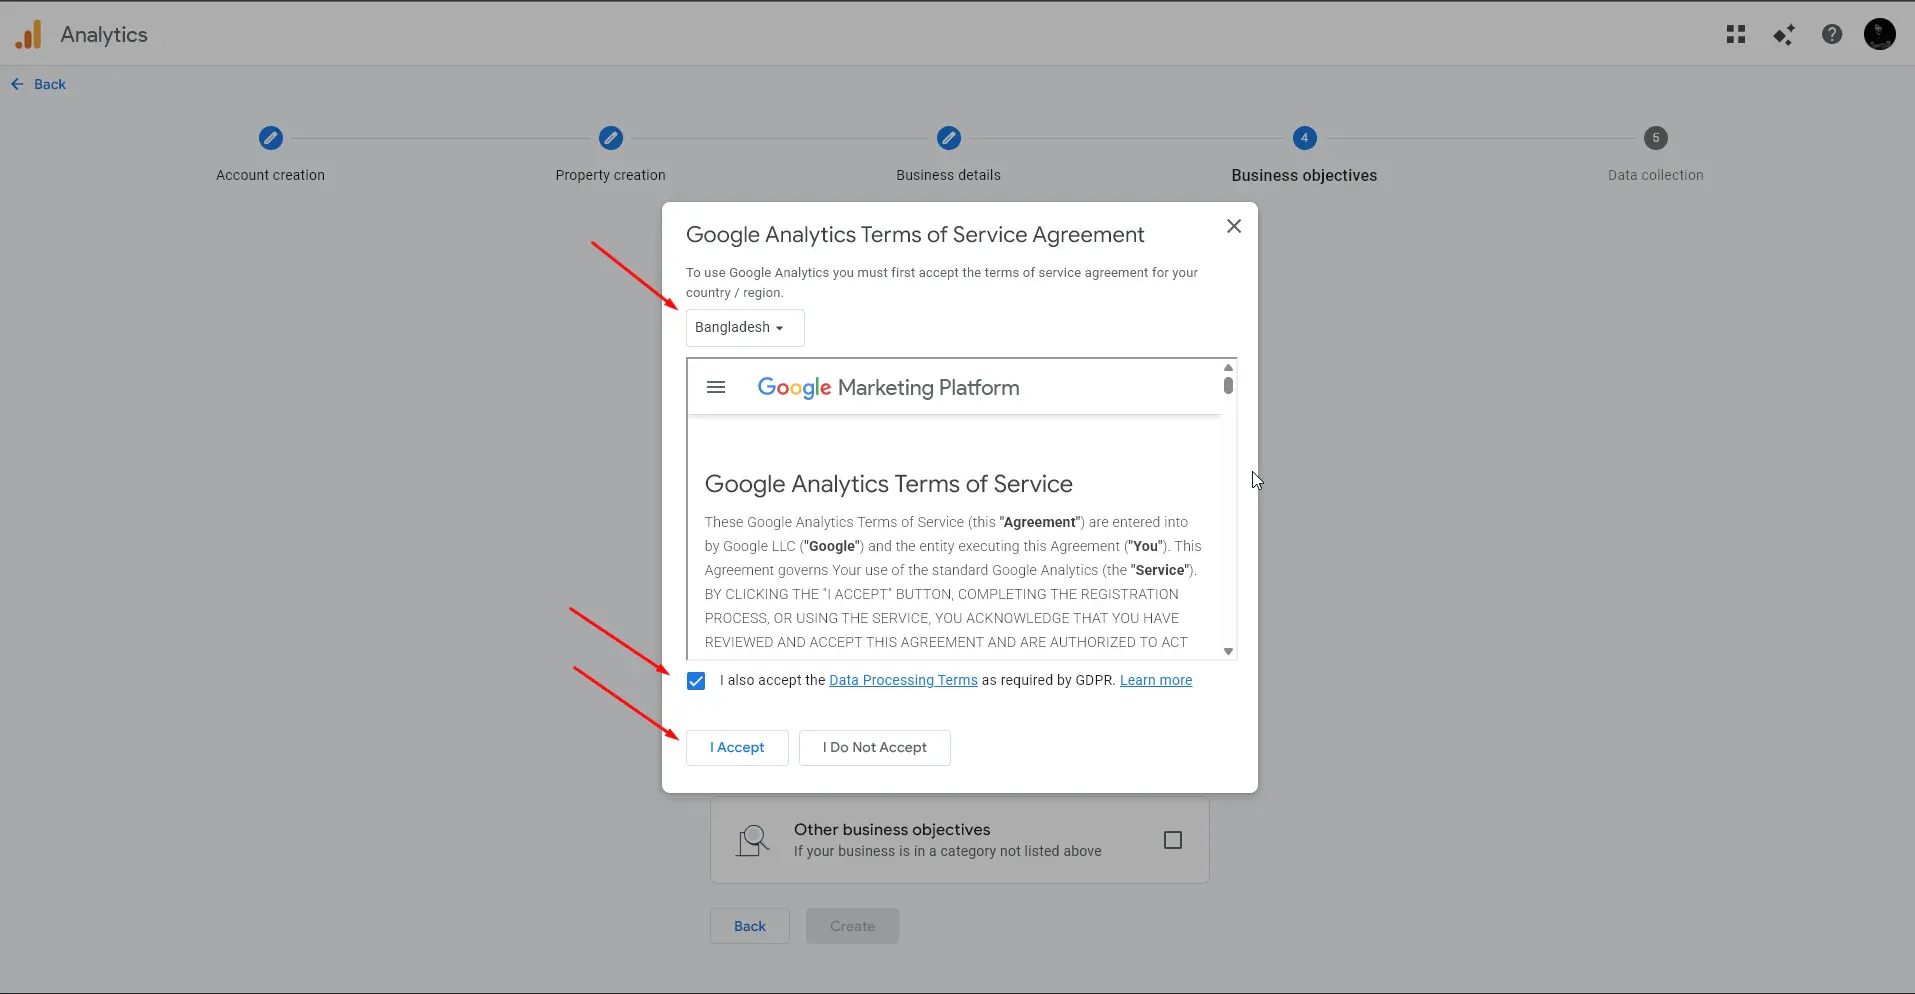
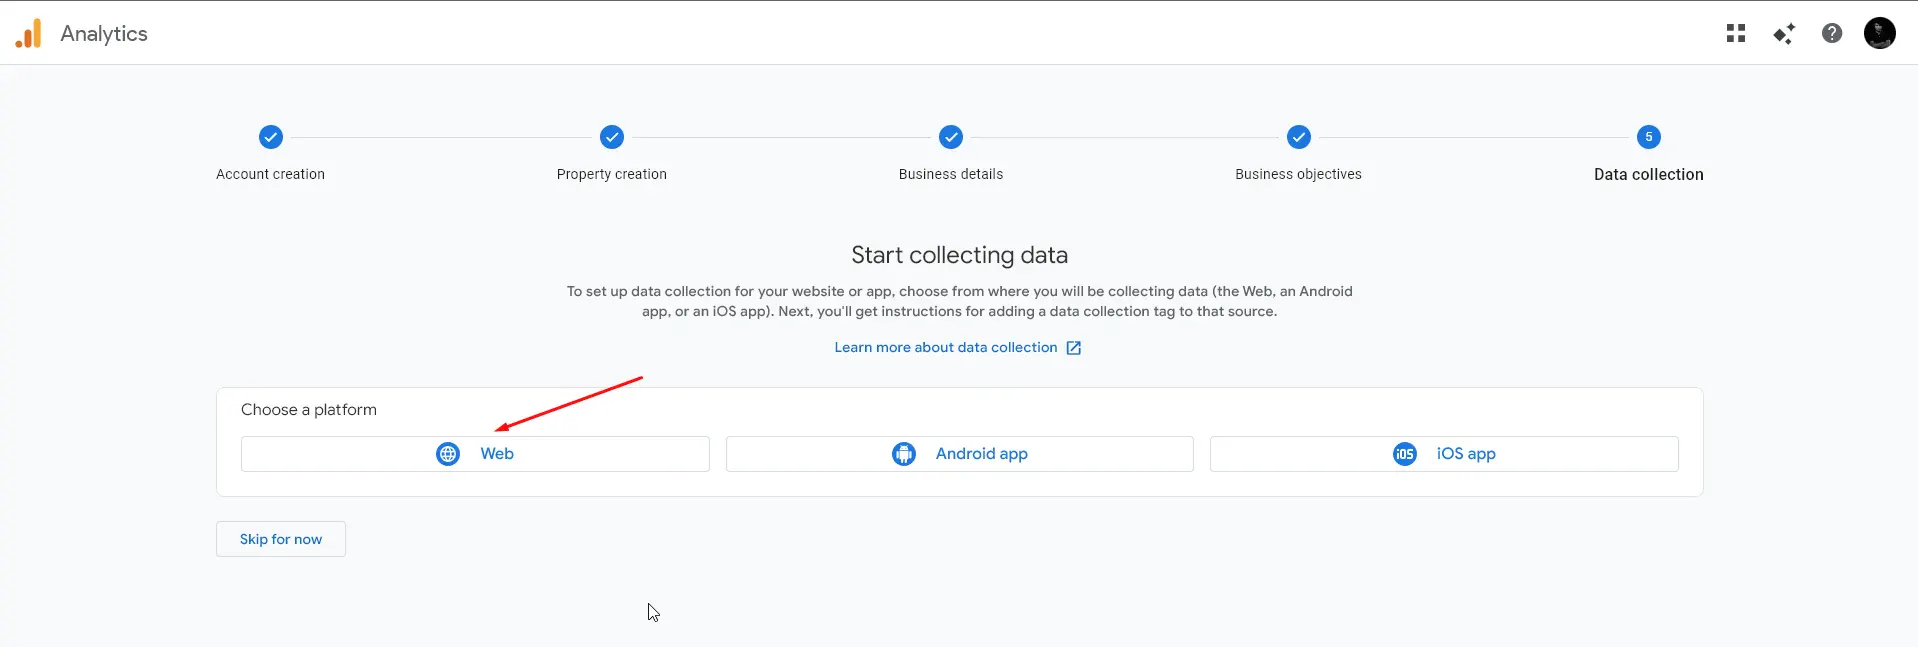
Now that your property is ready, you must tell Google Analytics where the data is coming from.
Choose Web as your platform, since Gumroad is a web-based storefront.
In the website URL field, enter your specific Gumroad domain (e.g., https://gumroadanalytics.staging.gumroad.com) and give the stream a recognizable name.
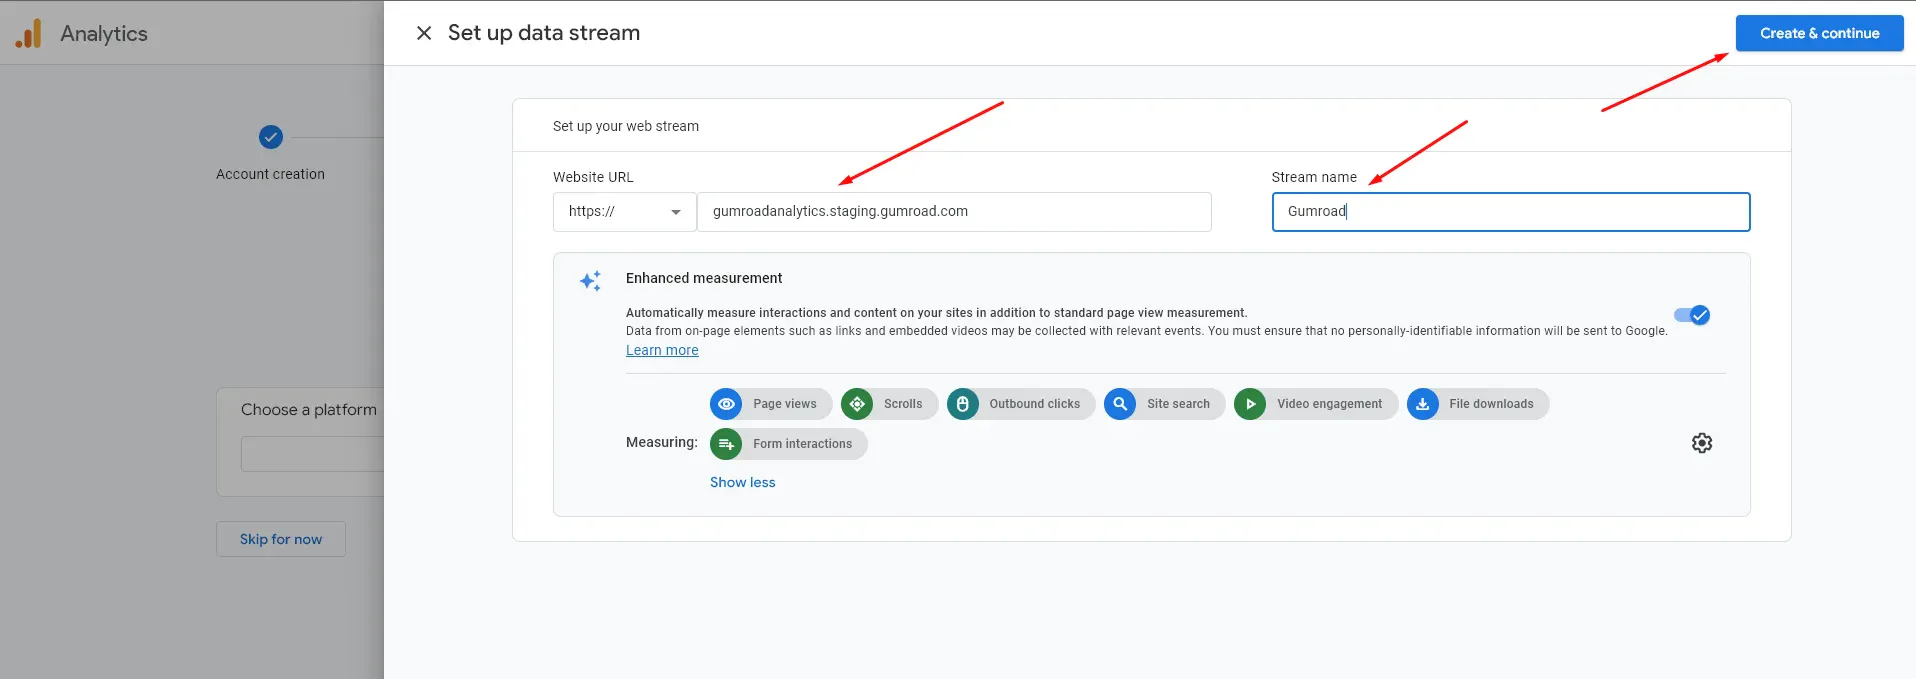
💡 Pro Tip: Keep "Enhanced Measurement" enabled! This smart feature automatically tracks helpful interactions like page scrolls, outbound clicks, and file downloads without requiring any extra coding magic. ✨
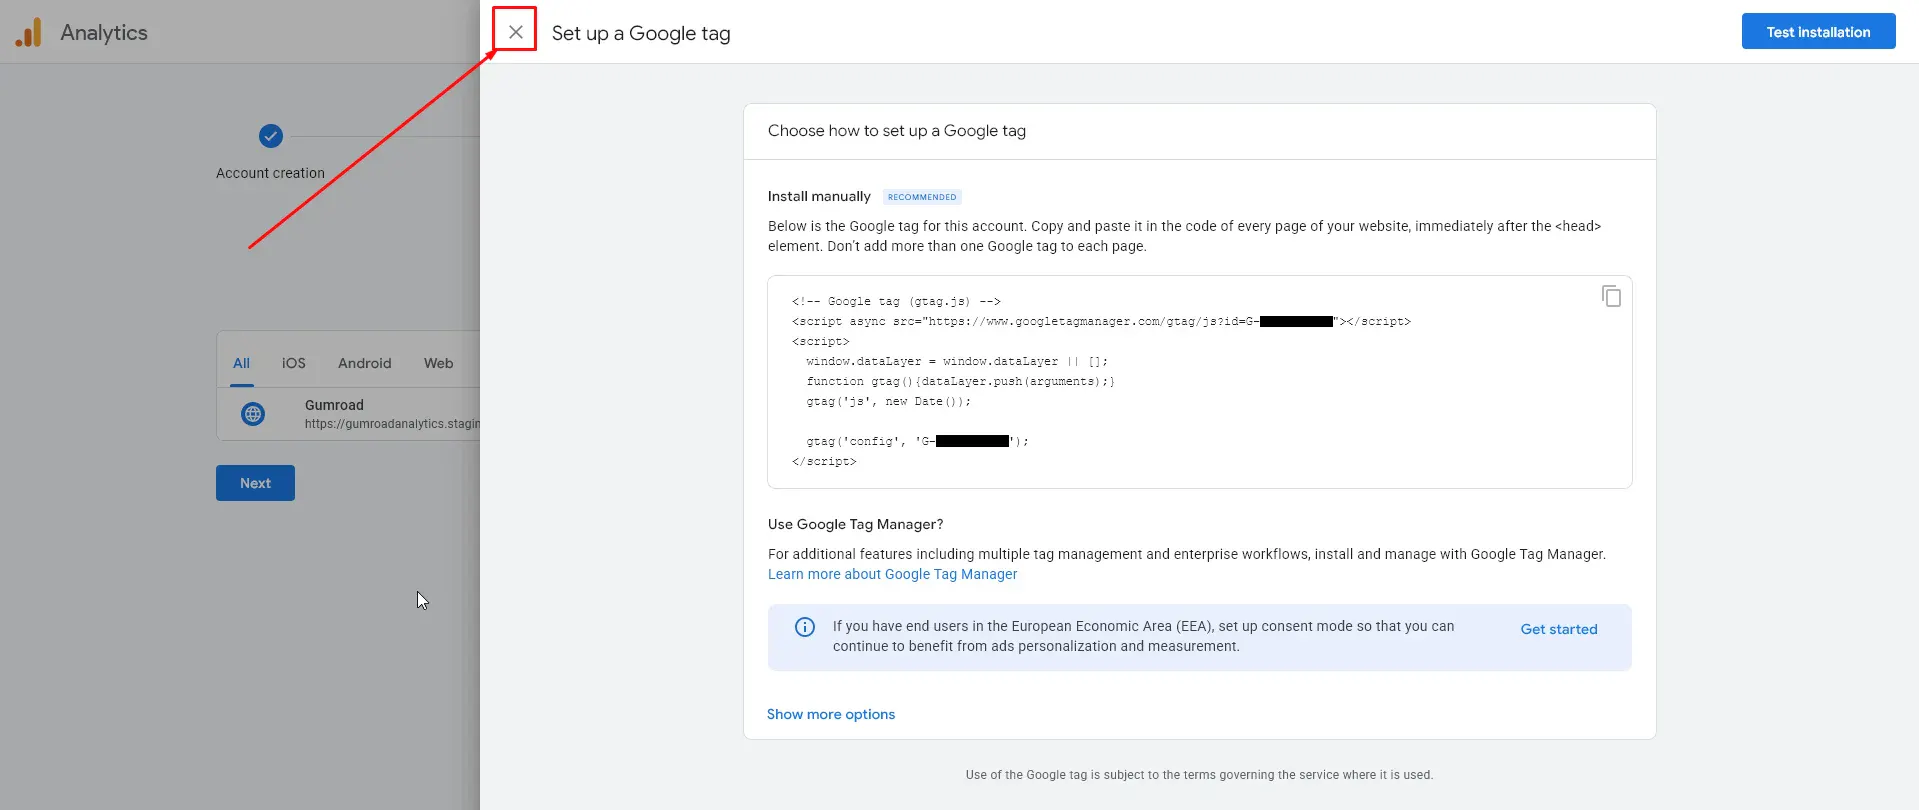
Here is where the magic happens—and the best part? No manual code injection required! 🙌
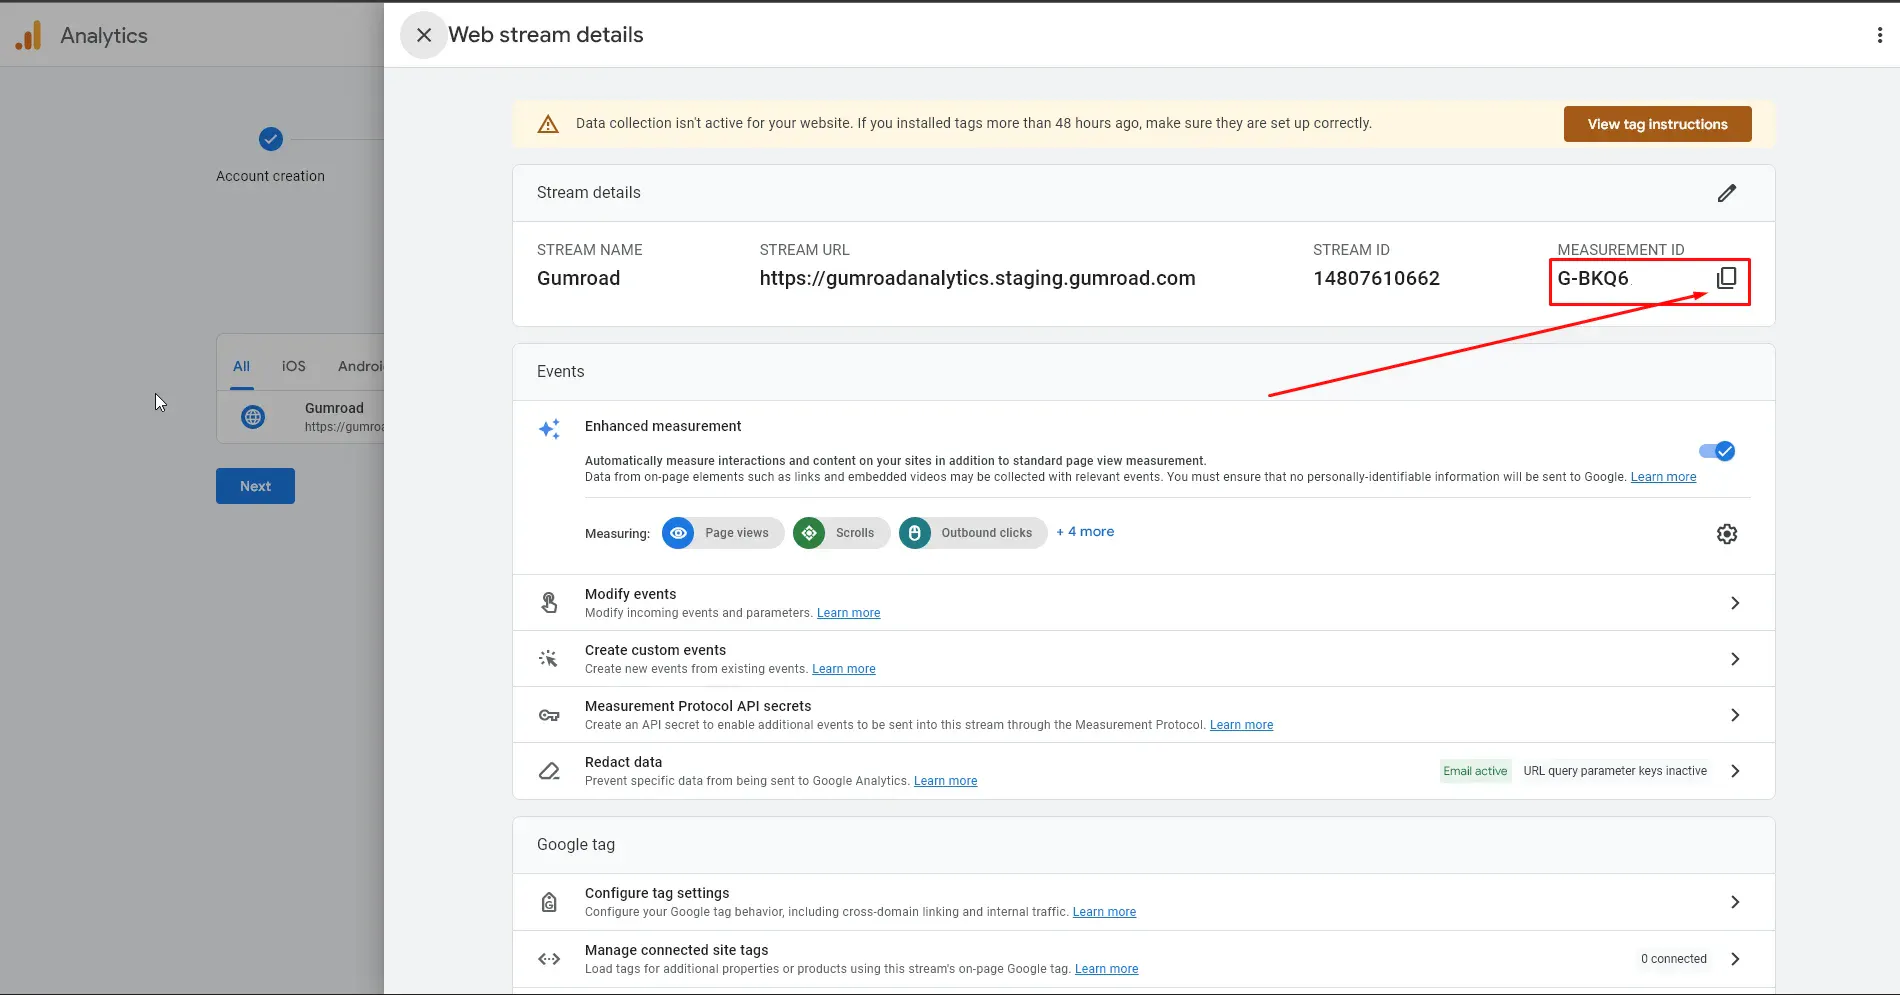
On the Web Stream Details page in Google Analytics, look for the Measurement ID (it starts with "G-") at the top right and copy it to your clipboard.
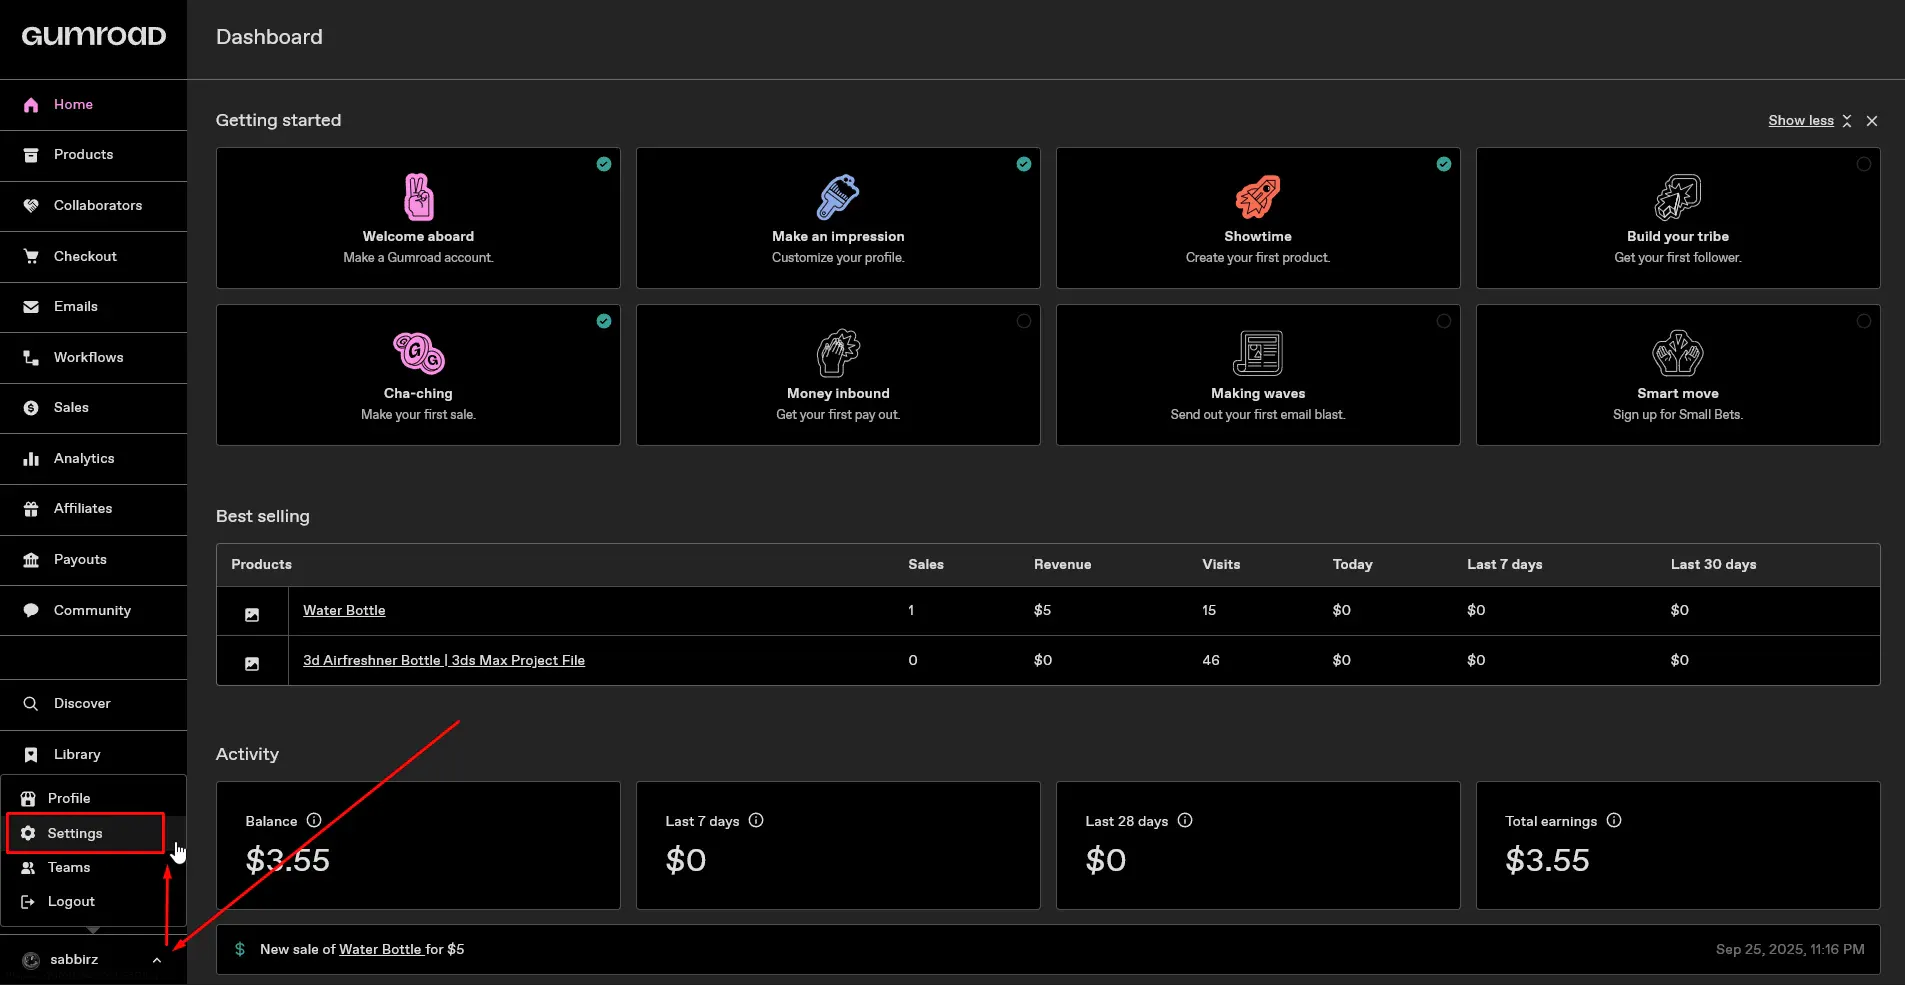
Head over to your Gumroad Dashboard and navigate to Settings in the left sidebar.
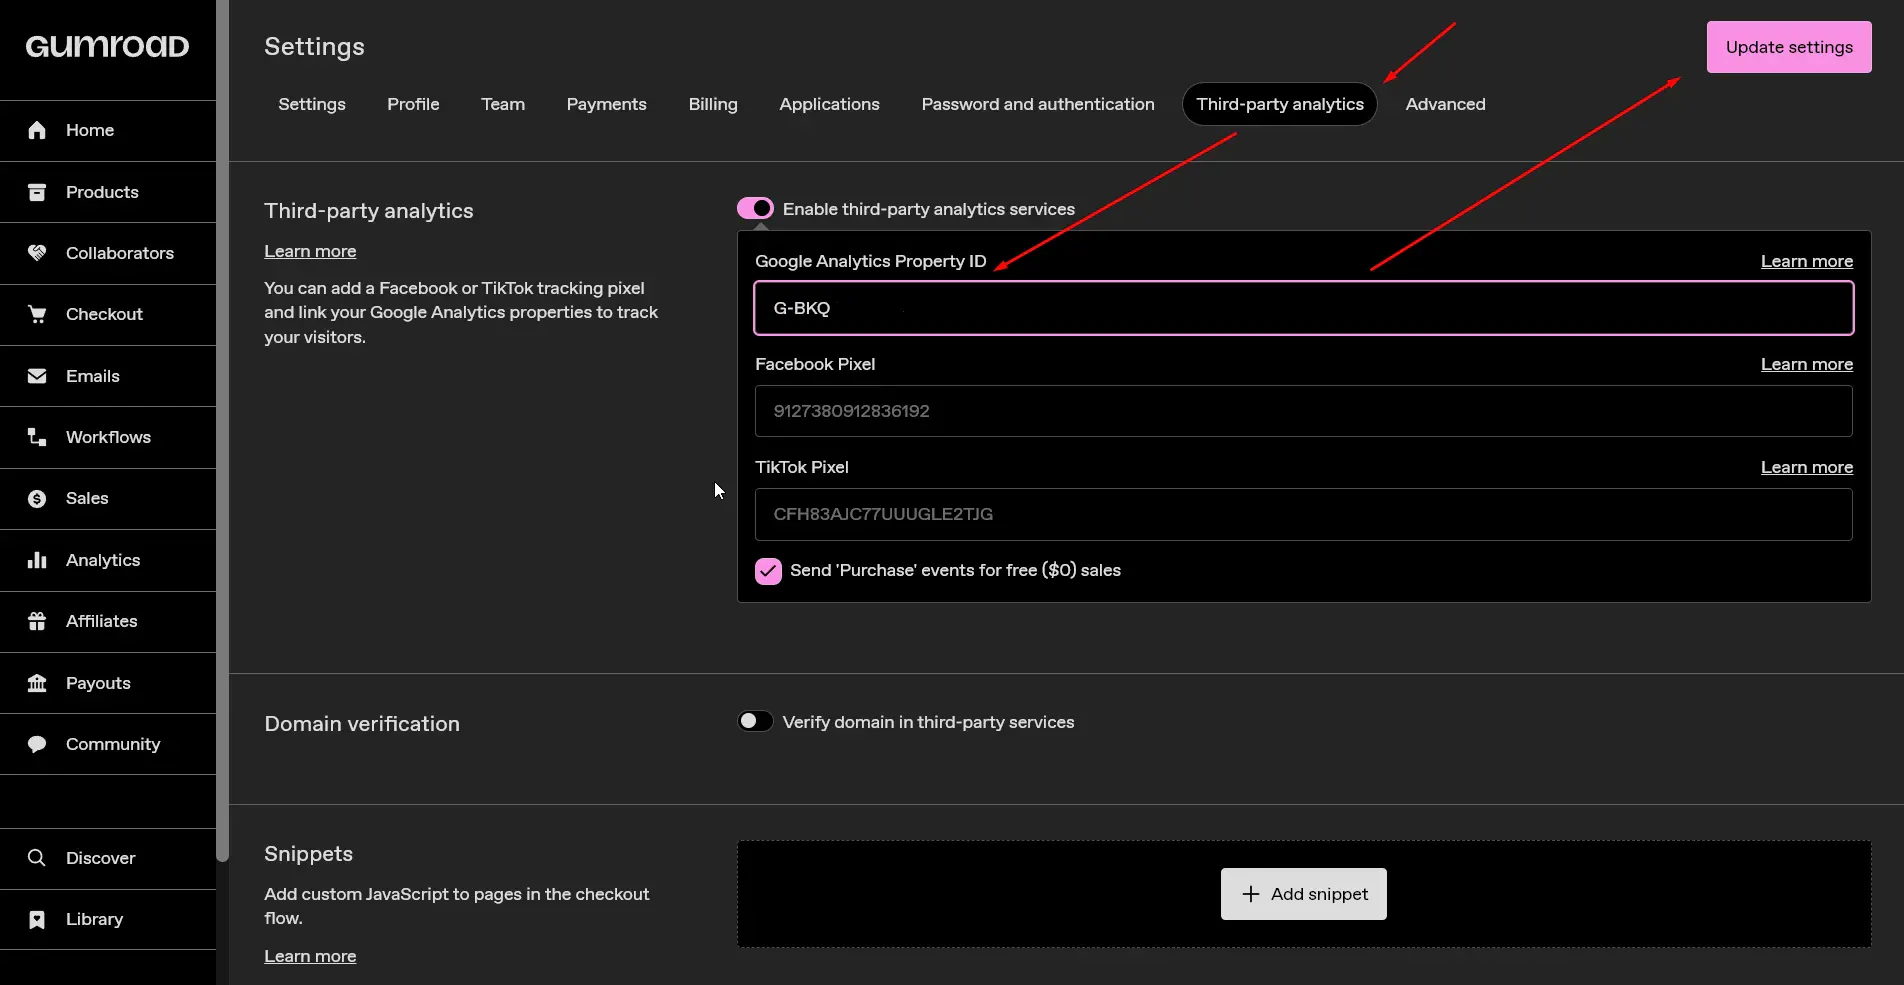
In the top menu bar of the settings page, click on Third-party analytics.
Locate the "Google Analytics property ID" field, paste your copied Measurement ID, and click Update settings.
It's always a best practice to verify that data is actively flowing between Gumroad and Google Analytics. Because standard GA4 reports can take 24-48 hours to fully process data, the Realtime view is your best friend for instant gratification.
In Google Analytics, navigate to Reports > Realtime.
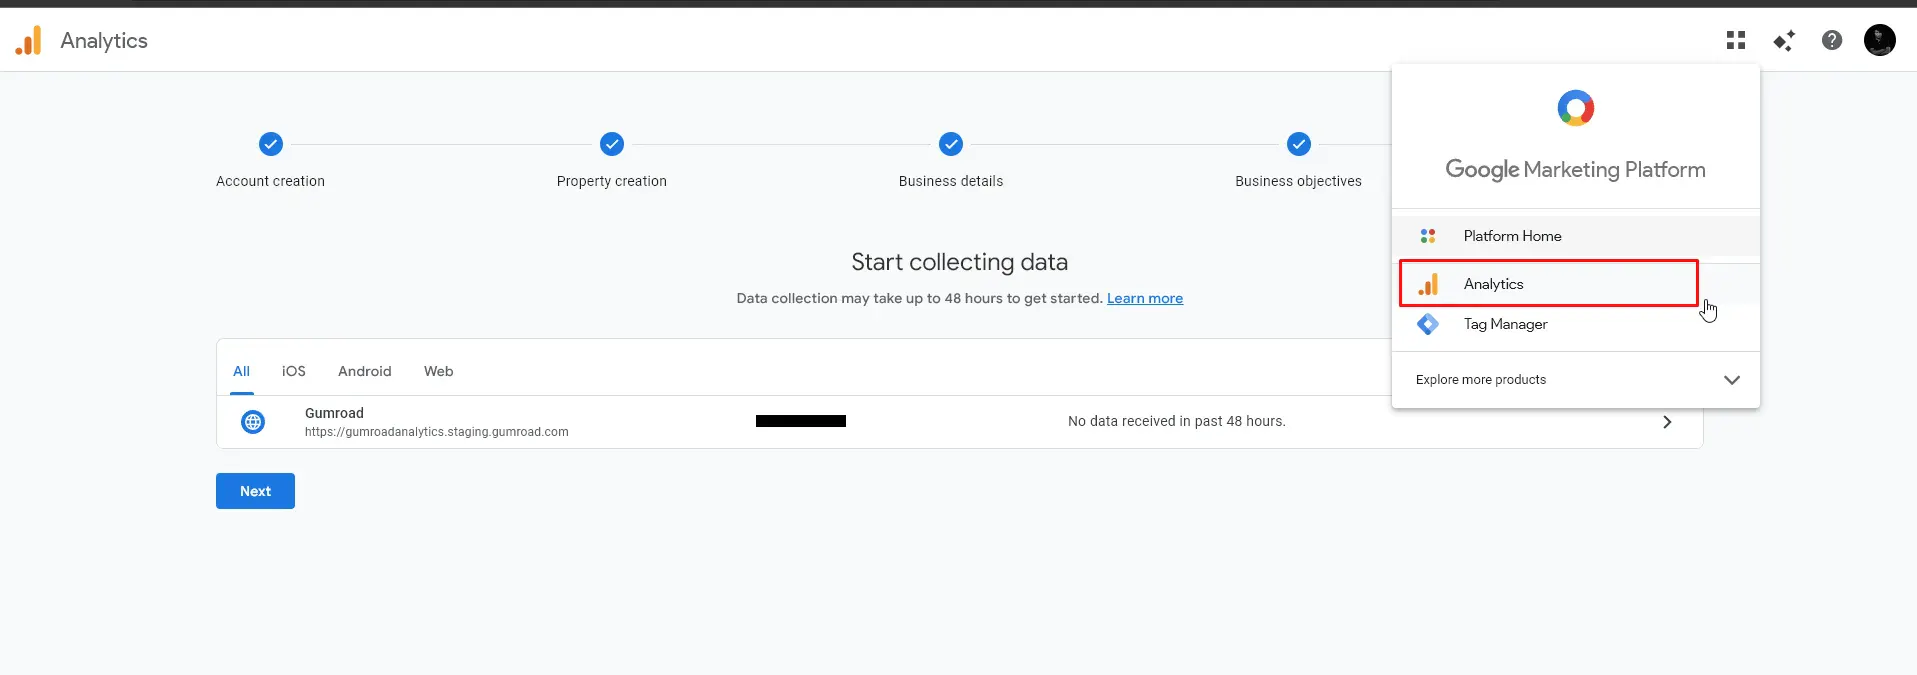
Open a new incognito window, go to your live Gumroad page, and act like a customer. Click around, view a product, and even add it to your cart. 🛒
Head back to your Google Analytics tab. Within a few moments, you should see your activity pop up on the screen, logging specific events like view_item and add_to_cart.
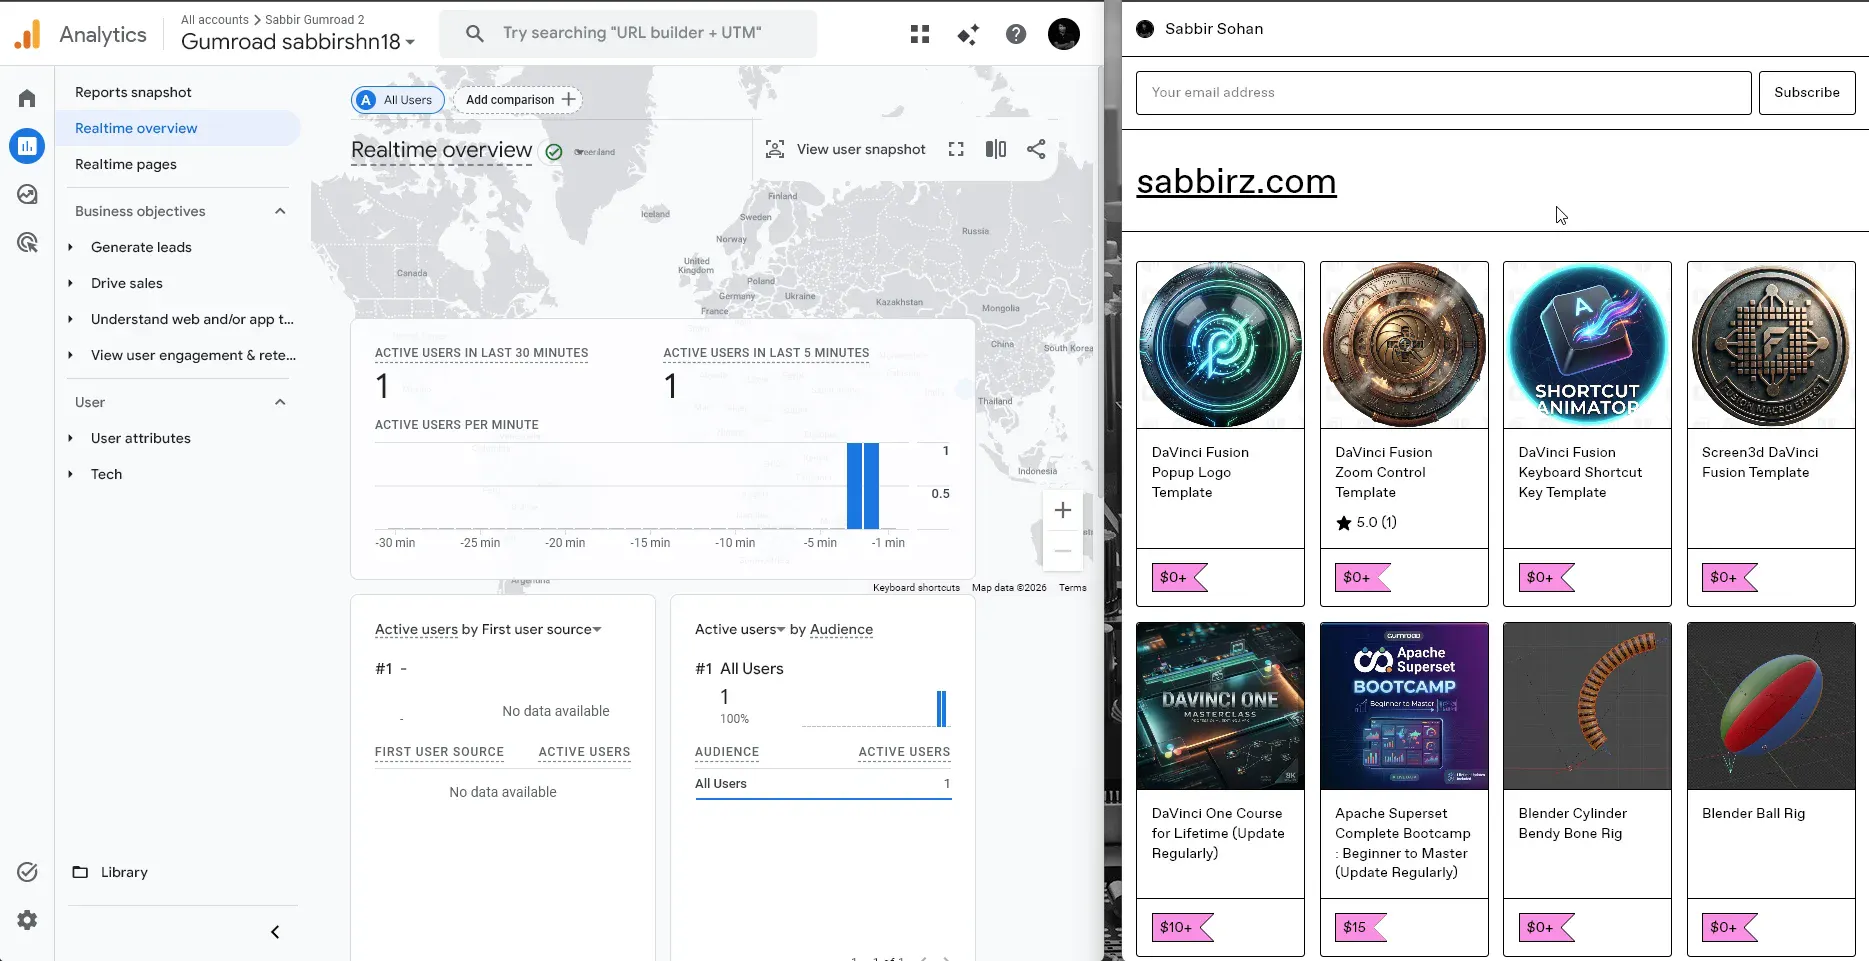
Boom! You're live! 🎇