How to Easily Rename WSL Distros on Windows - video tutorial included

Sometimes, it's convenient to rename your WSL (Windows Subsystem for Linux) distros for better identification. Renaming a distro makes it easier to manage multiple distributions. Follow these steps to rename a WSL distro:
Before making any changes, stop all running instances of WSL.
wsl --shutdown
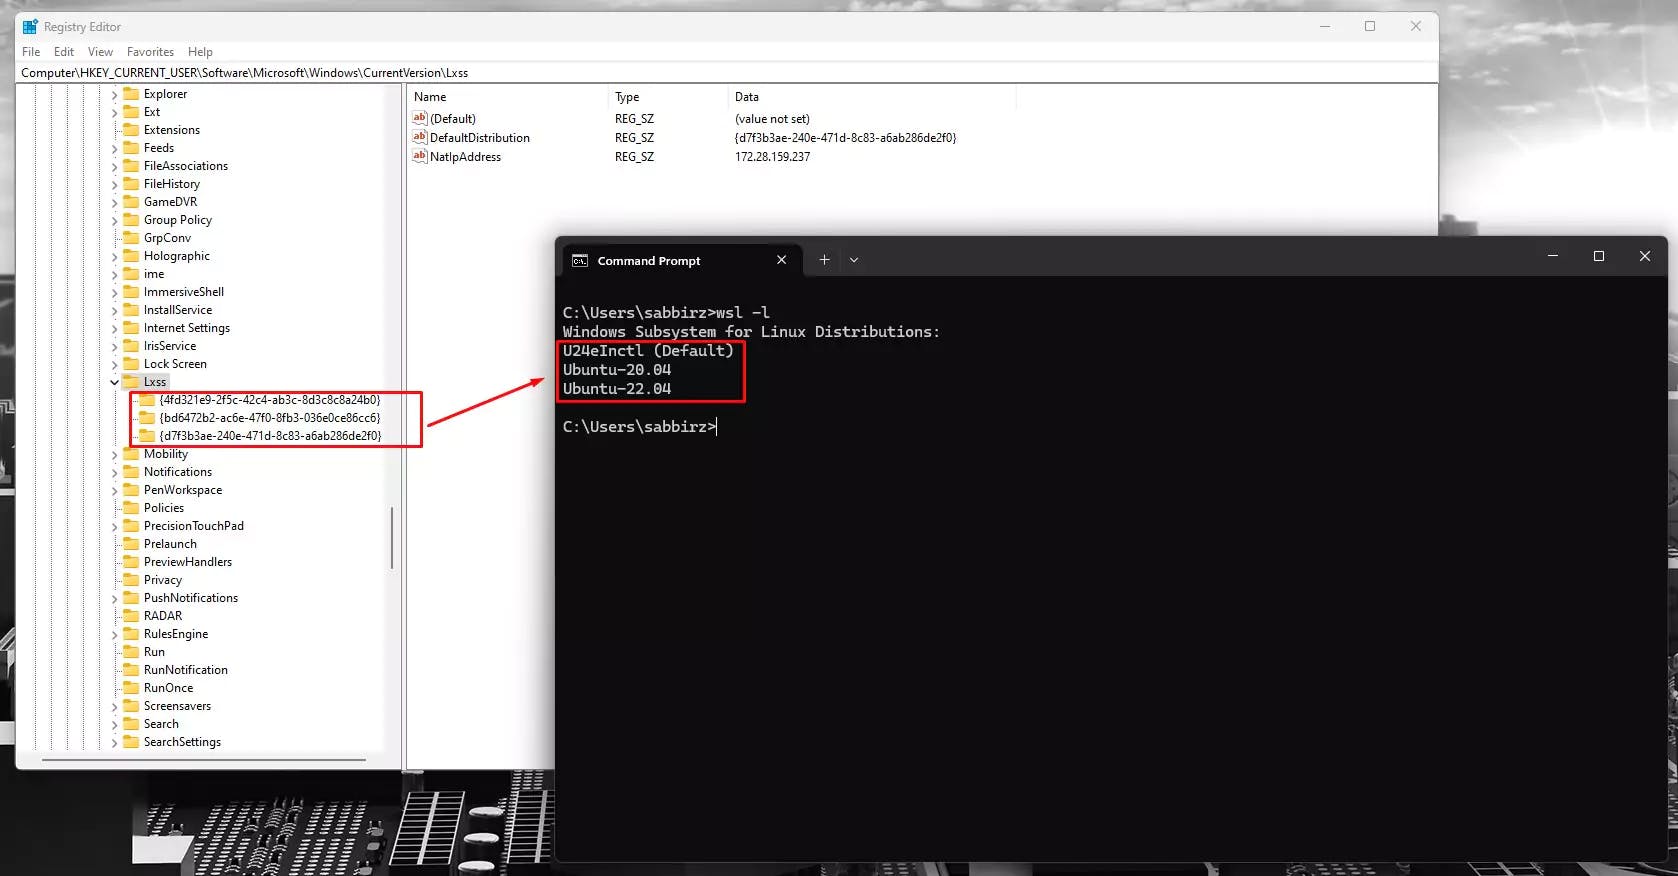
Open the Registry Editor by searching for it in the Start menu.

In the Registry Editor, navigate to the following path:
Computer\HKEY_CURRENT_USER\Software\Microsoft\Windows\CurrentVersion\Lxss
Each subfolder under Lxss represents a different WSL distro.
DistributionNameOpen the subfolder corresponding to the distro you want to rename. You'll find a value called DistributionName. This is the current name of your distro.
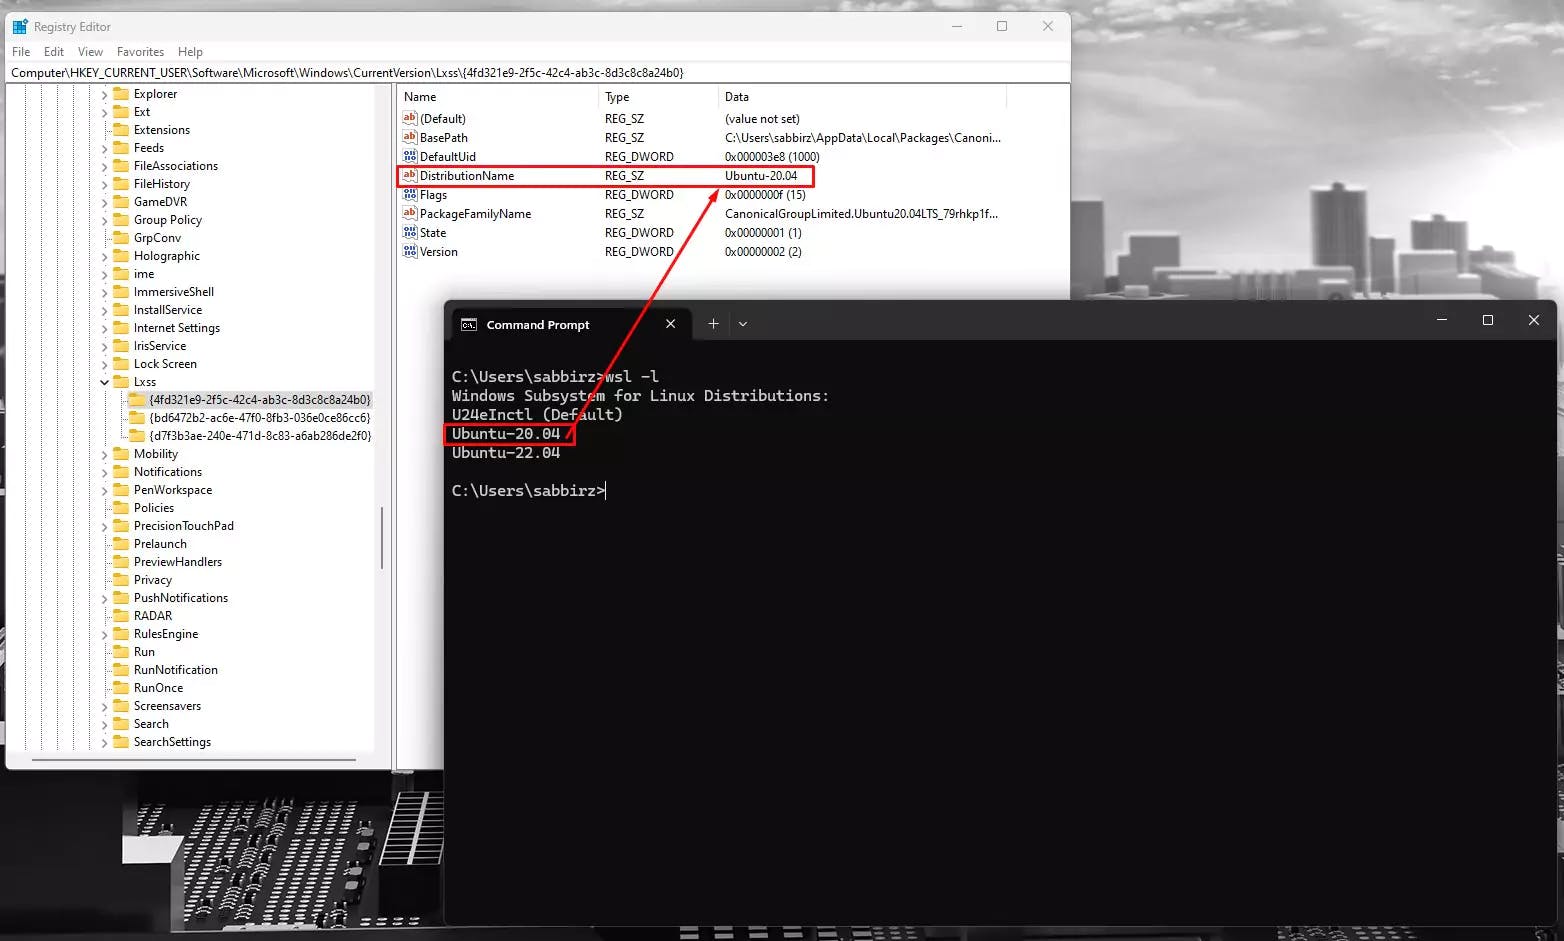
Double-click DistributionName and change it to your desired name. Click "OK" to confirm.

After making the changes, restart your computer to apply them.

Once your computer has restarted, run the following command to see the updated distro name:
wsl -l
Your renamed distro should now appear in the list of available distros.
All set! Your WSL distro has been successfully renamed.

Just created a new Git branch and see 500+ modified files? Uncover the GitHub Desktop on Windows trap and resolve annoying line ending & permission errors step-by-step.

Preventing AI disasters in WSL! Learn how to configure Google Antigravity for Frappe & ERPNext projects to avoid 'sudo' errors and master your dev environment.

Step-by-step guide to installing Frappe 16 and ERPNext on Windows using WSL. Learn to set up Python 3.14, Node 24, and PostgreSQL for a next-gen dev environment.