How to Retarget Cascadeur Animations in Blender with Auto-Rig Pro
Ready to bring your stunning, physics-based animations from Cascadeur into the powerful world of Blender? 🚀
This tutorial will walk you through the entire process of retargeting your character animations using the fantastic Auto-Rig Pro addon.
For this guide, I'm assuming you've already created your animation in Cascadeur, as shown in our previous tutorial on character animation.
The workflow here is your key to a seamless transition from one software to the other.
Let's get started!
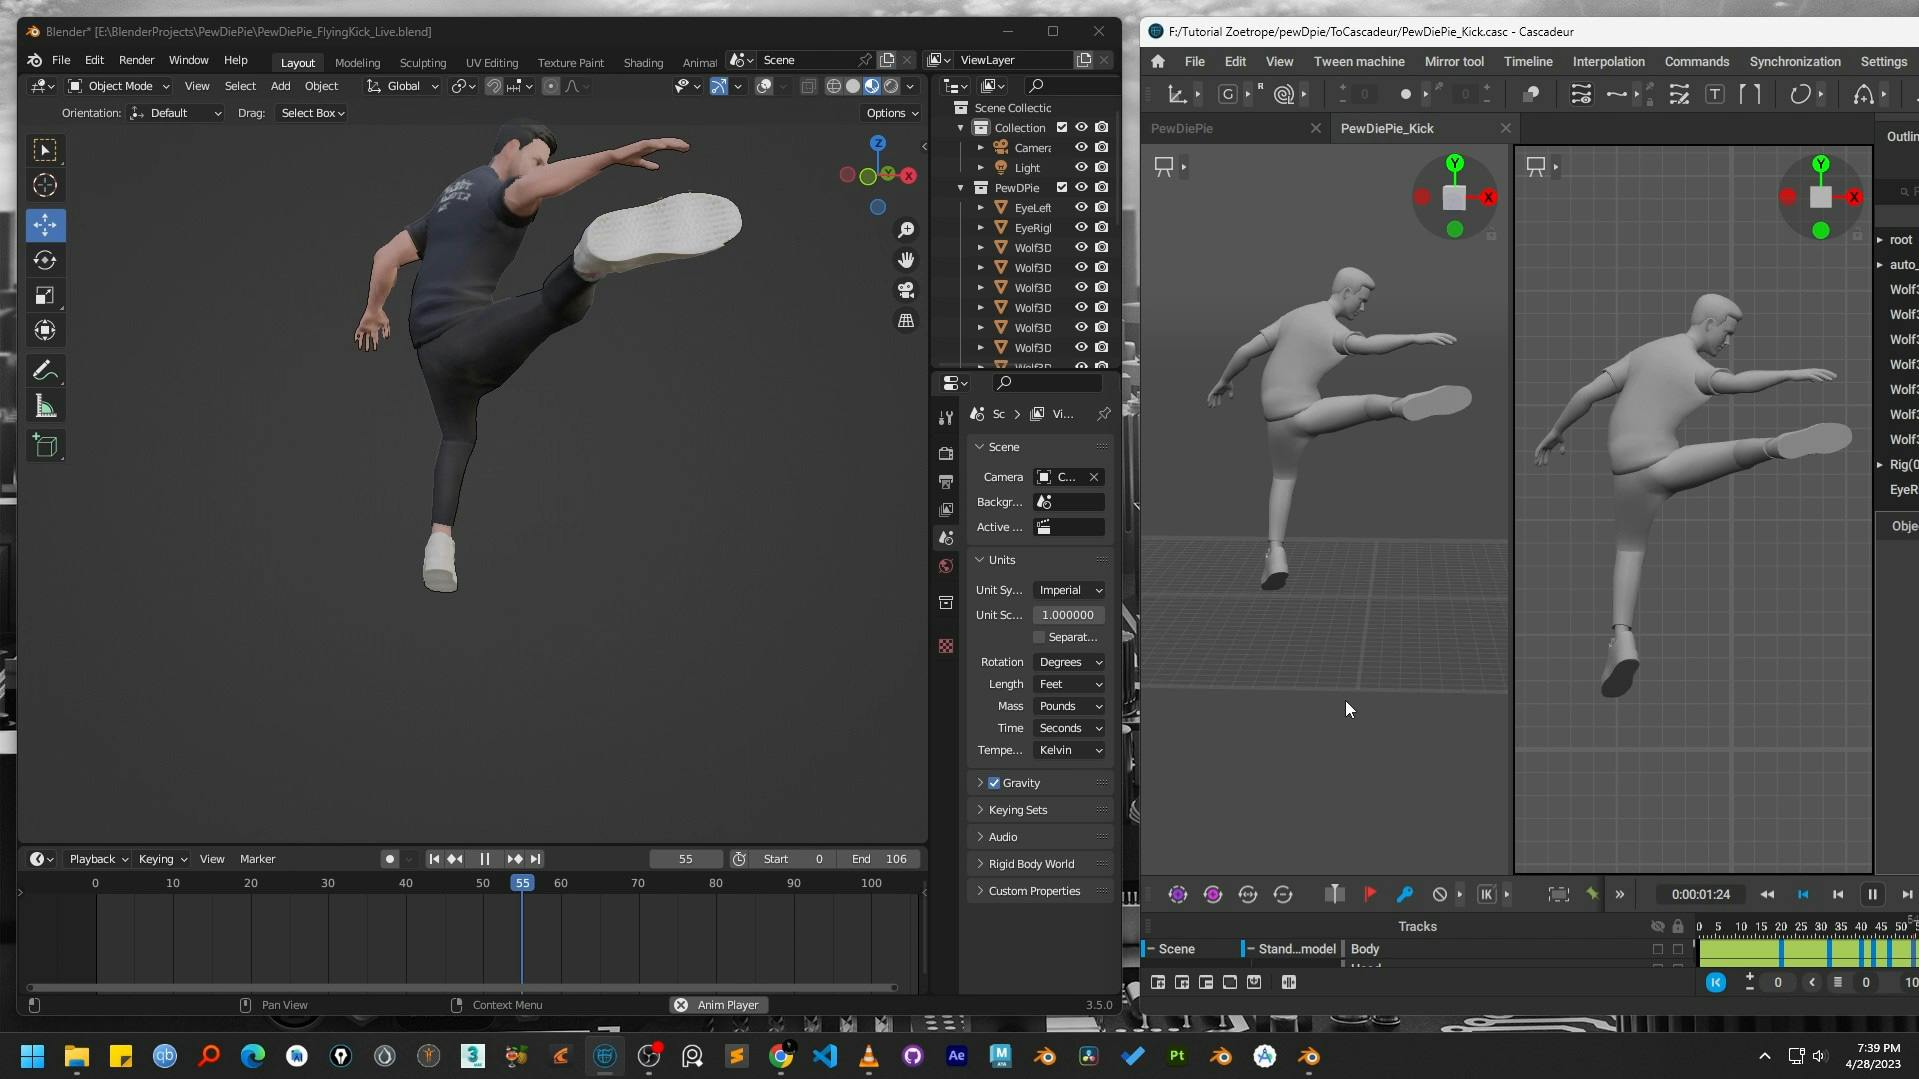
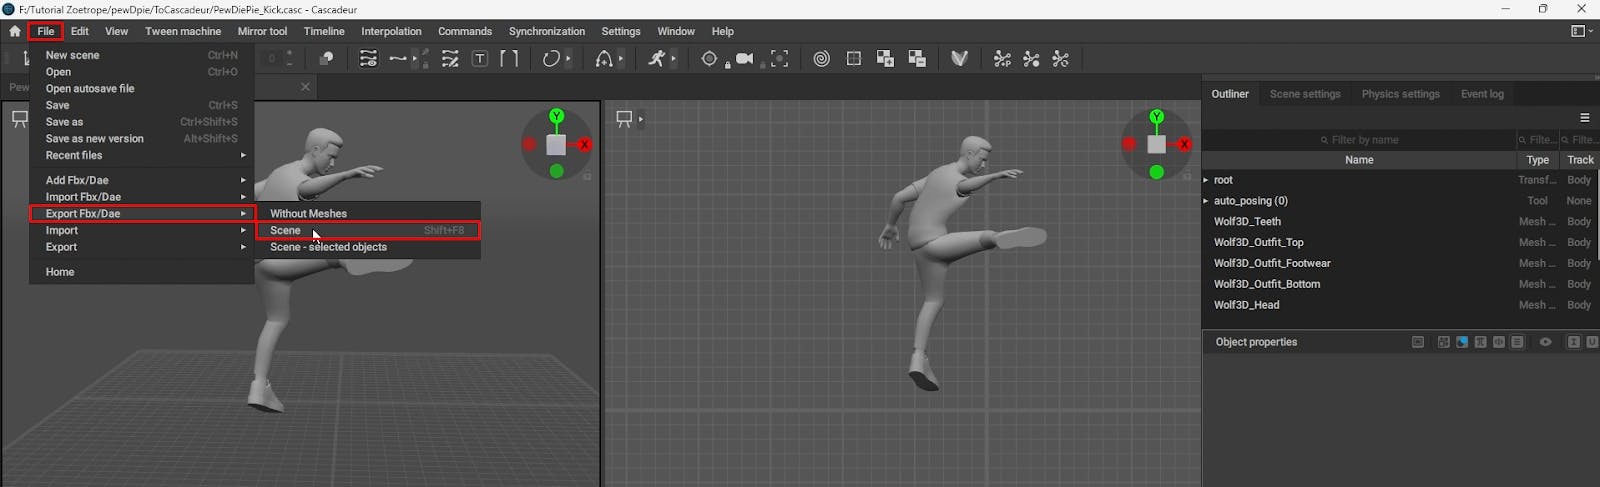
First, we need to get your animation data out of Cascadeur and into your Blender project correctly.
In Cascadeur, navigate to the top menu and select File > Export Fbx/Dae > Scene.
This will package your animation and armature into a compatible FBX file.
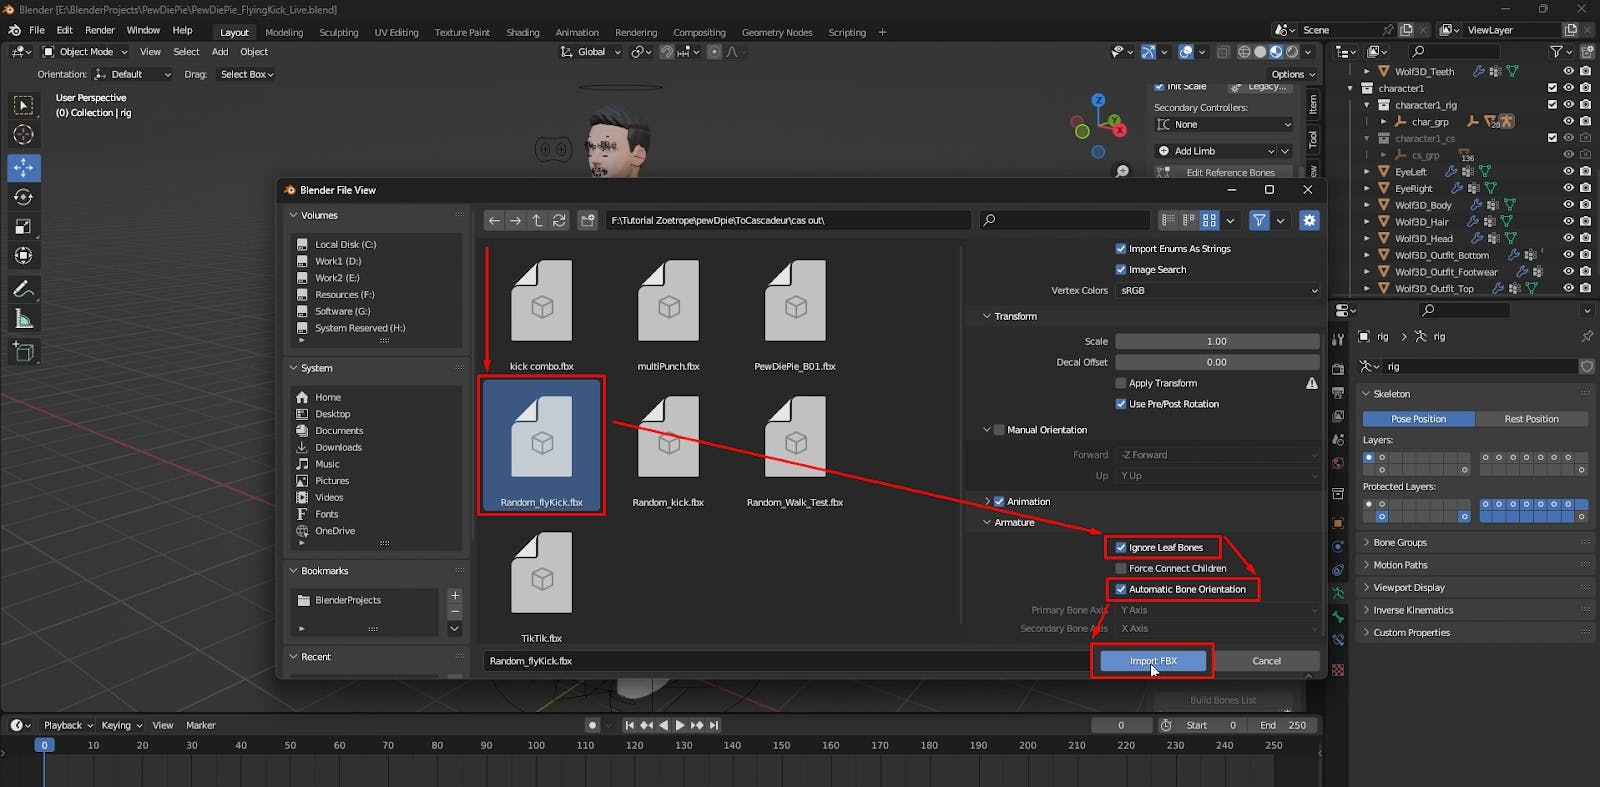
Switch over to Blender. Go to File > Import > FBX (.fbx) and locate your exported file. Before confirming, make sure to check two crucial boxes in the import settings:
These settings help ensure a cleaner import and prevent potential issues with the armature hierarchy.
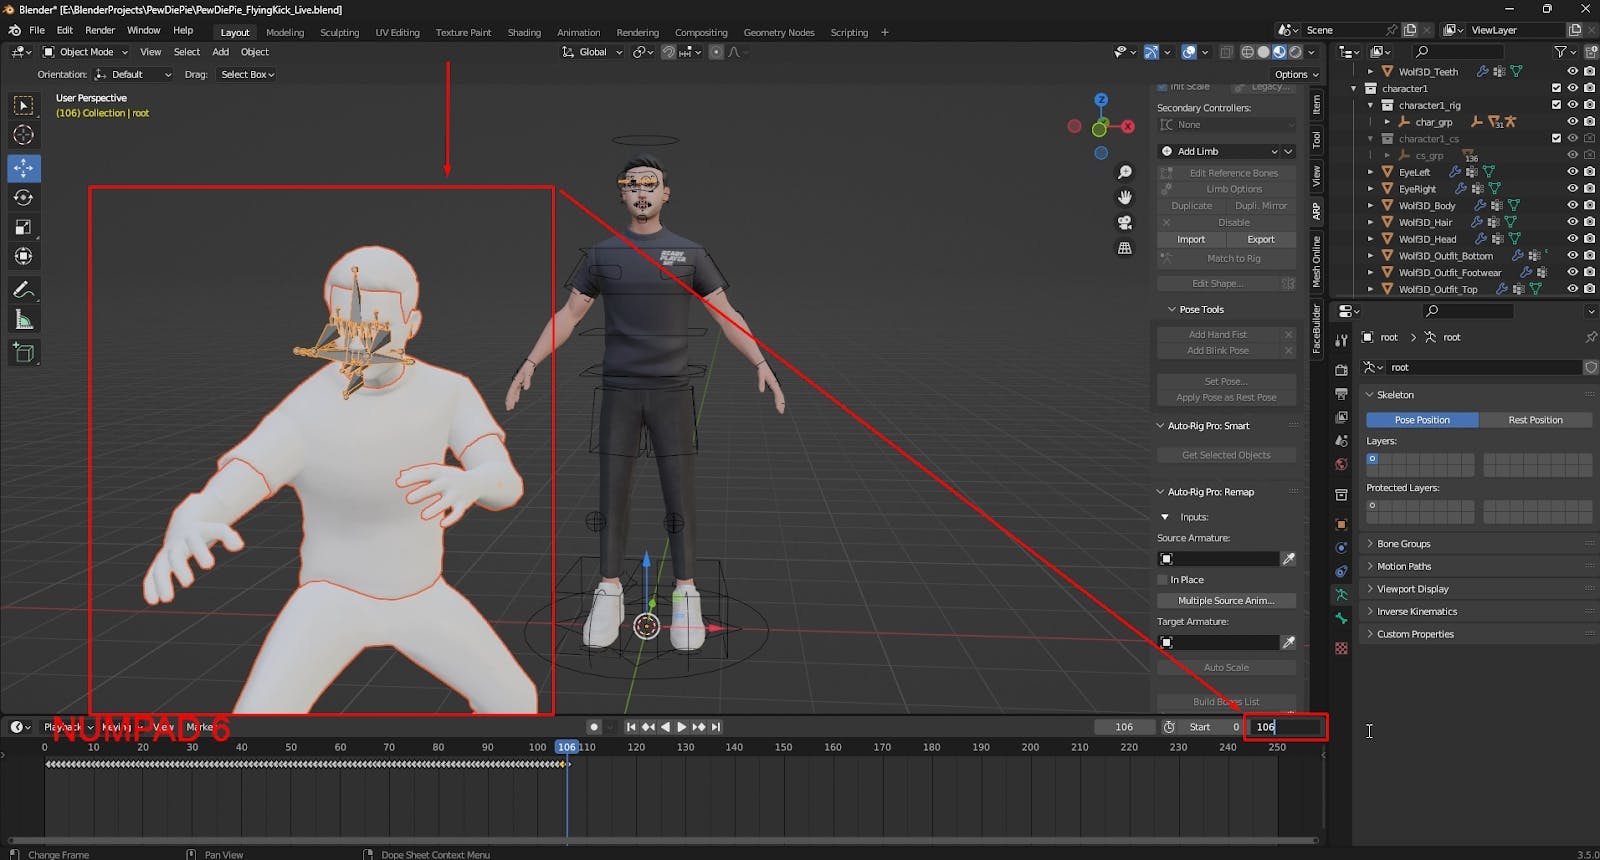
Once imported, Blender may not automatically set the timeline's duration to match your animation's length. Manually adjust the End frame in the timeline to match the last keyframe of your imported animation.
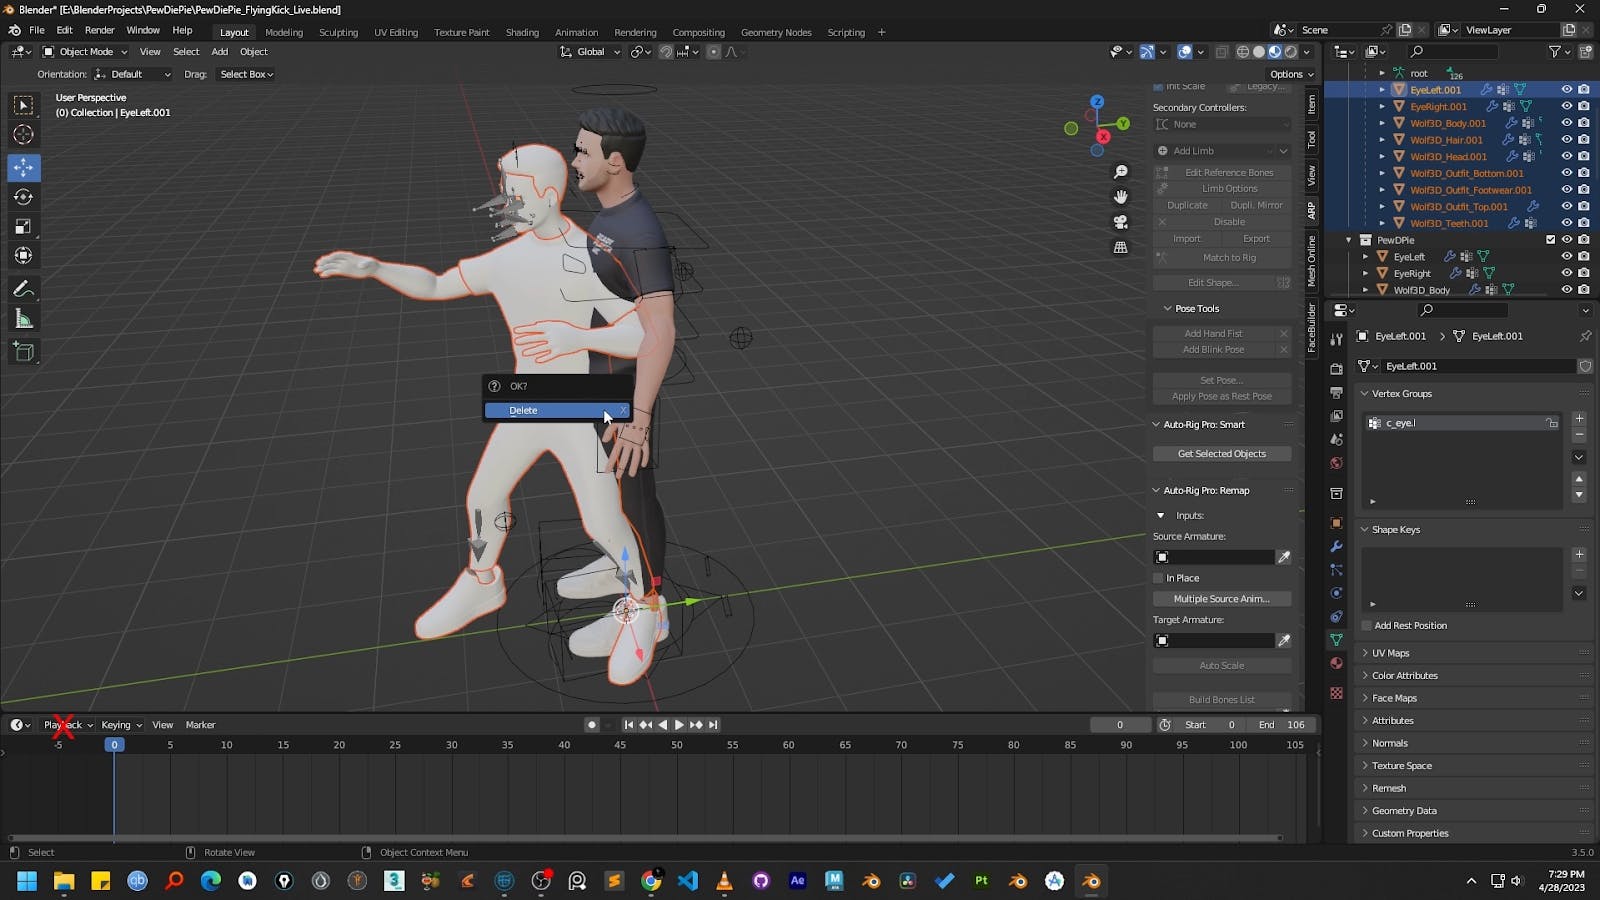
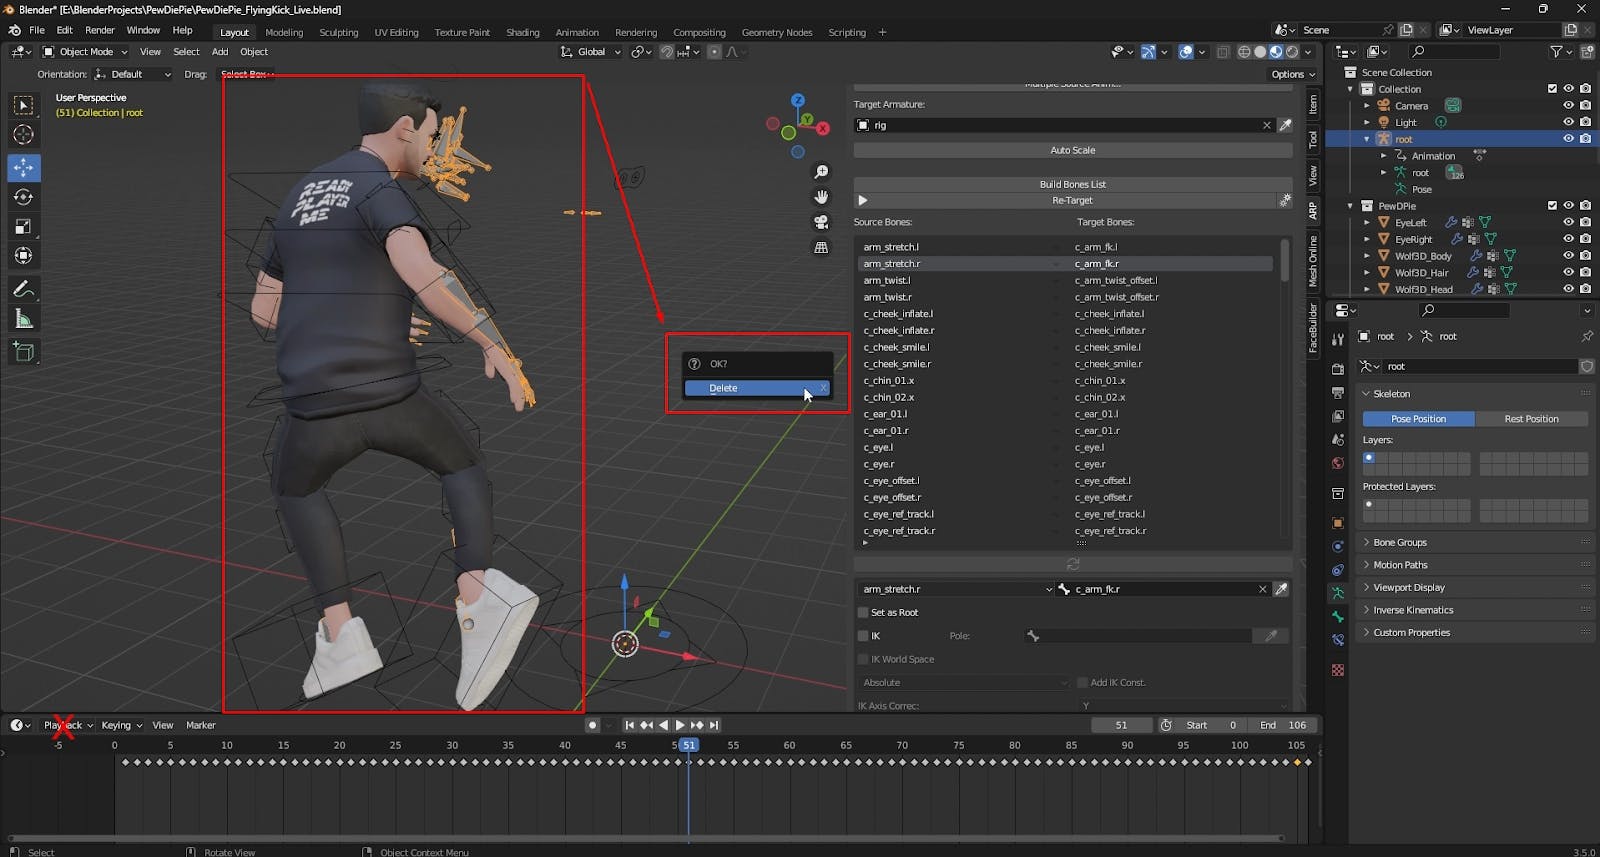
The FBX file includes the character mesh from Cascadeur, which we don't need since we'll be applying the animation to our own Blender character. Select all the imported mesh objects (but not the armature!) and press X to delete them.
With the source animation's skeleton in place, it's time to fire up Auto-Rig Pro and prepare for the retargeting magic. ✨
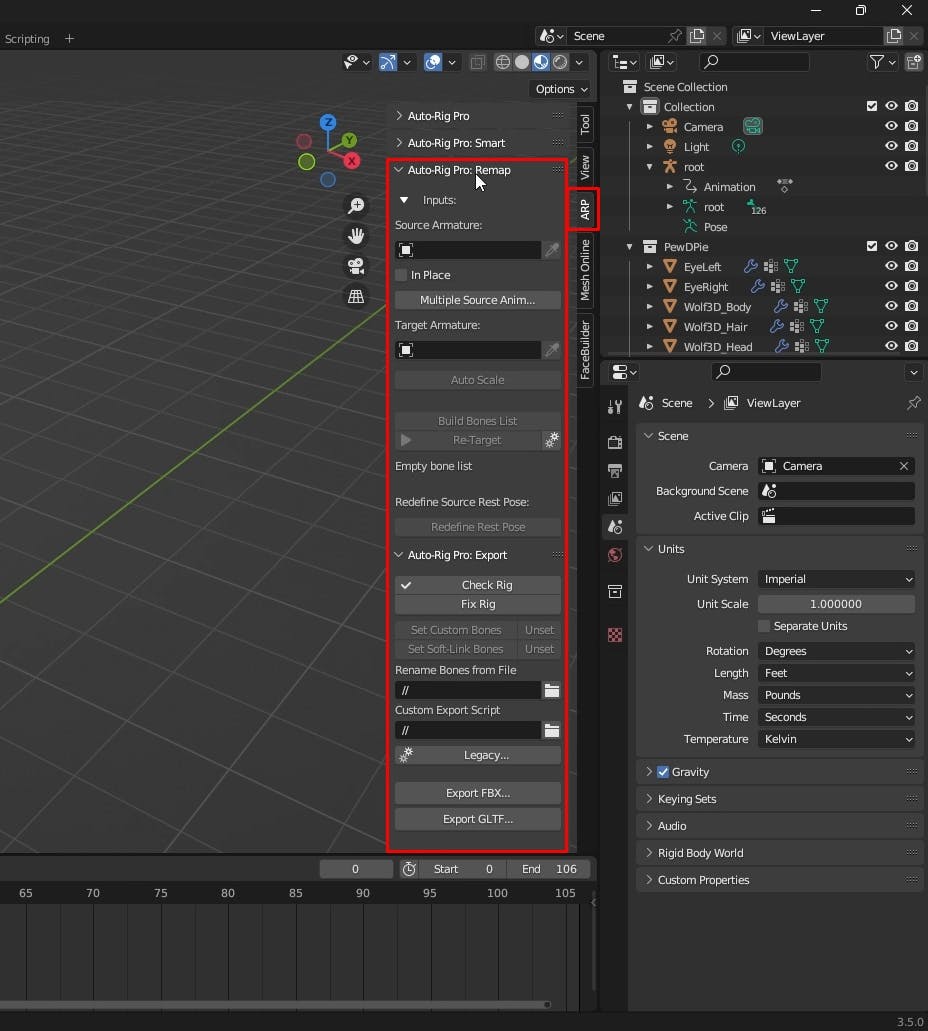
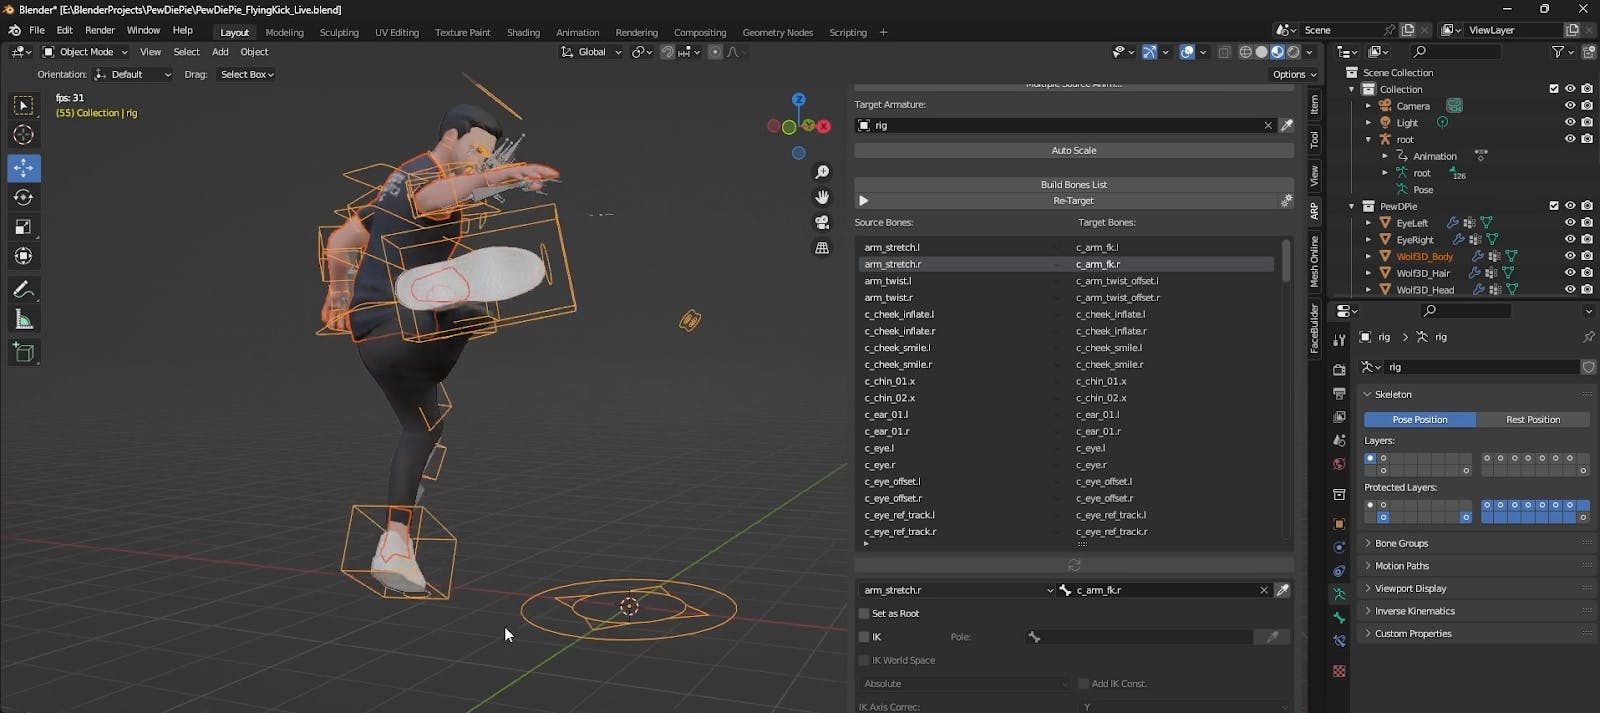
Select your target character's armature, go to the ARP tab in the N-Panel, and click on Remap to open the retargeting toolkit.
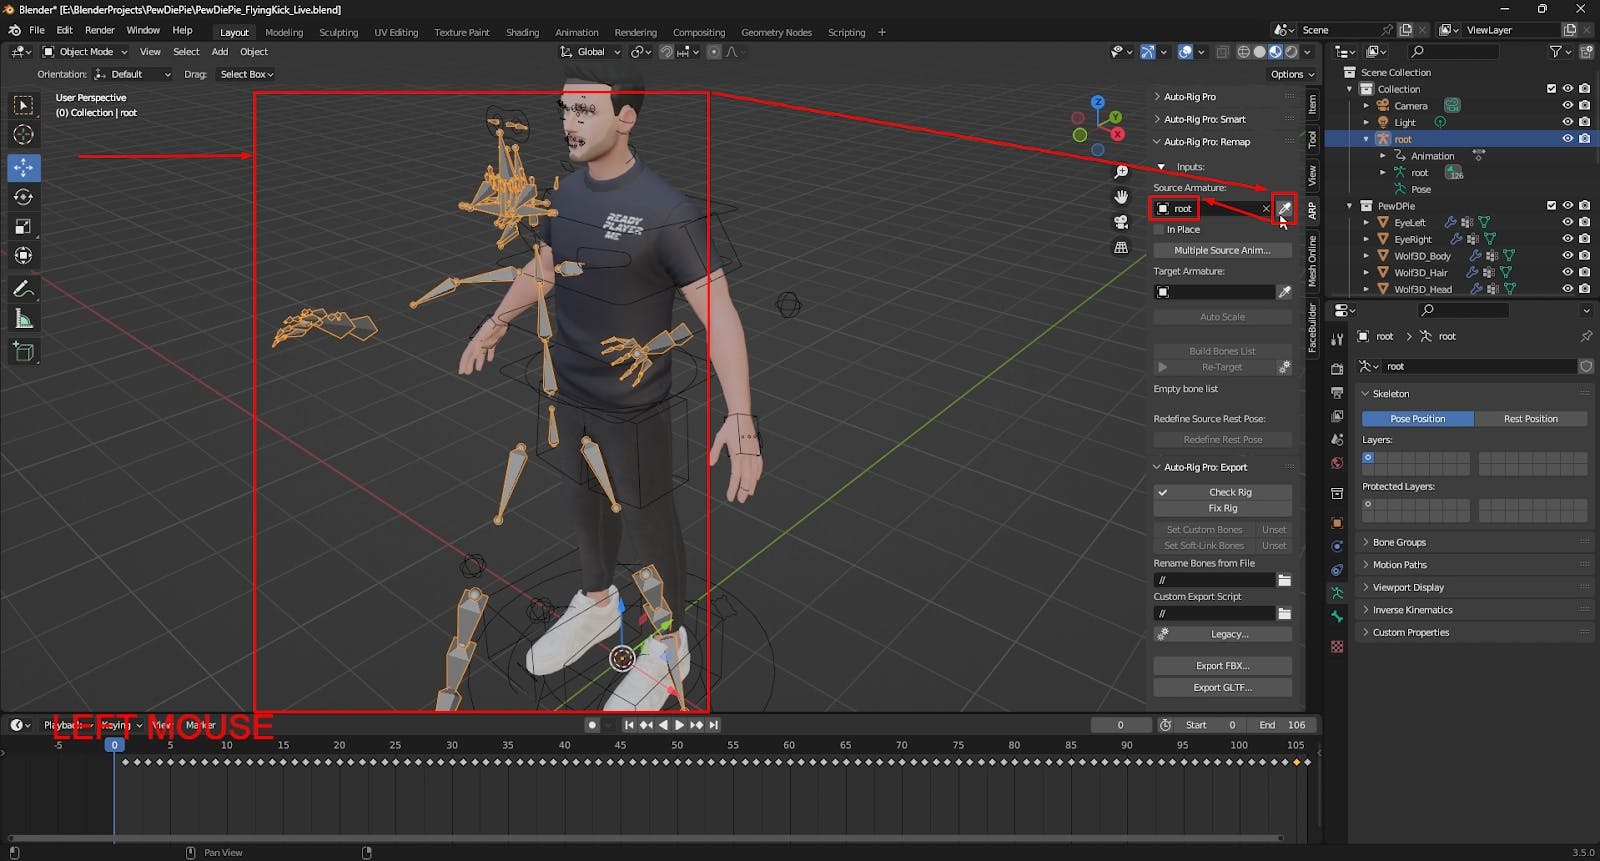
In the Remap window, find the Source Armature field. Use the eyedropper tool and click on the skeleton you just imported from Cascadeur. This tells Auto-Rig Pro where the animation data is coming from.
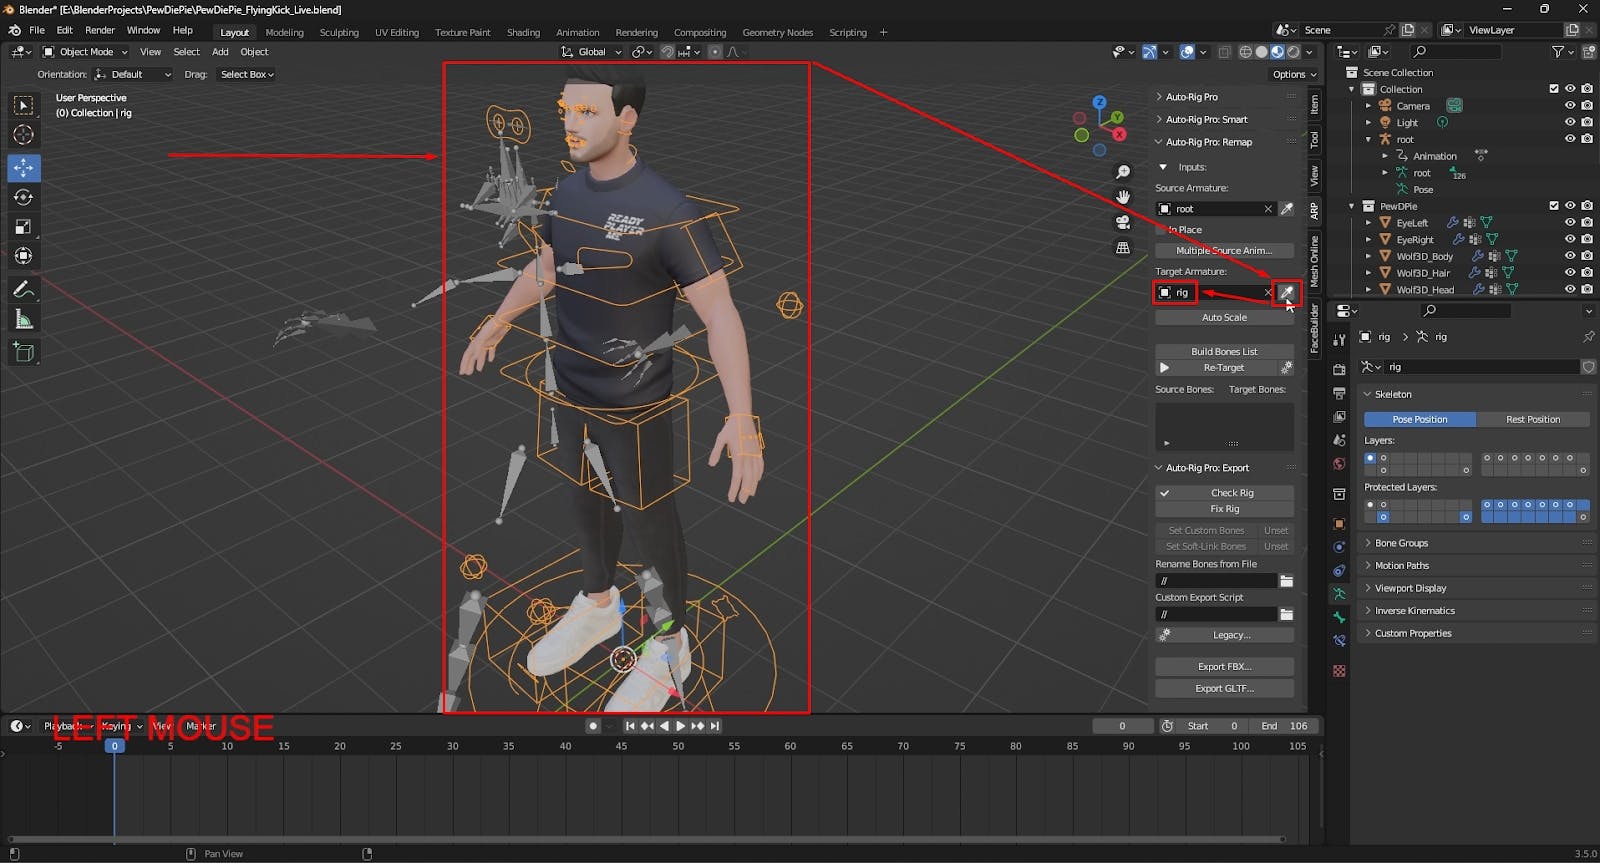
Next, do the same for the Target Armature. Use the eyedropper tool to select your main character rig in Blender—the one you want to apply the animation to.
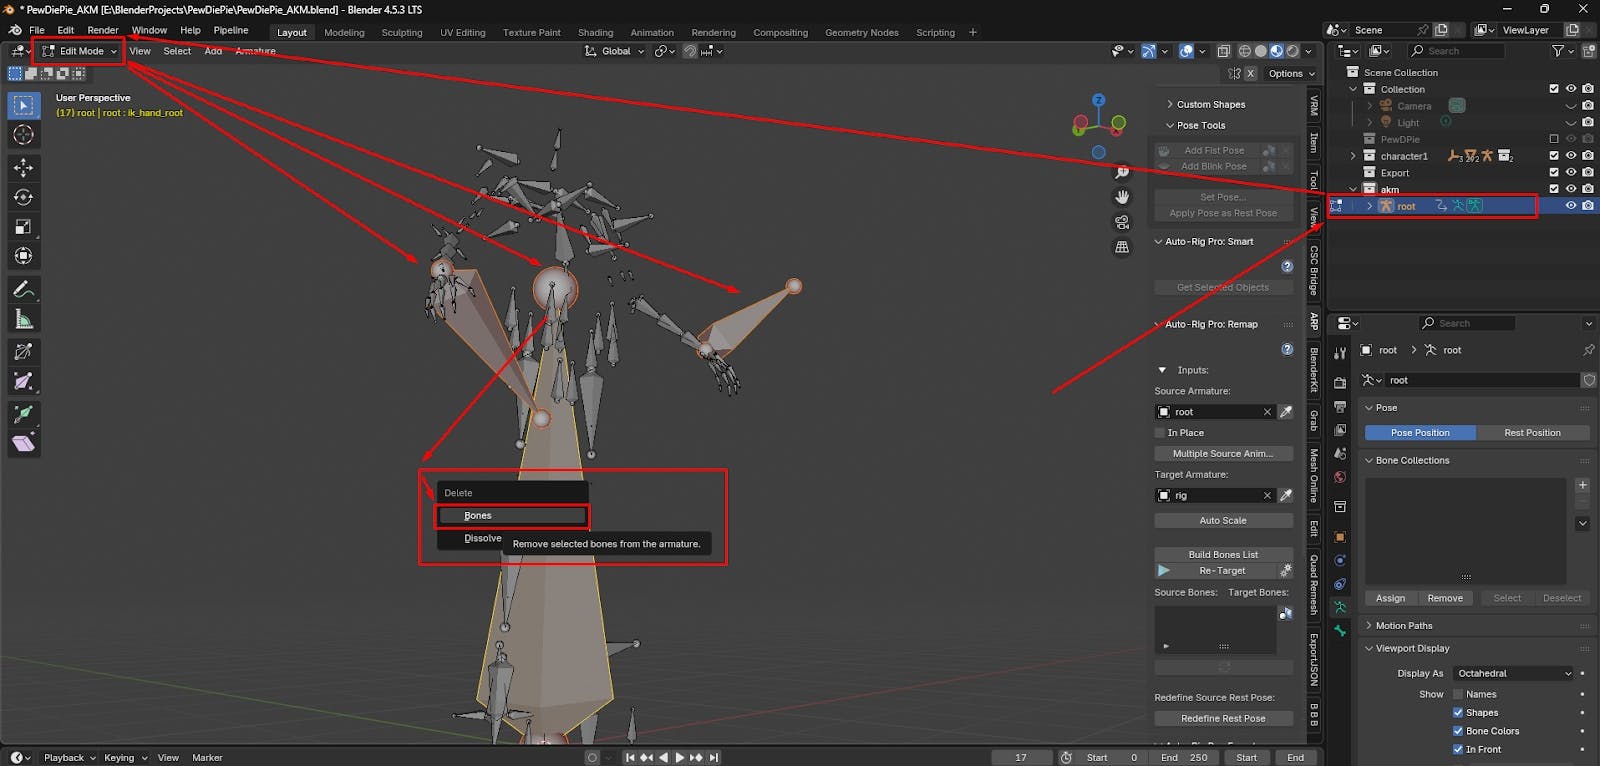
If your rig has extra bones (eg: bone for weapon, bone for accessories etc) that you don't want to be affected by the retargeting process, you can remove them from the list.
This step is optional but can be useful for complex rigs.
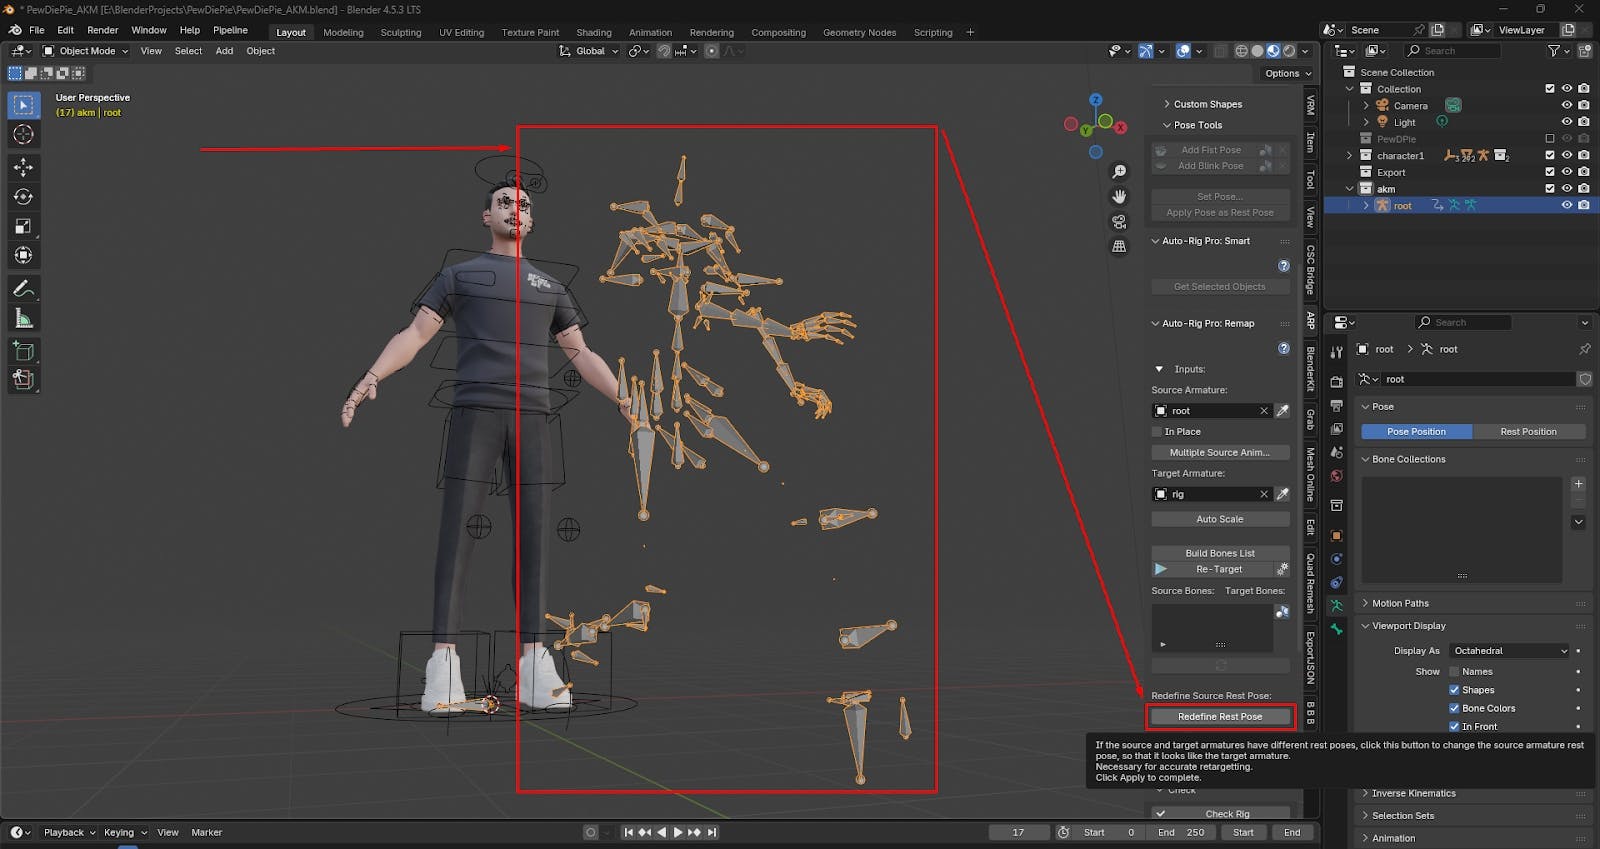
This is the most critical phase. Careful alignment here ensures a perfect transfer of motion.
Poses must match for accurate retargeting. If your source and target armatures don't share the exact same T-pose or A-pose, you need to align them.
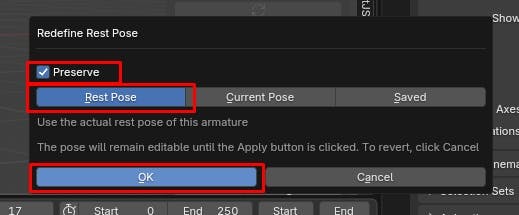
A dialog box will appear. Check the Preserve box, select Rest Pose, and press OK.
Blender will automatically switch to Pose Mode for the source armature. Inspect the alignment. As you can see in the example, the source armature's hands are not matching the target's.
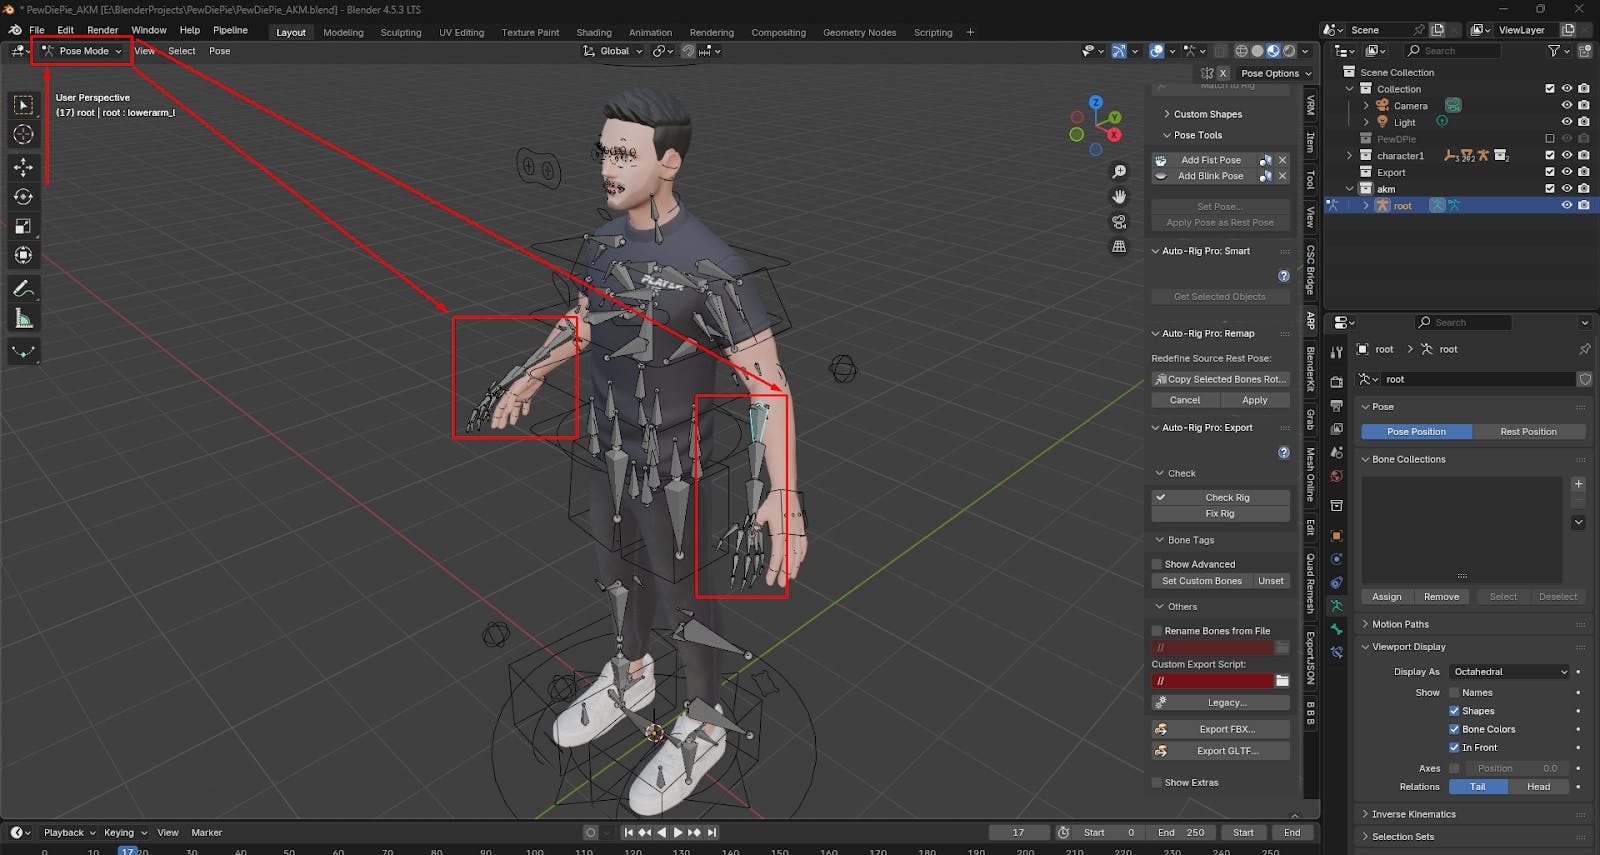
Manually rotate the bones of the source armature until they match the target armature's pose as closely as possible. Once you're satisfied, click the Apply button to lock in this new reference pose.

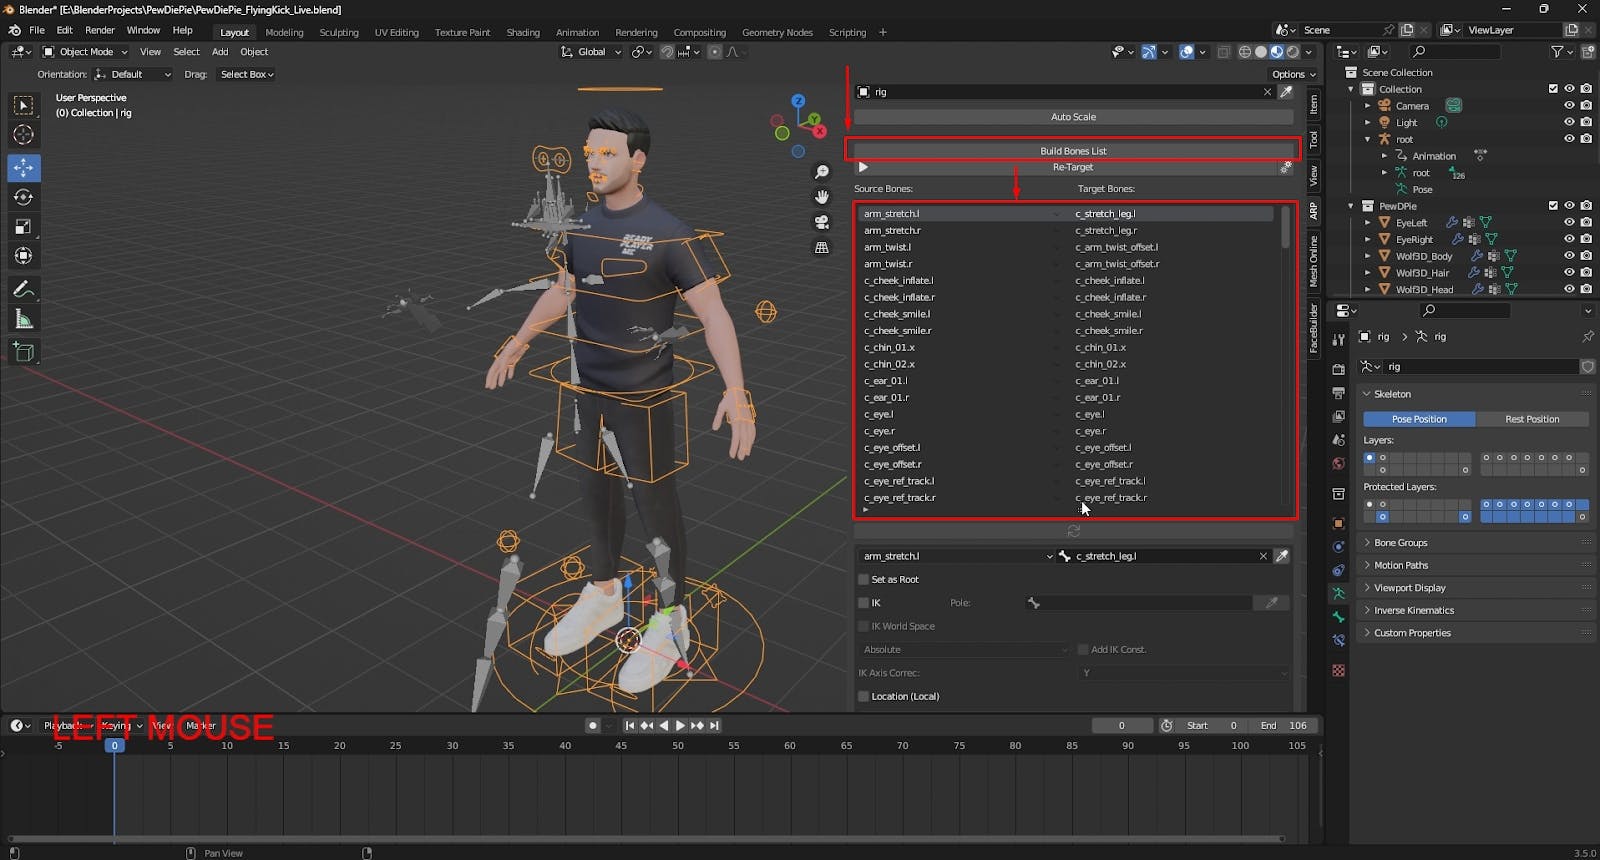
Now, click Build Bones List. Auto-Rig Pro will attempt to automatically map the bones from the source skeleton to your target rig based on their names.
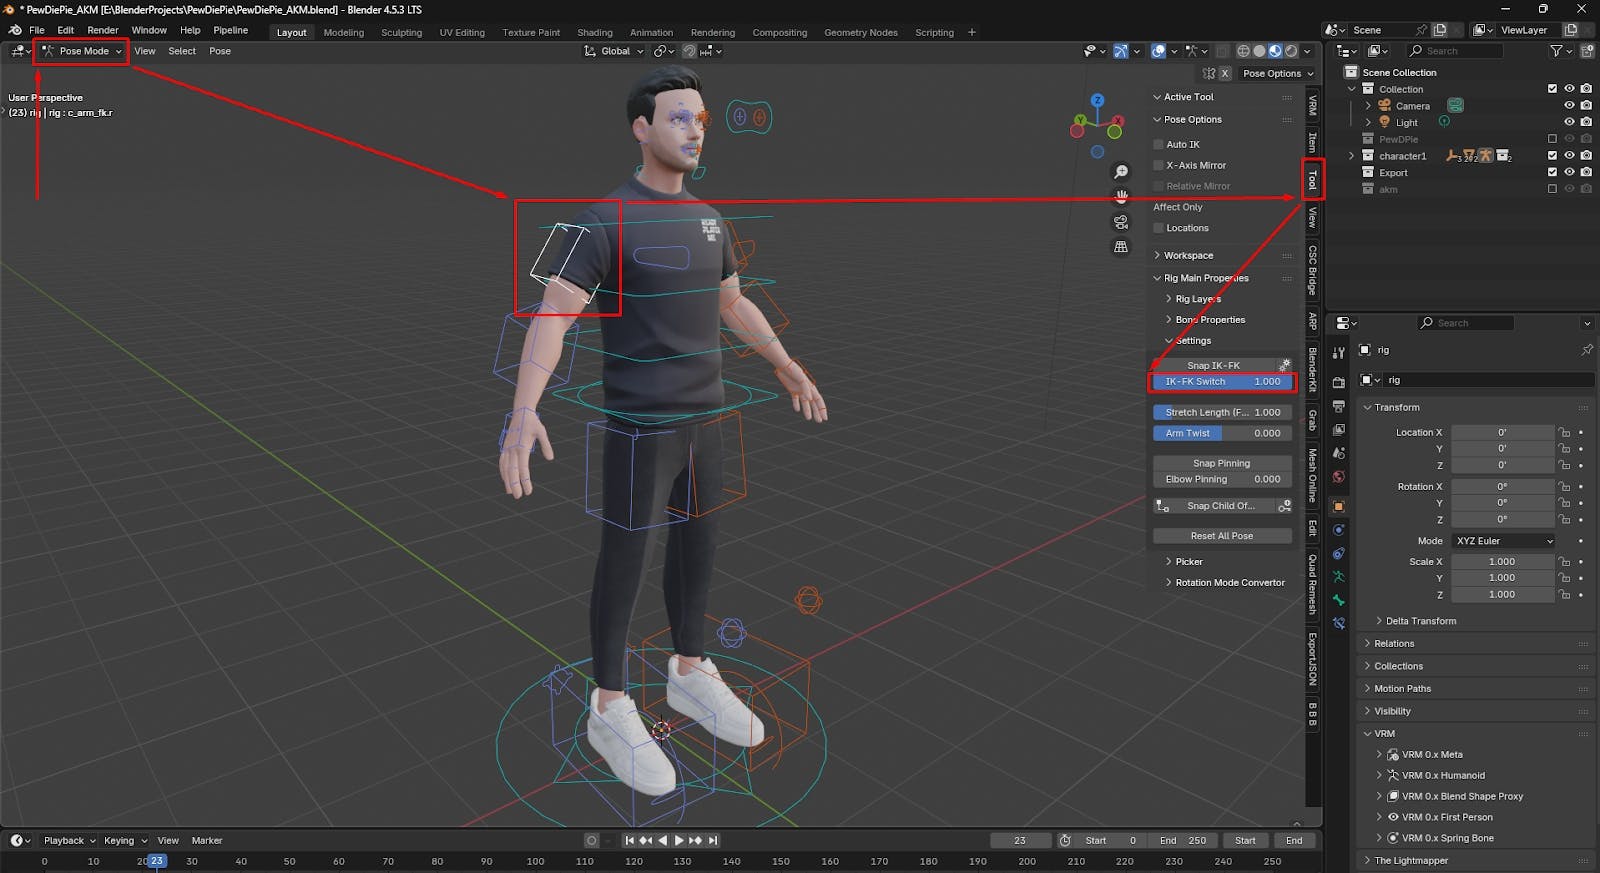
For the retargeting to work correctly on the limbs, you need to ensure the arms are in FK (Forward Kinematics) mode.
c_hand_ik.l).1.0 (which corresponds to FK).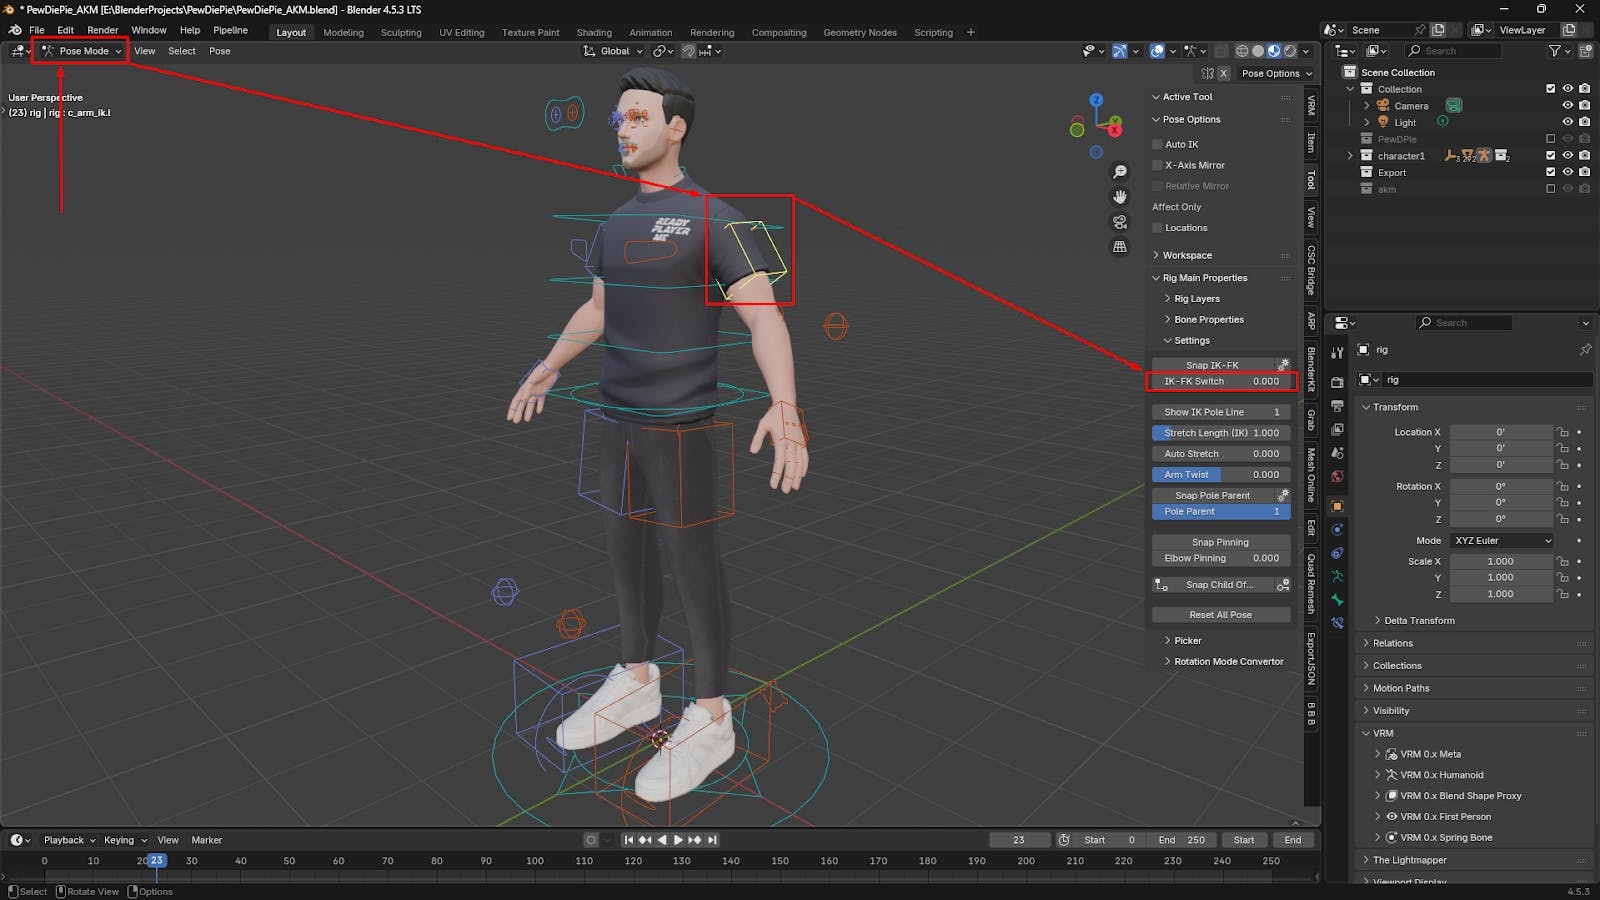
Don't forget to repeat this exact same step for the other hand!
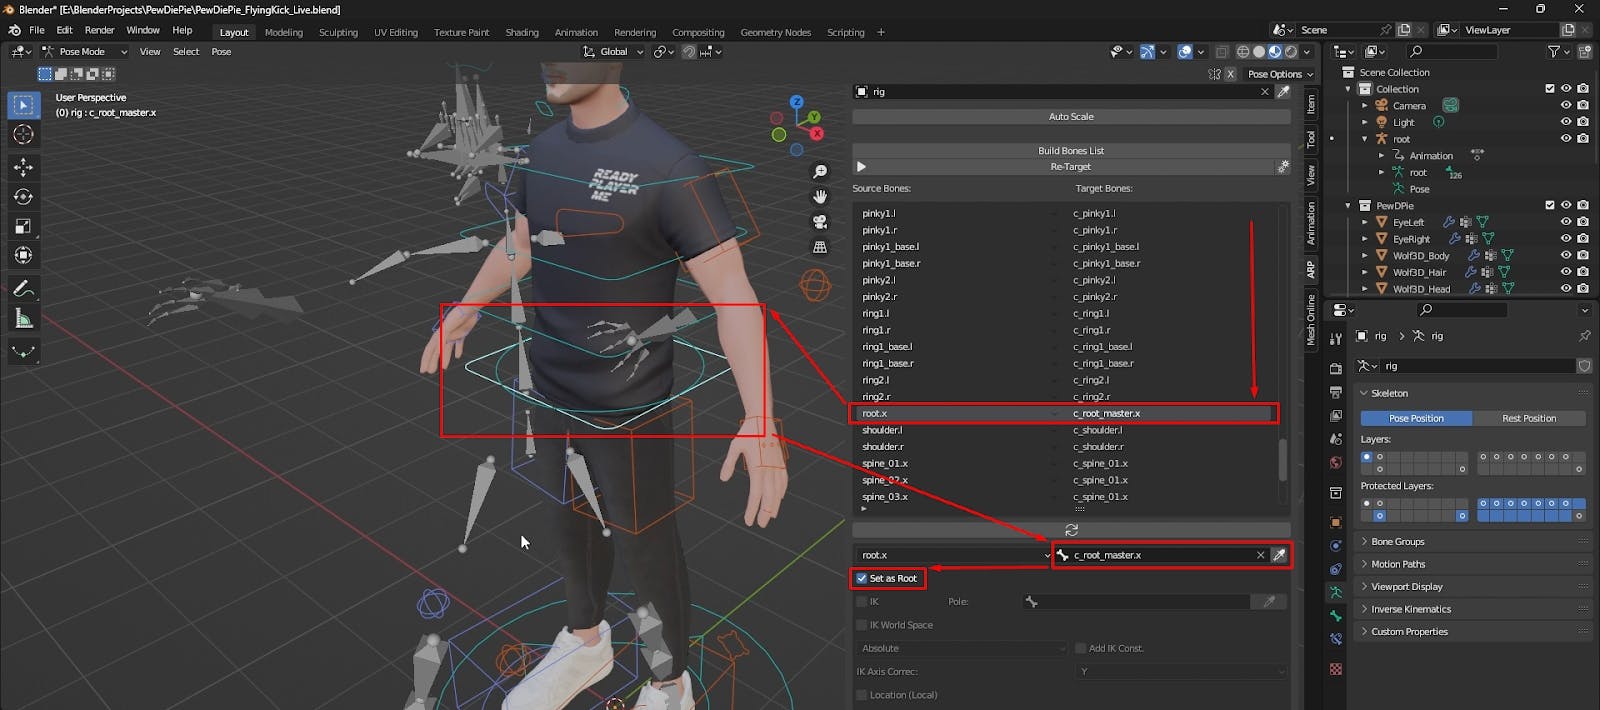
This step is crucial! Carefully review the list of mapped bones. You need to ensure every source bone is correctly paired with its corresponding target bone. Mismatches here are the number one cause of broken animations.
Find your character's main root or hip bone in the list (often named root or pelvis). Ensure it's correctly mapped, and then check the Set as Root box. This anchors the entire animation.
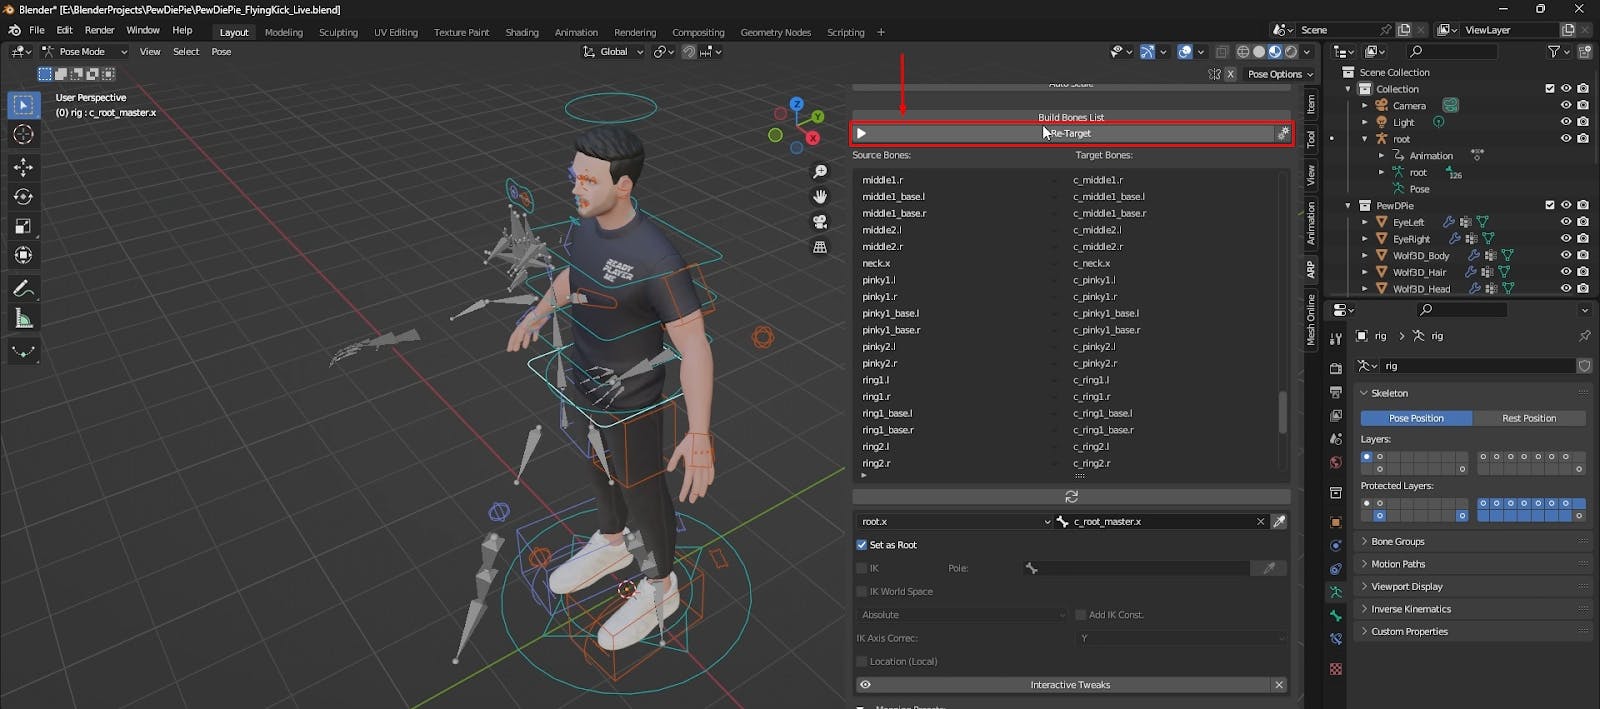
It's the moment of truth! Click the Retarget button. Auto-Rig Pro will now process the data and apply the animation.
Sometimes things don't go perfectly on the first try. Here's what to do.
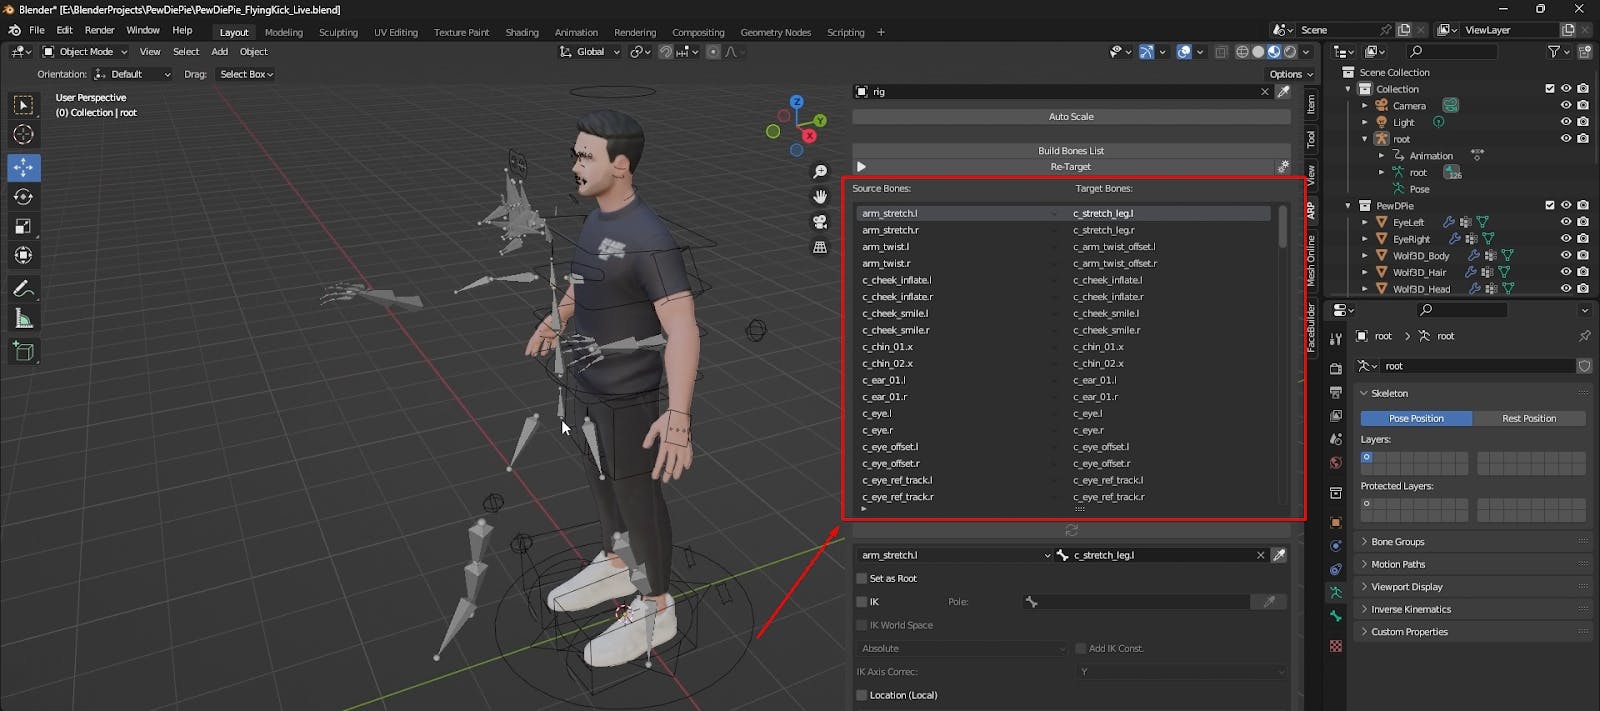
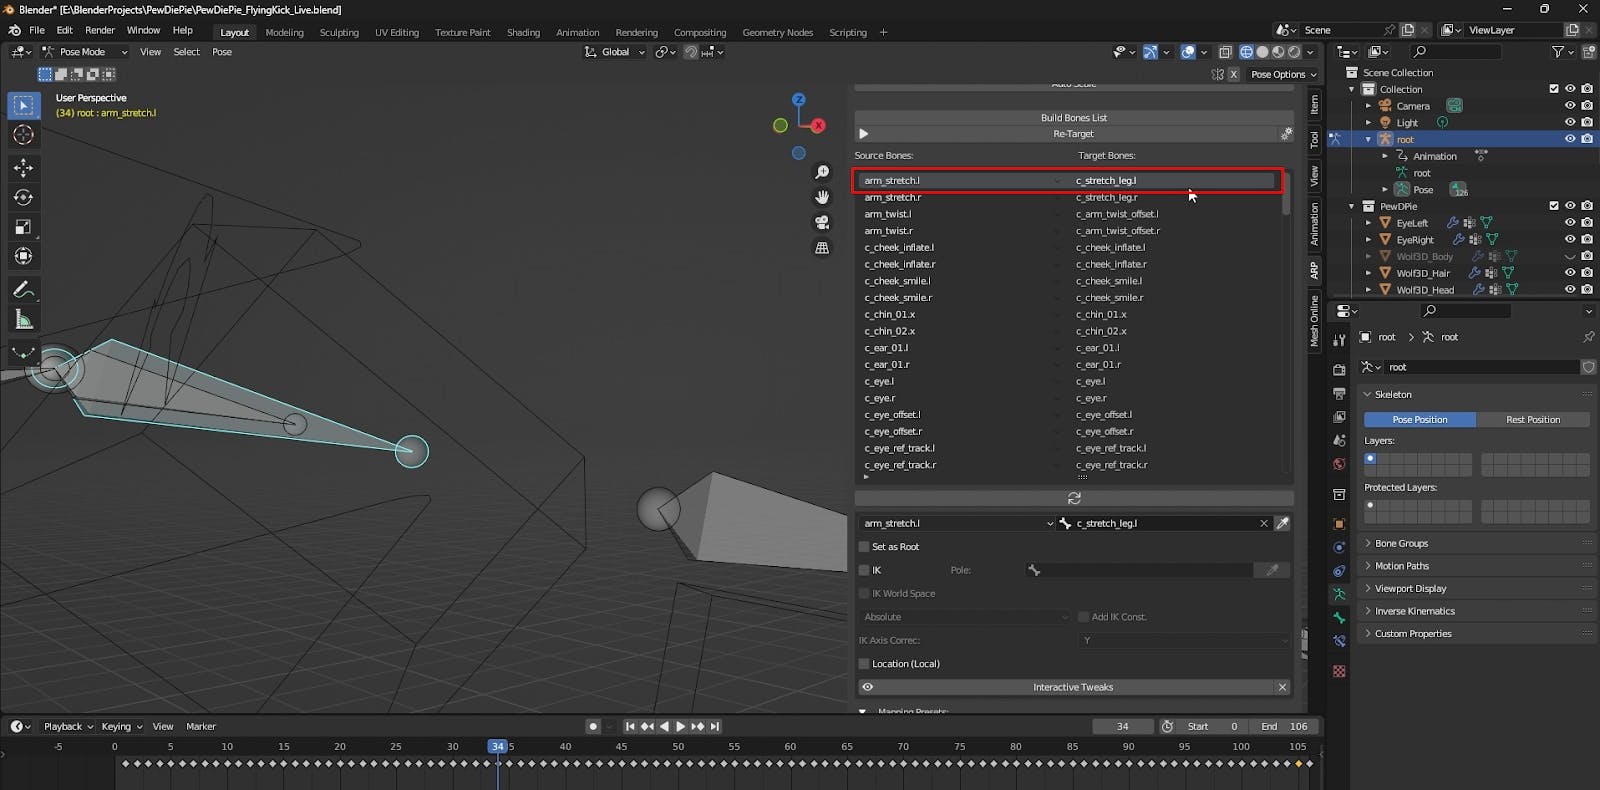
If your character looks distorted after retargeting (like in the image below), it means there was a mistake in the bone mapping.
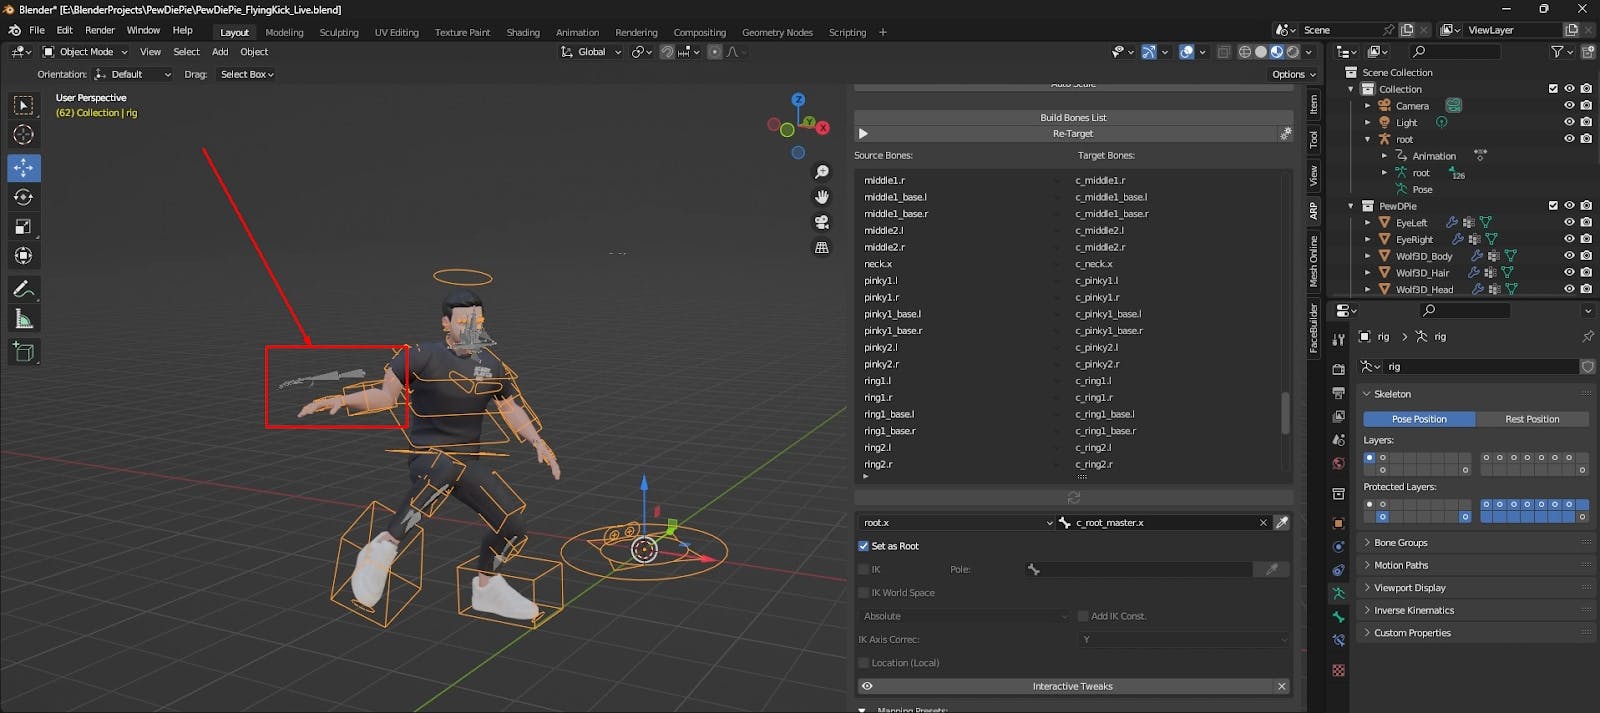
You have two options:
Once you've corrected the bone list, press Re-Target again. This time, the animation should transfer perfectly. Look at that smooth motion! 🎉
Your animation is now successfully baked onto your Blender rig. You no longer need the source armature from Cascadeur, so feel free to select it and delete it to keep your scene tidy.
And there you have it! Your complex, physics-based animation from Cascadeur is now fully functional on your native Blender character rig. Congratulations! 🥳

Learn to manipulate background layers through a custom glass shape in Fusion. Perfect for title sequences and abstract motion design. Free tutorial inside
Learn a quick trick to add a clean, procedural outline to any image with an alpha channel in DaVinci Resolve Fusion using the Delta Keyer
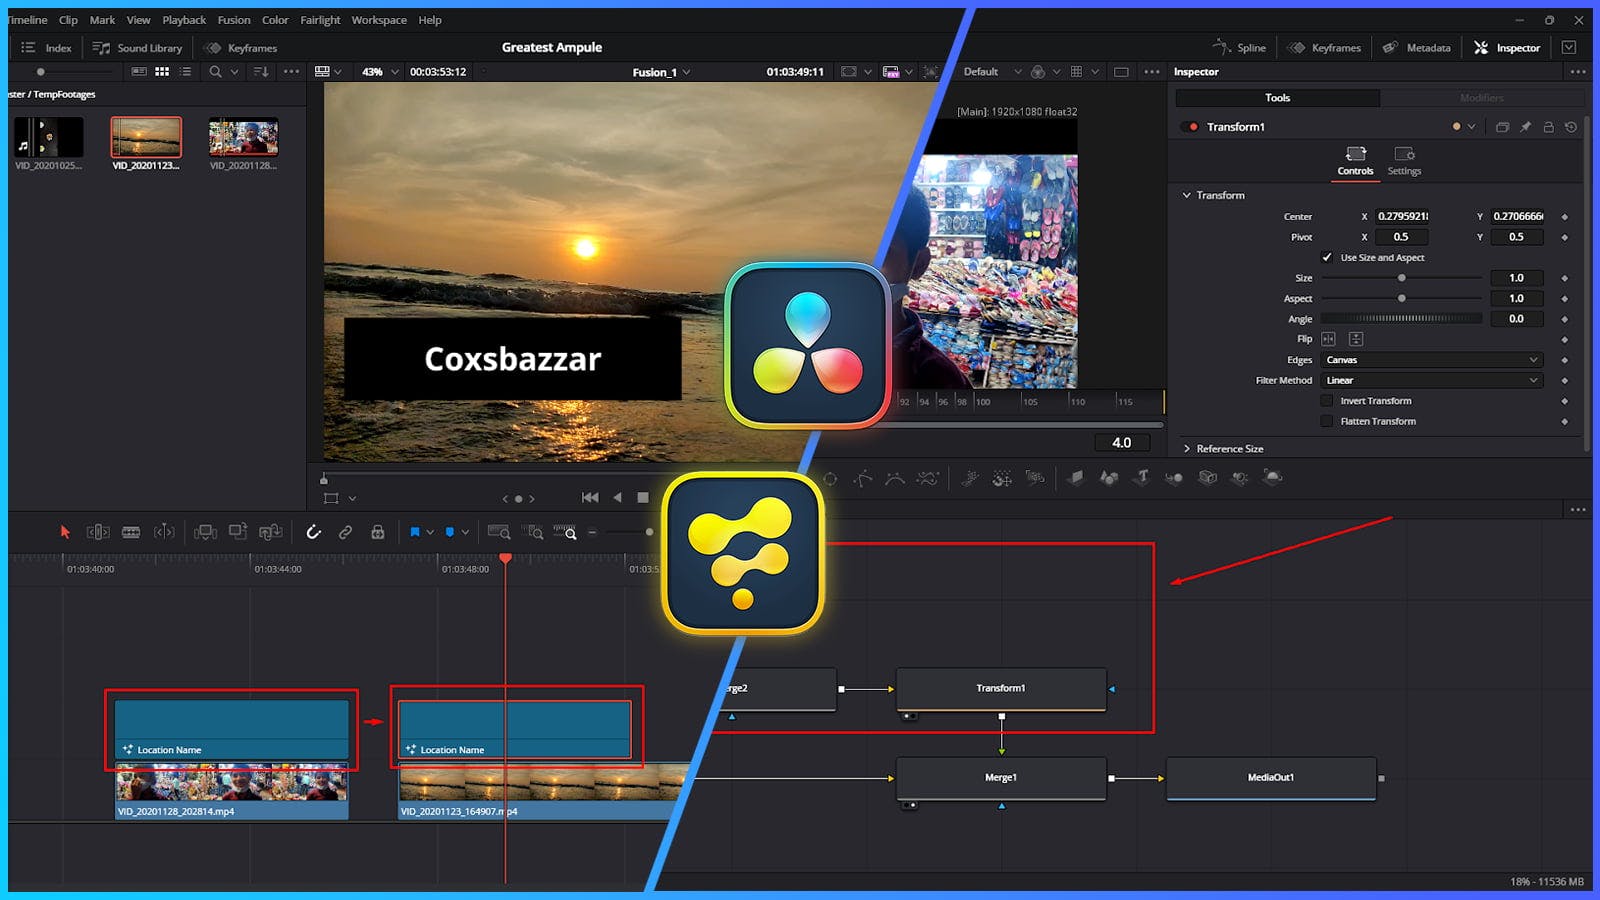
Elevate your video editing. Discover a simple trick in DaVinci Resolve to create powerful Fusion compositions that work on any clip in your timeline.
