From GLB, GLTF to svelte file: Integrating 3D Models into Your Sveltekit App via Threlte
Integrating GLB/ GLTF 3d model in sveltekit is step by step process. Let's first create basic structure to display 3d model using threlte which is a three js library for sveltekit.
If you are new in threlte then follow this tutorial to create a basic scene in threlte Create Basic Scene in threlte
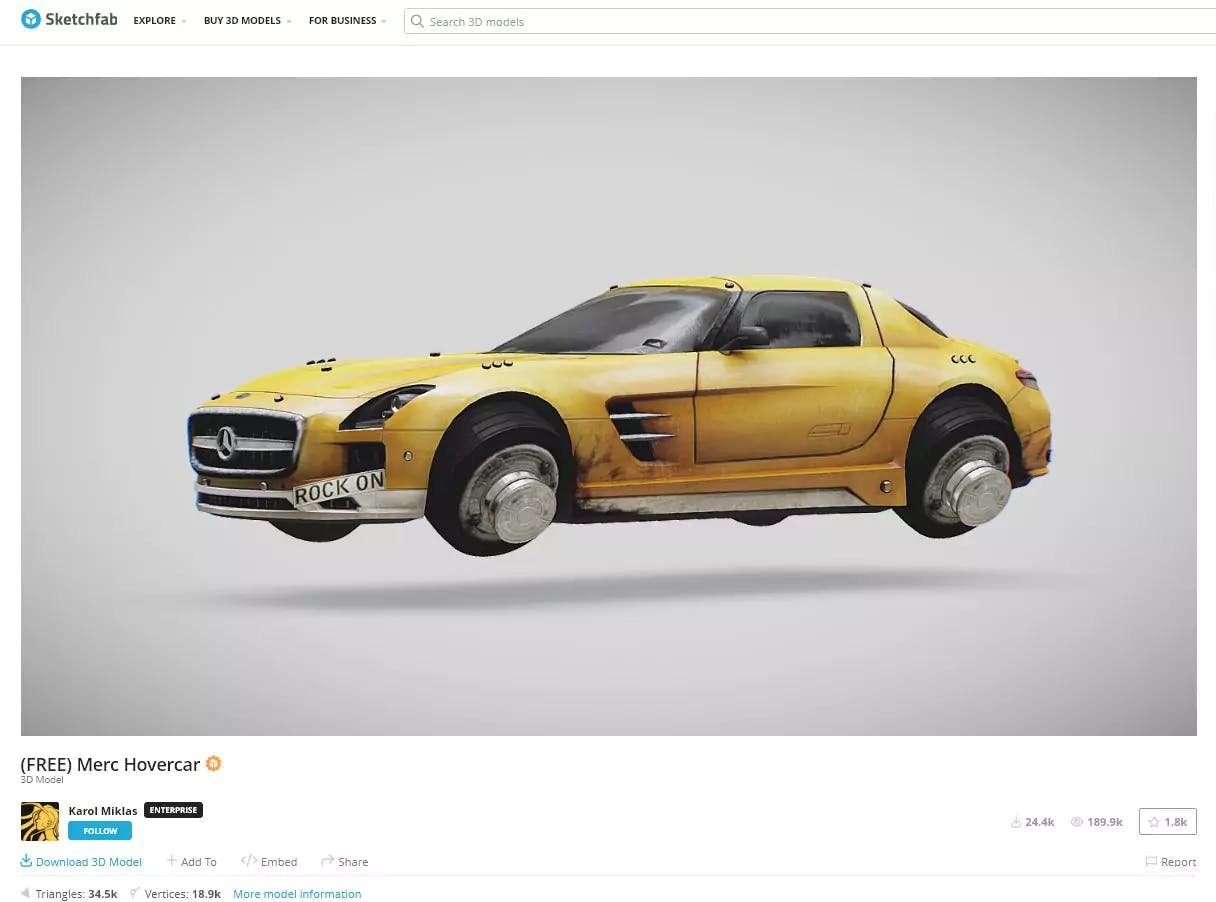
Download Merc Hovercar
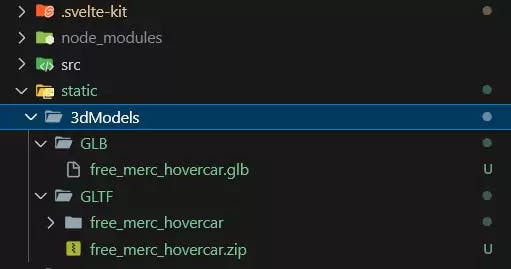
In this blog post, I will show you the process of working with both gltf and glb formats. I have downloaded both versions and stored them inside the static folder.
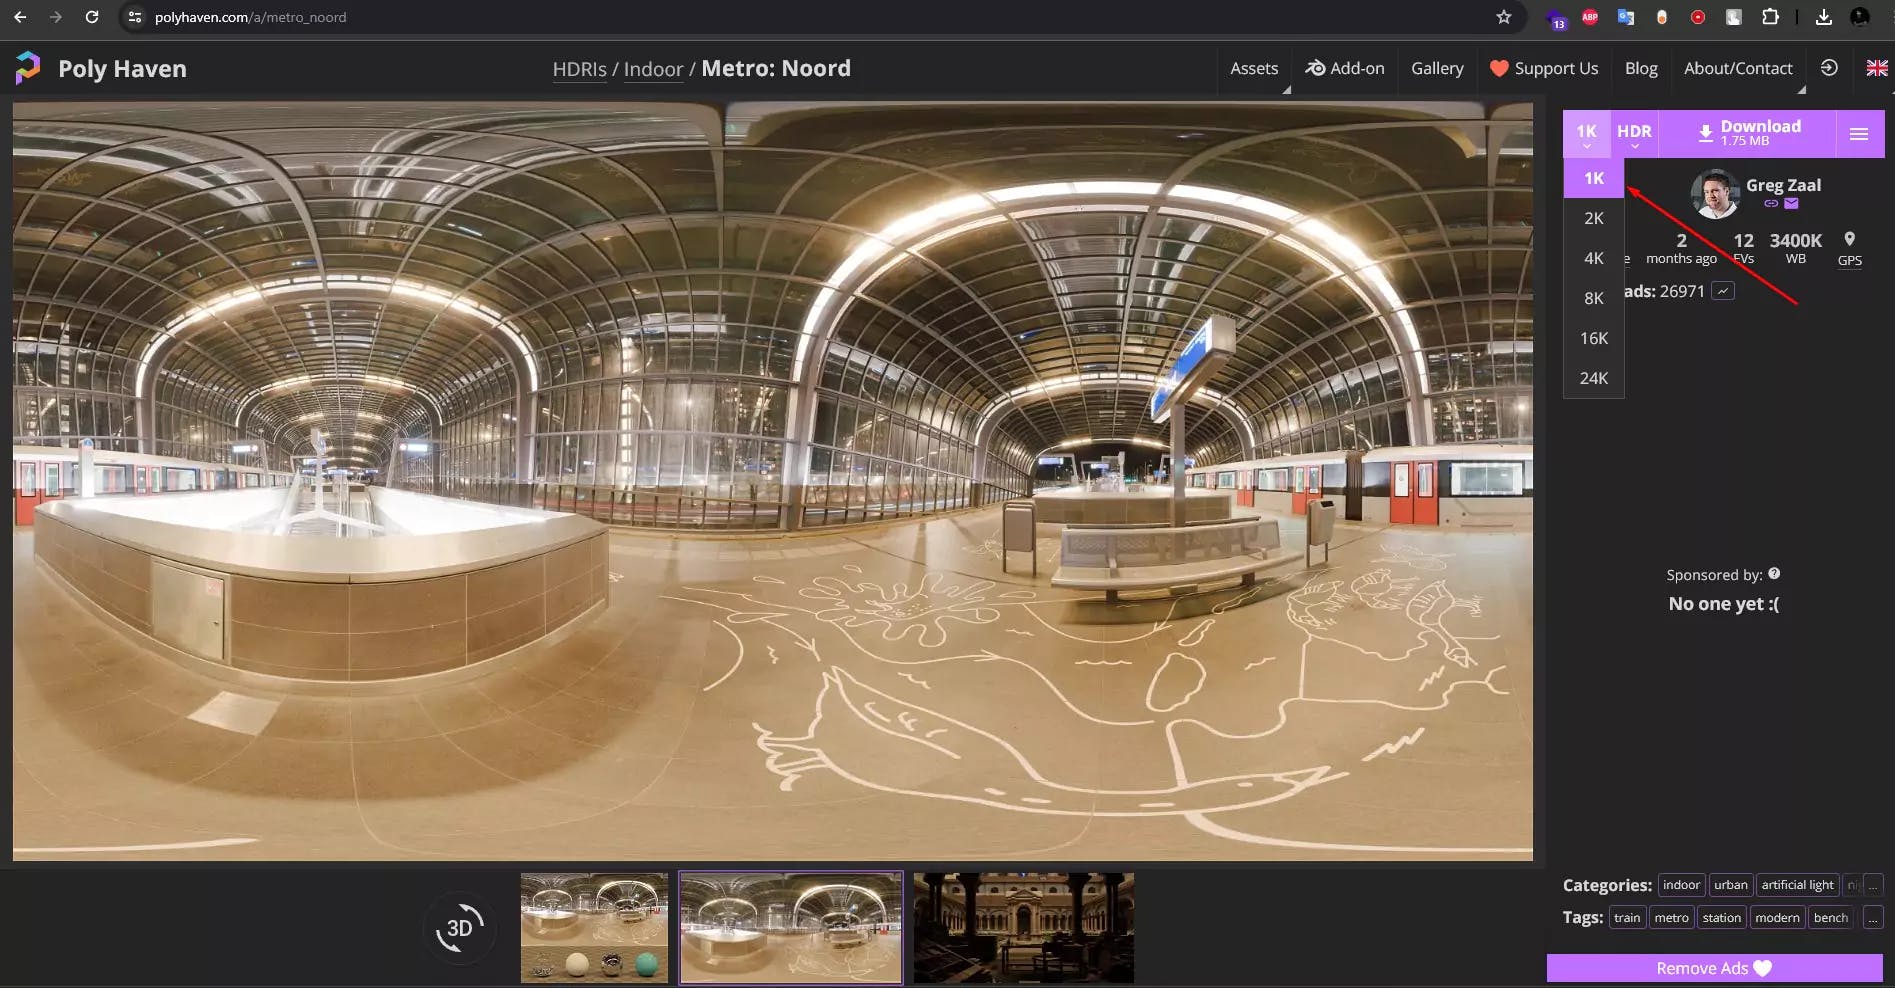
I have also downloaded a HDR file from polyhaven & stored inside static folder.
Use the terminal to navigate to the GLB model folder. In my case, it is located at \static\3dModels\GLB
Run
npx @threlte/gltf@next .\free_merc_hovercar.glb
This will create a svelte threlte component named Free_merc_hovercar.svelte inside the model folder
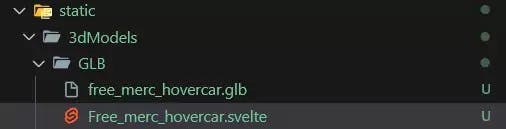
Keeping the Svelte threlte component inside staic folder is considered bad practice, Let's move the Free_merc_hovercar.svelte filte to the src\lib\3dmodels folder
Open the Free_merc_hovercar.svelte file, and you can notie a reference to our glb model in the
const gltf = useGltf('/free_merc_hovercar.glb')
Since we have changed the location of our svelte threlte component, we need to update this as well. If you followed my file structure, the corrected code should be
const gltf = useGltf('3dModels/GLB/free_merc_hovercar.glb')
If you followed my previous instructions and followed my article Create Basic Scene in threlte then you should have
<script>
   import { Canvas } from '@threlte/core';
   import SceneOne from '../lib/SceneOne.svelte';
</script>

<section class="p-5">
   <div class="canvas-wrapper ring h-[700px]">
      <Canvas>
         <SceneOne />
      </Canvas>
   </div>
</section>
The scene file
<script>
   import { T } from '@threlte/core';
   import * as THREE from 'three';
   import { OrbitControls, Environment, Sky } from '@threlte/extras';
</script>

<T.PerspectiveCamera makeDefault position={[10, 10, 10]} fov={80} near={0.1} far={1000}>
<OrbitControls
      autoRotate
      autoRotateSpeed={1.0}
      allowPan={false}
      enableDamping
      maxDistance={200}
      minDistance={10}
   />
</T.PerspectiveCamera>

<Sky />

<T.Mesh position={[0, 0.5, 0]} scale={1}>
<T.SphereGeometry />
<T.MeshStandardMaterial roughness={0} color="gray" side={0} />
</T.Mesh>

<T.GridHelper args={[10, 10]} />
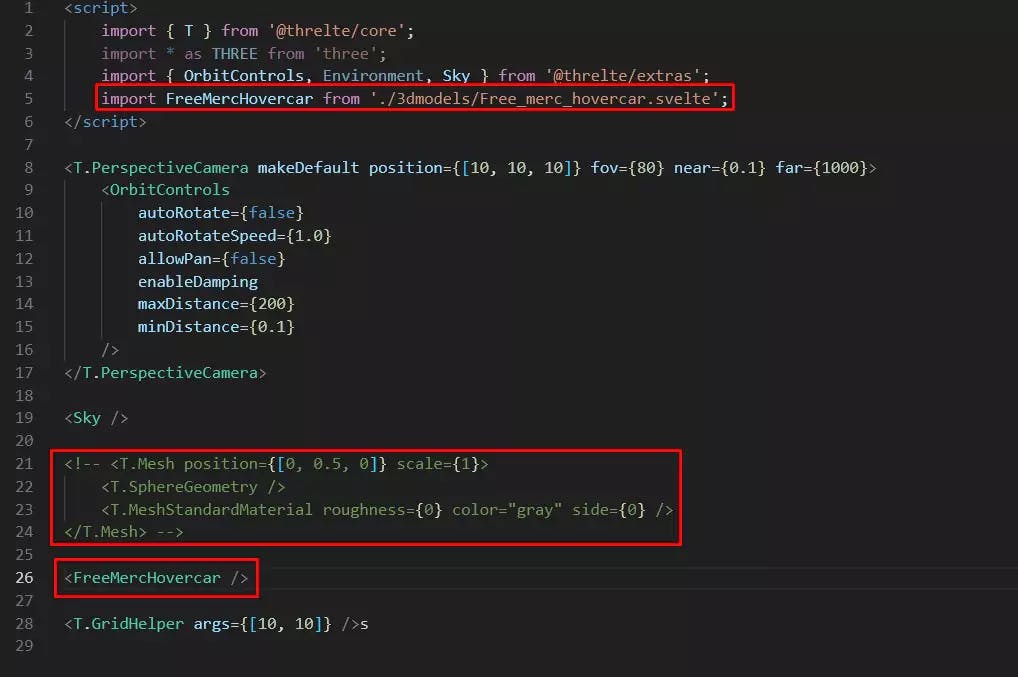
Now import the svelte threlte component to the scene file
<script>
  import FreeMercHovercar from './3dmodels/Free_merc_hovercar.svelte';
</script>

	<FreeMercHovercar />
Make sure to remove or comment out the sphere geometry code; the complete code should look like this
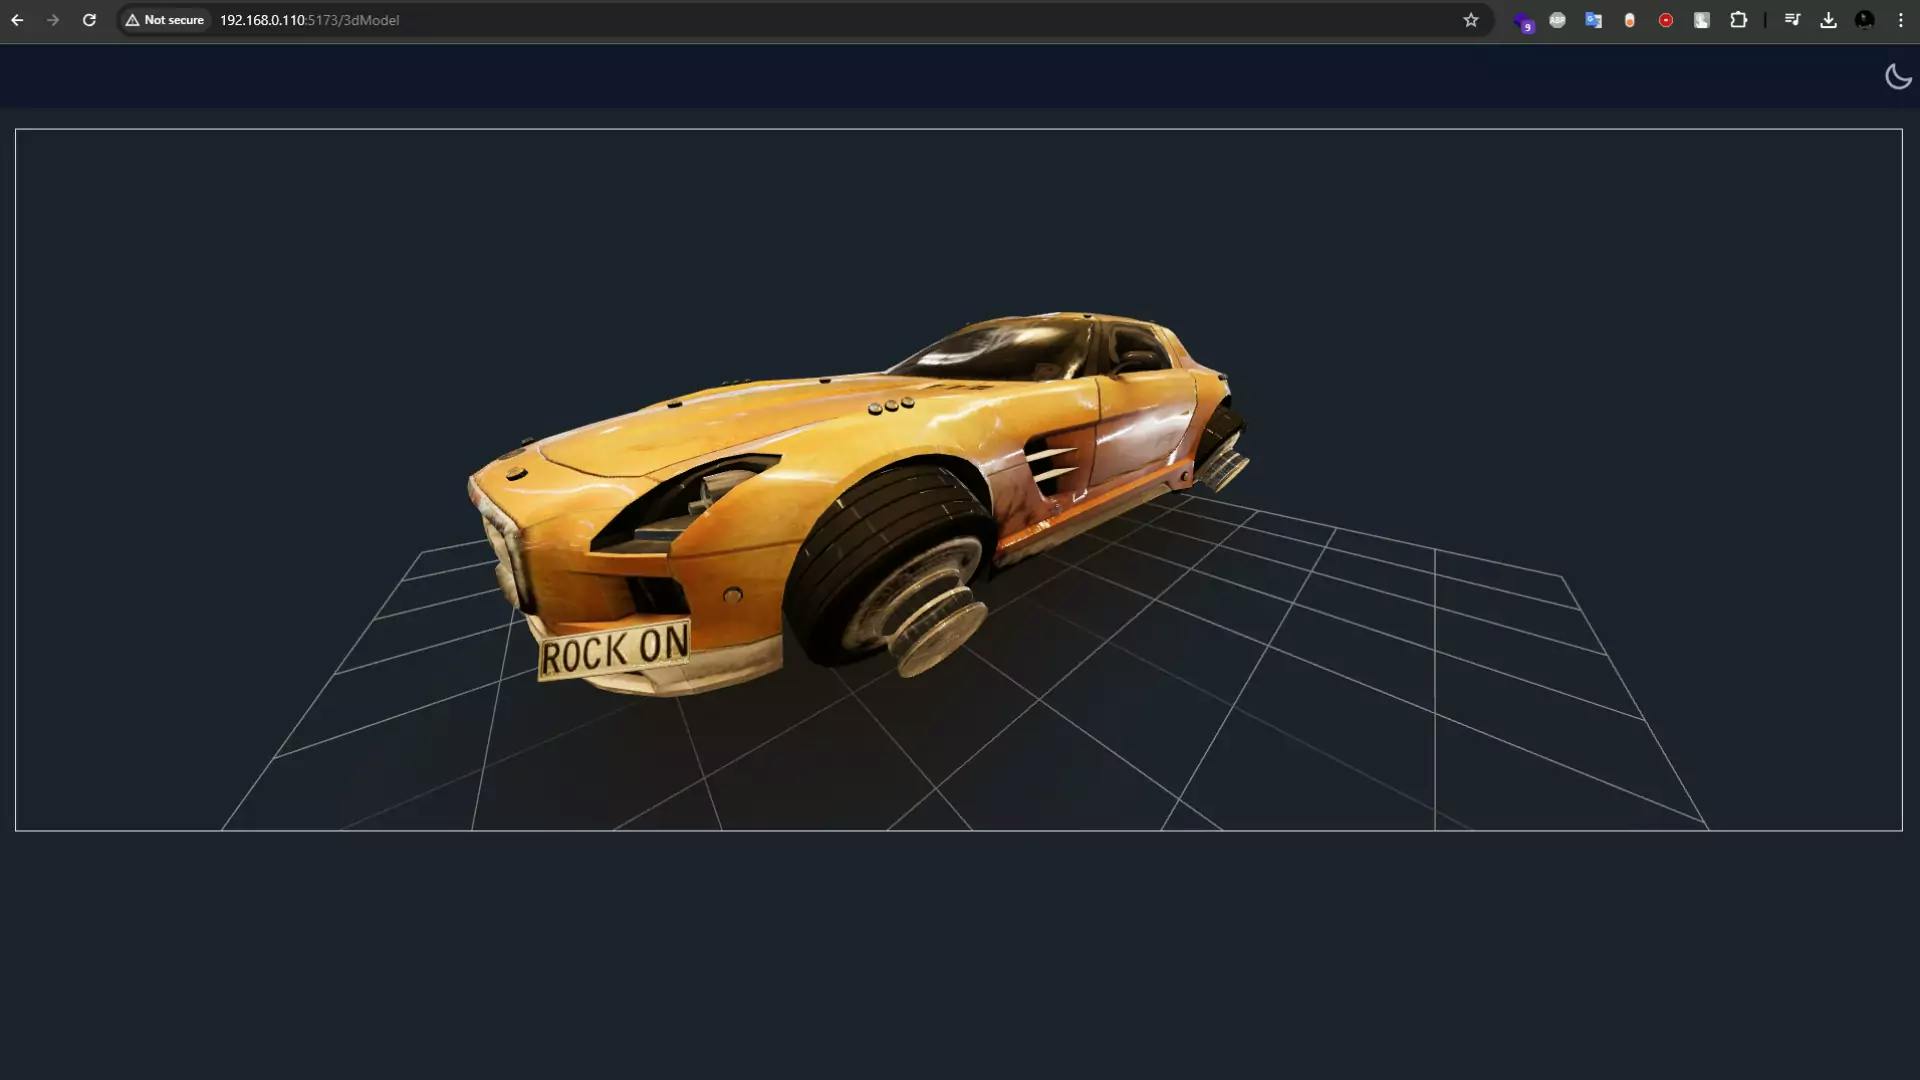
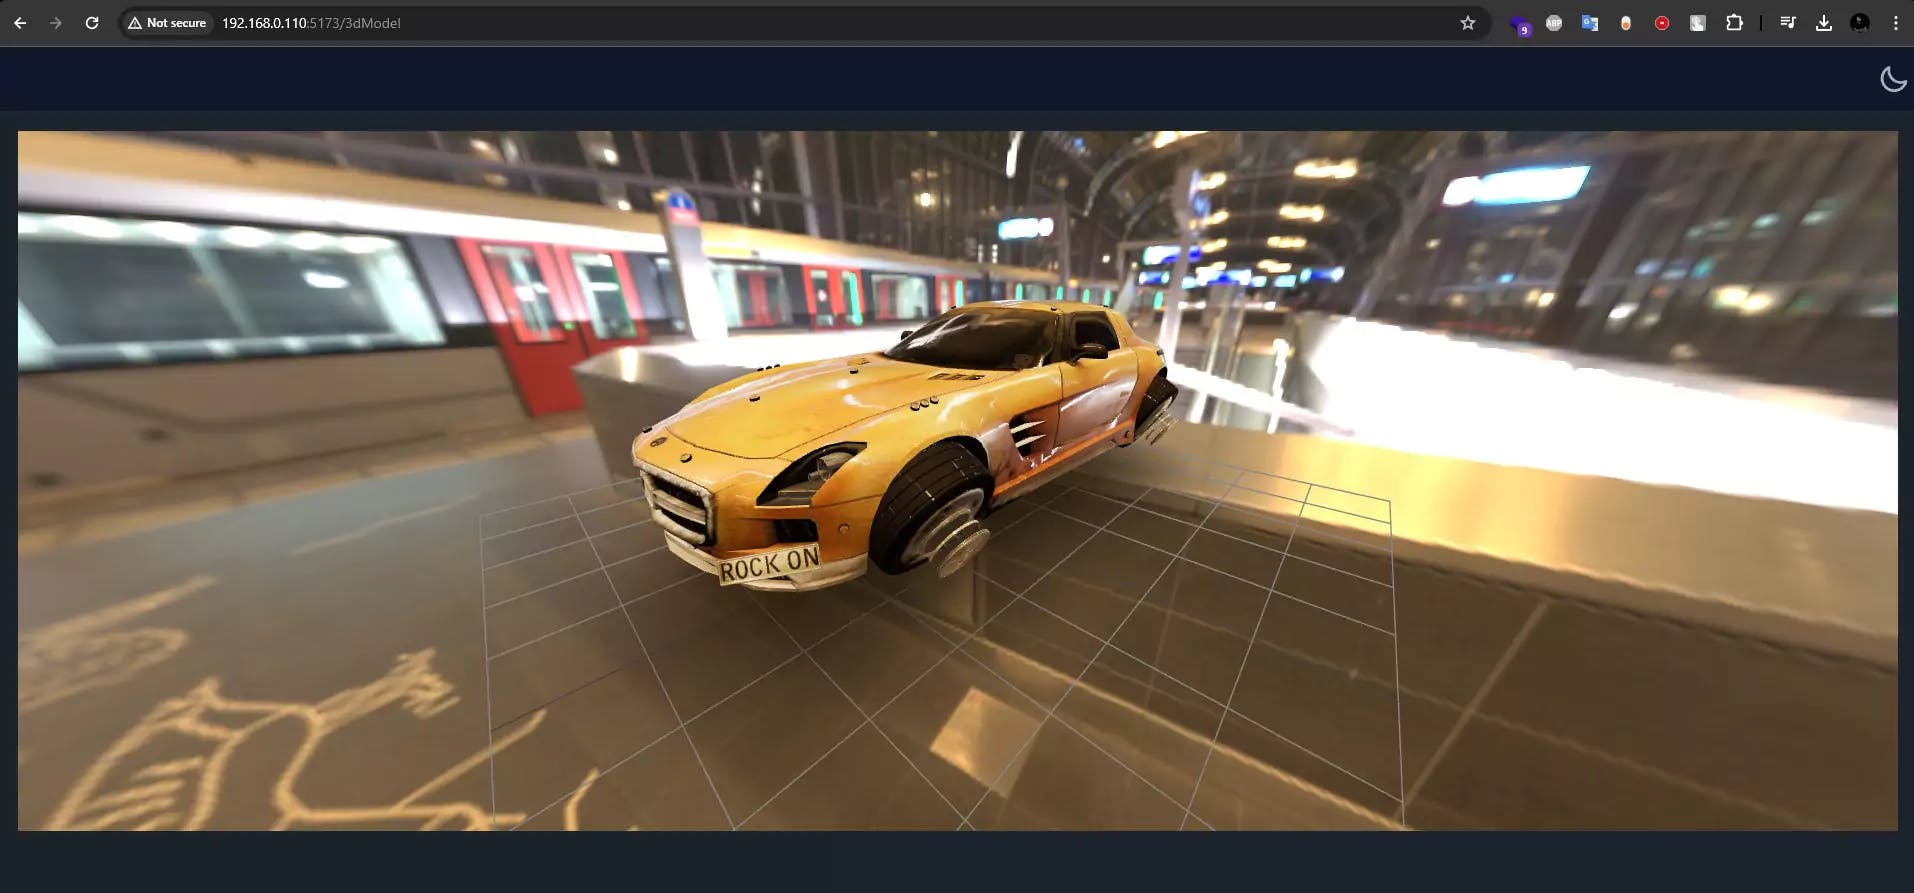
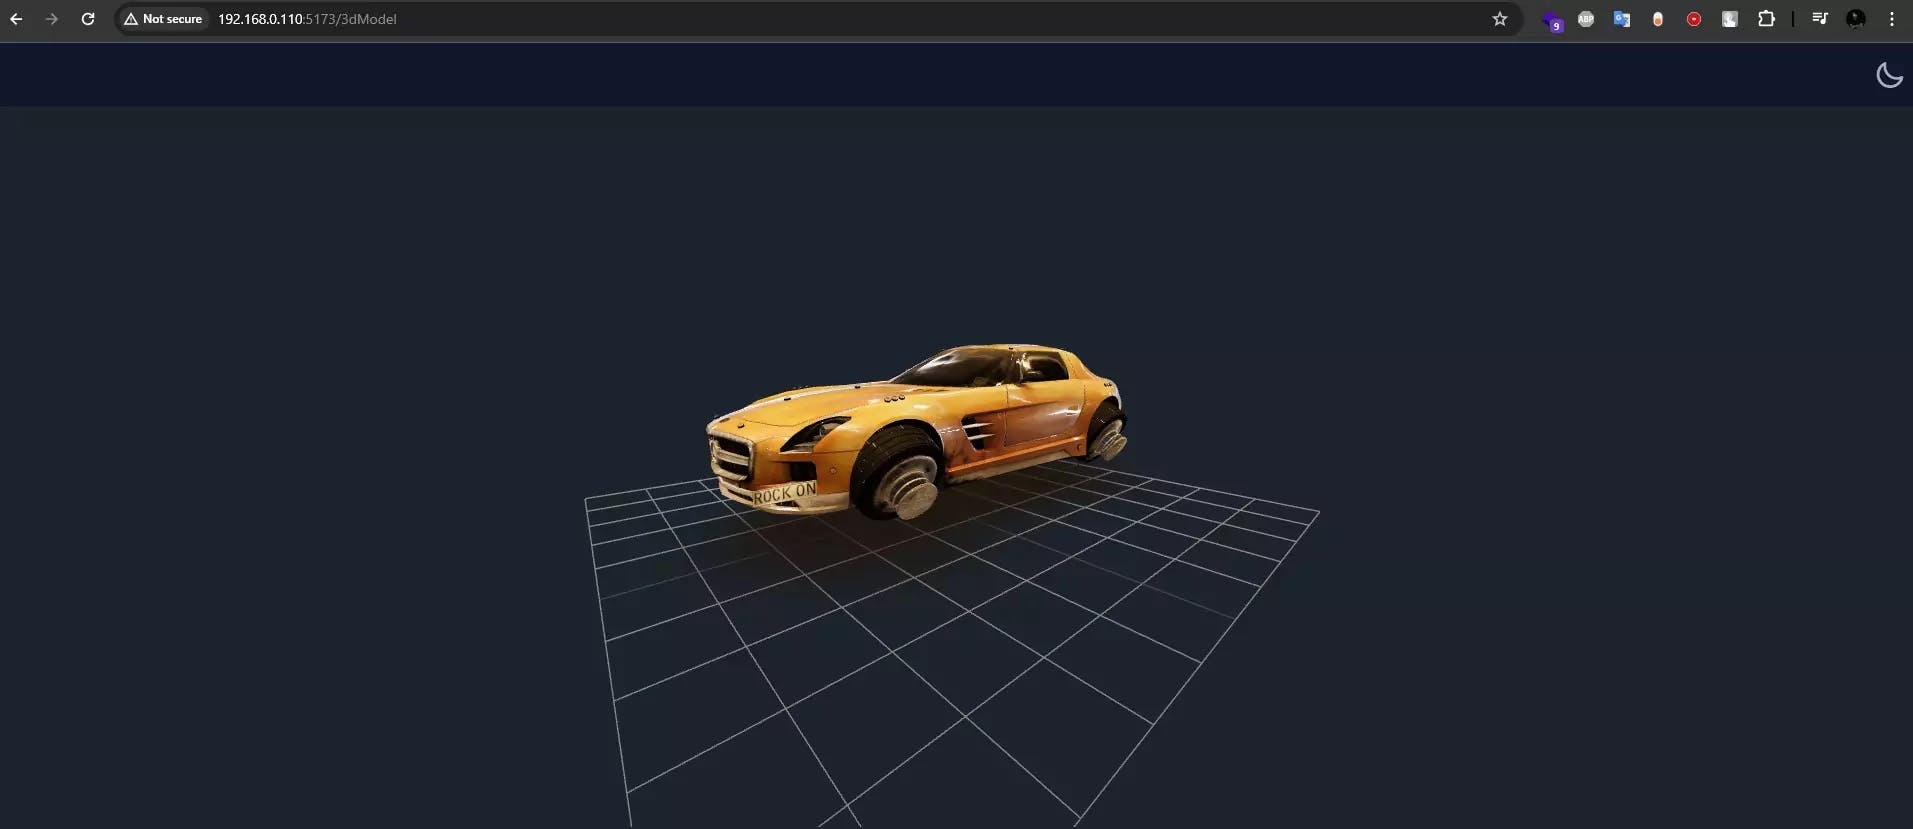
Check the result on browser
Let's resize the hover car by wrapping the car component in a T.Group.
<T.Group position={[0, 2, 0]} scale={5}>
	<FreeMercHovercar />
</T.Group>
To use the HDR file, utilize the environment tag and make sure to comment out the sky tag.
<Environment
  path="/hdr/"
  format="hdr"
  isBackground={true}
  files="metro_noord_1k.hdr"
/>
To use the HDR component without the background, we can set isBackground to false. Thus, the complete code should look like this
<script>
   import { T } from '@threlte/core';
   import * as THREE from 'three';
   import { OrbitControls, Environment, Sky } from '@threlte/extras';
   import FreeMercHovercar from './3dmodels/Free_merc_hovercar.svelte';
</script>

<T.PerspectiveCamera makeDefault position={[10, 10, 10]} fov={80} near={0.1} far={1000}>
   <OrbitControls
      autoRotate={false}
      autoRotateSpeed={1.0}
      allowPan={false}
      enableDamping
      maxDistance={200}
      minDistance={0.1}
   />
</T.PerspectiveCamera>

<!-- <Sky /> -->

<!-- <T.Mesh position={[0, 0.5, 0]} scale={1}>
   <T.SphereGeometry />
   <T.MeshStandardMaterial roughness={0} color="gray" side={0} />
</T.Mesh> -->

<Environment path="/hdr/" format="hdr" isBackground={false} files="metro_noord_1k.hdr" />

<T.Group position={[0, 2, 0]} scale={5}>
   <FreeMercHovercar />
</T.Group>

<T.GridHelper args={[10, 10]} />

Want to build game mechanics in Svelte? Discover how easy it is to create a camera-locked weapon system using Threlte's component-based architecture
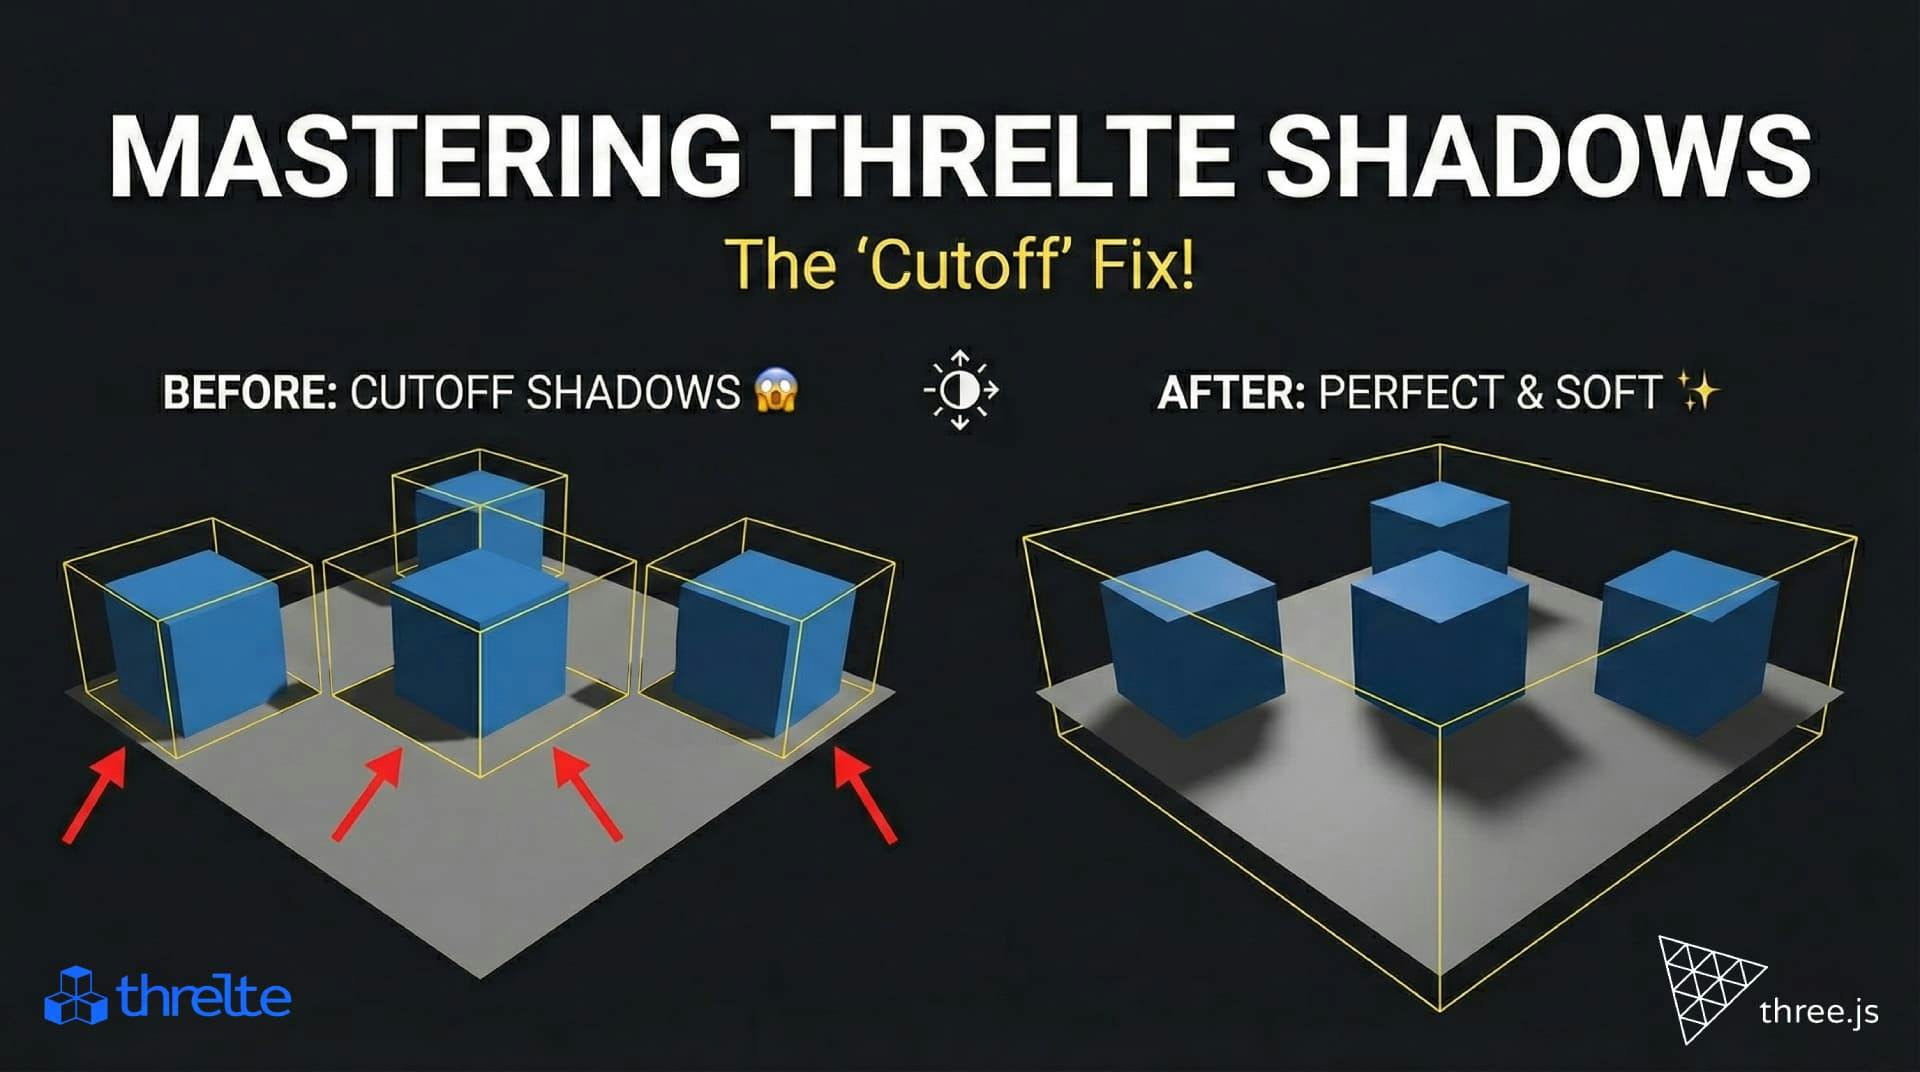
Shadows disappearing in your Threlte or Three.js scene? It’s a frustum issue. Learn how to visualize the shadow box and fix clipping instantly with this guide.
