Adding Subscription Billing to a Frappe App: Stripe & Razorpay Integration Guide

You built something people actually want — a custom Frappe app that solves a real problem, and users are already asking when they can pay you. Only there's no checkout page, no recurring charge, no way to know who's paid. It's the wall every solo founder hits right after the MVP: the demo works, but the billing layer doesn't exist yet.
The good news: Frappe already gives you most of the scaffolding you need. You just have to connect a payment gateway like Stripe or Razorpay, and know which parts are free versus what you build yourself.
Subscription DocType does — and where it stops short for SaaS billing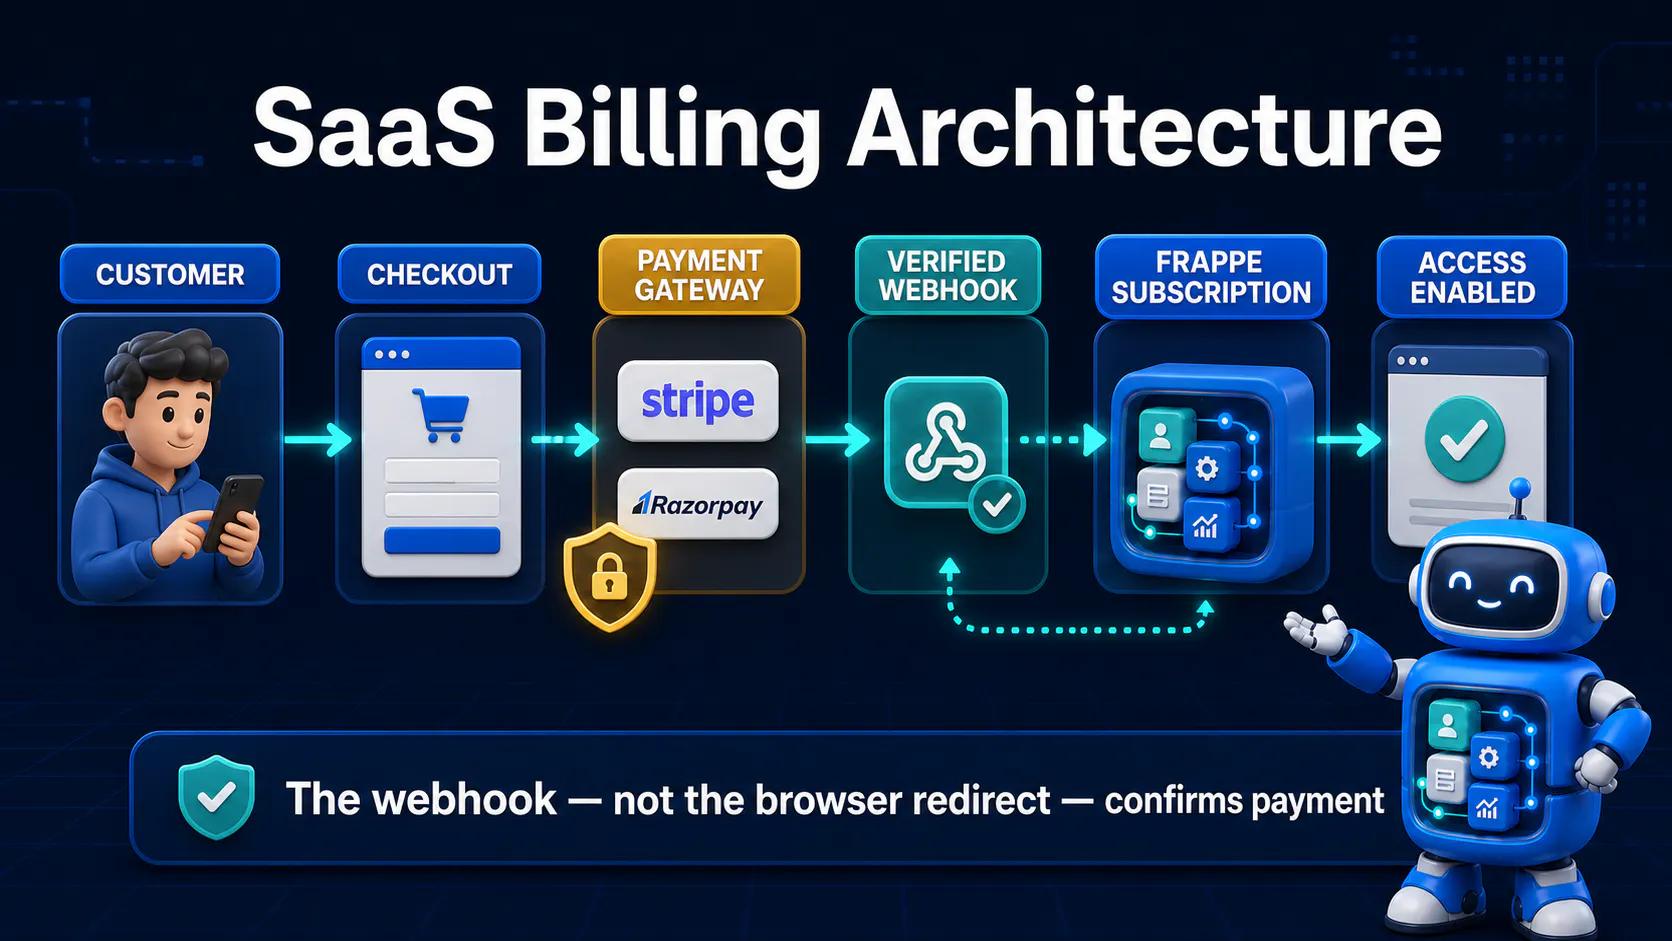
Every subscription billing integration, regardless of provider, follows the same three-stage loop: checkout, webhook, fulfillment 🔁.
First 🛒, your Frappe app creates a checkout session or order server-side and redirects the user to the provider's hosted payment page. Your server never touches raw card numbers — that's the whole point of using Stripe or Razorpay.
Second 📡, once the user pays (or a renewal succeeds or fails), the provider sends an asynchronous webhook — a POST request to a public endpoint on your Frappe site announcing what happened.
Third ✅, your webhook handler verifies that the request genuinely came from Stripe or Razorpay (not an attacker), then updates your Subscription record, generates a Sales Invoice, and unlocks the plan's features. Everything below is really just implementing these three stages correctly and safely.
Subscription DocType Already Gives You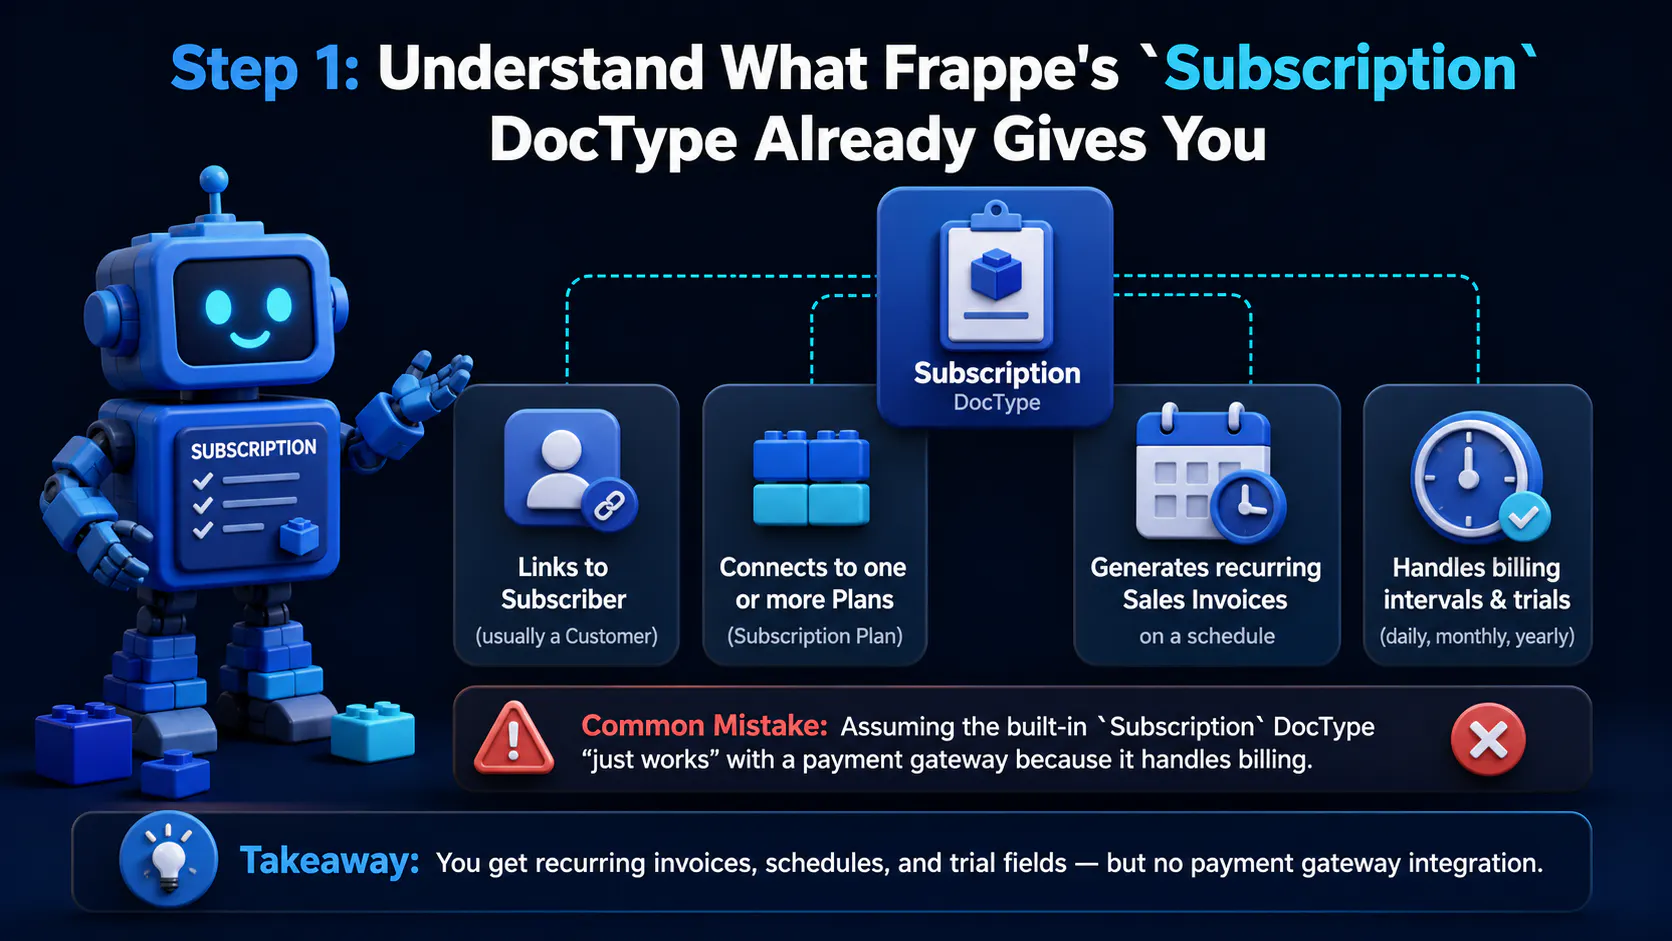
Section visual: Understand What Frappe's Subscription DocType Already Gives You.
Frappe ships with a built-in Subscription DocType 📦 designed for recurring billing scenarios. It links a Subscriber (usually a Customer) to one or more Subscription Plan records, and it can automatically generate recurring Sales Invoices on a schedule via its own background job.
That's genuinely useful ✅ — you get invoice generation, billing interval logic (daily, monthly, yearly), and trial period fields for free. For an internal tool or an ERPNext-adjacent workflow, it might be enough on its own.
For a SaaS product taking real money from strangers on the internet, it falls short in one critical way: it has no concept of Stripe or Razorpay 🚫. There's no checkout session creation, no webhook listener, and no signature verification anywhere in the core module.
⚠️ Common Mistake: Assuming the built-in
SubscriptionDocType "just works" with a payment gateway because it has invoice logic. It doesn't talk to Stripe or Razorpay at all — you're building that bridge yourself.
The practical approach is to reuse ♻️ Subscription and Subscription Plan as your source of truth for status and billing cycle, but layer your own gateway-specific logic around them rather than replacing them.
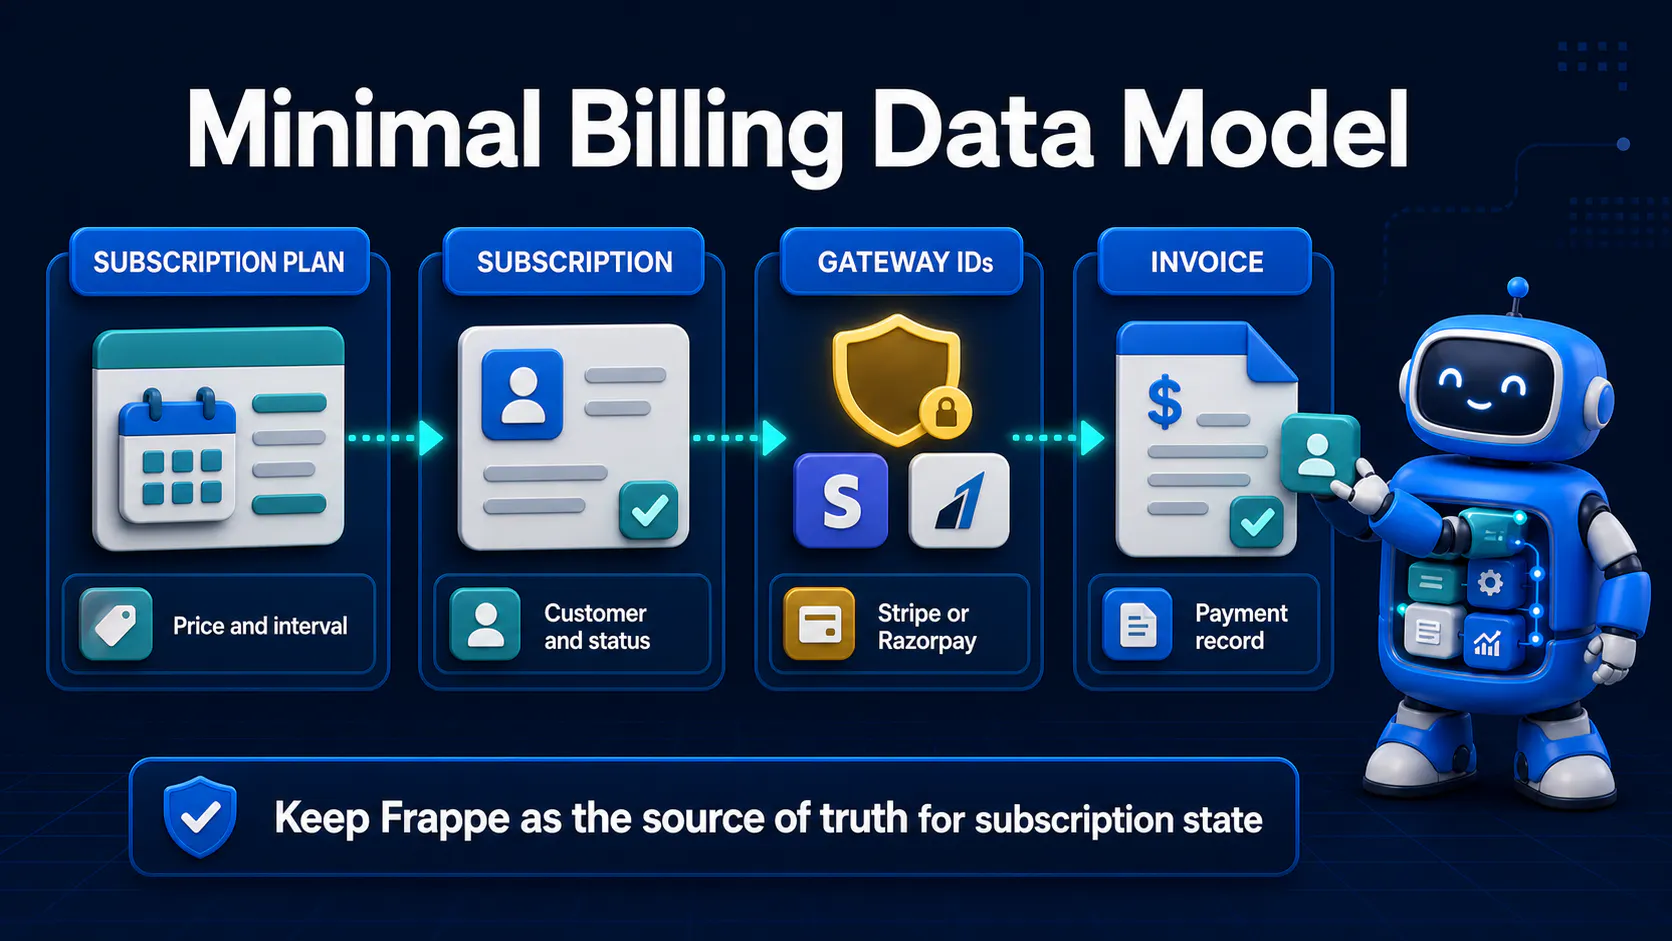
Keep this simple 🧩. You need three things: a plan, a customer link, and a status field you can trust.
# Reuse Frappe's built-in Subscription Plan DocType for pricing tiers
# Fields you'll actually use: plan_name, cost, billing_interval, currency

# Custom fields added to Subscription (via Customize Form or a fixture):
# - stripe_subscription_id   (Data)
# - razorpay_subscription_id (Data)
# - gateway                  (Select: Stripe / Razorpay)
# - status                   (Select: Trialing / Active / Past Due / Cancelled)
🔑 The status field is the single most important piece of this whole system. Every feature gate in your app — "can this user access the premium dashboard?" — should check this one field, nowhere else.
Resist the urge to scatter payment logic across your app's controllers 📌. Centralize it in a dedicated billing module so there's exactly one place that decides whether a customer is paid up.
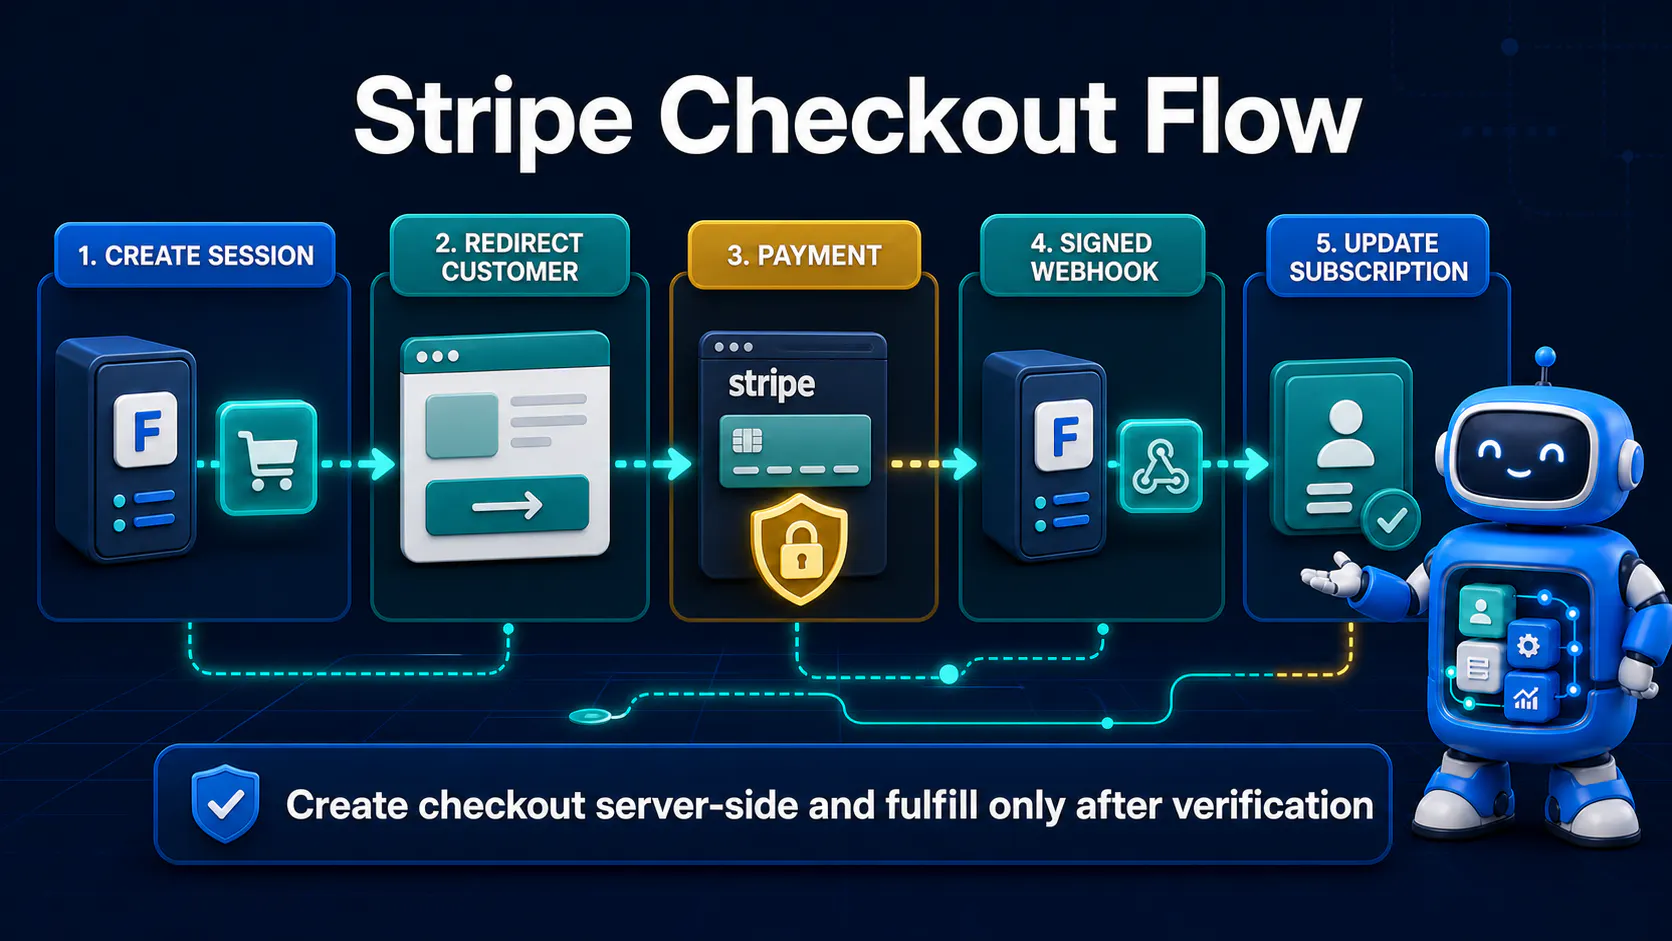
Your frontend button 🔘 calls a Frappe API method, which talks to Stripe server-side, and returns a redirect URL.
# apps/your_app/your_app/api/billing.py
import frappe
import stripe

@frappe.whitelist()
def create_stripe_checkout_session(plan_price_id):
    stripe.api_key = frappe.conf.get("stripe_secret_key")
    customer = frappe.session.user

    session = stripe.checkout.Session.create(
        mode="subscription",
        payment_method_types=["card"],
        line_items=[{"price": plan_price_id, "quantity": 1}],
        client_reference_id=customer,
        success_url=frappe.utils.get_url("/billing-success"),
        cancel_url=frappe.utils.get_url("/billing-cancelled"),
    )
    return {"checkout_url": session.url}
On the client side, call this method and redirect the browser to the returned URL:
frappe.call({
  method: "your_app.api.billing.create_stripe_checkout_session",
  args: { plan_price_id: "price_1AbCdEfGhIjK" },
  callback: function (r) {
    if (r.message && r.message.checkout_url) {
      window.location.href = r.message.checkout_url;
    }
  },
});
Razorpay's equivalent creates an Order 🧾 rather than a hosted session — Razorpay's checkout is typically embedded via their JS widget instead of a redirect.
@frappe.whitelist()
def create_razorpay_order(amount, currency="INR"):
    import razorpay
    client = razorpay.Client(auth=(
        frappe.conf.get("razorpay_key_id"),
        frappe.conf.get("razorpay_key_secret"),
    ))
    order = client.order.create({
        "amount": int(amount) * 100,  # Razorpay expects paise, not rupees
        "currency": currency,
        "payment_capture": 1,
    })
    return order
🔒 Security Note:
@frappe.whitelist()withoutallow_guest=Truerequires an authenticated Frappe session. That's correct here — only logged-in users should be able to spin up a checkout session for themselves.
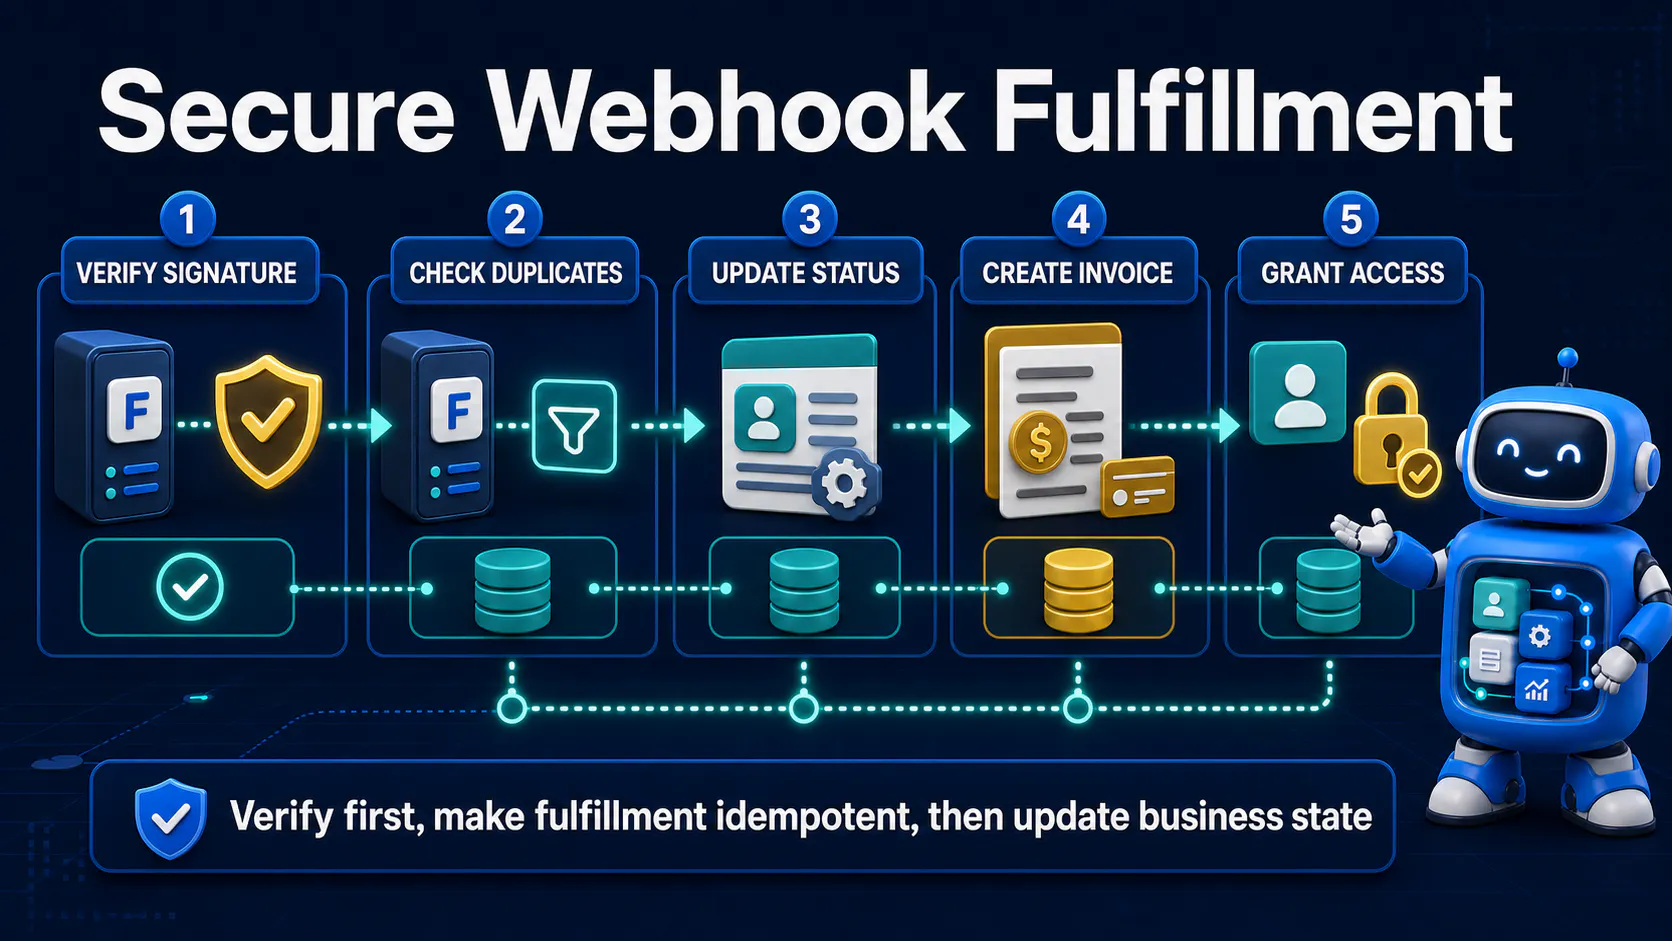
This is the step where most first attempts go wrong 🚧. Your webhook endpoint must accept unauthenticated POST requests, because Stripe and Razorpay are not logged-in Frappe users.
@frappe.whitelist(allow_guest=True)
def stripe_webhook():
    payload = frappe.request.data
    sig_header = frappe.get_request_header("Stripe-Signature")
    endpoint_secret = frappe.conf.get("stripe_webhook_secret")

    try:
        event = stripe.Webhook.construct_event(
            payload, sig_header, endpoint_secret
        )
    except (ValueError, stripe.error.SignatureVerificationError):
        frappe.local.response.http_status_code = 400
        return {"error": "Invalid signature"}

    handle_stripe_event(event)
    return {"status": "ok"}
⚙️ stripe.Webhook.construct_event does the heavy lifting: it recomputes the HMAC over the raw payload using your webhook secret and compares it against the Stripe-Signature header. If they don't match, the payload is rejected before you ever touch it.
Razorpay uses a similar HMAC-SHA256 scheme 🔐, but you verify it manually with their utility function or with hmac directly:
import hmac
import hashlib

@frappe.whitelist(allow_guest=True)
def razorpay_webhook():
    payload = frappe.request.data
    received_signature = frappe.get_request_header("X-Razorpay-Signature")
    webhook_secret = frappe.conf.get("razorpay_webhook_secret")

    expected_signature = hmac.new(
        key=webhook_secret.encode(),
        msg=payload,
        digestmod=hashlib.sha256,
    ).hexdigest()

    if not hmac.compare_digest(expected_signature, received_signature):
        frappe.local.response.http_status_code = 400
        return {"error": "Invalid signature"}

    event = frappe.parse_json(payload)
    handle_razorpay_event(event)
    return {"status": "ok"}
⚠️ Common Mistake: Comparing signatures with
==instead ofhmac.compare_digest. A plain string comparison leaks timing information that can theoretically help an attacker guess the correct signature byte by byte. Always use the constant-time comparison function.
🔒 Security Note: Never skip signature verification "just for testing." Test mode still uses real signed webhooks with your test webhook secret — there's no scenario where trusting an unverified payload is acceptable, even temporarily.
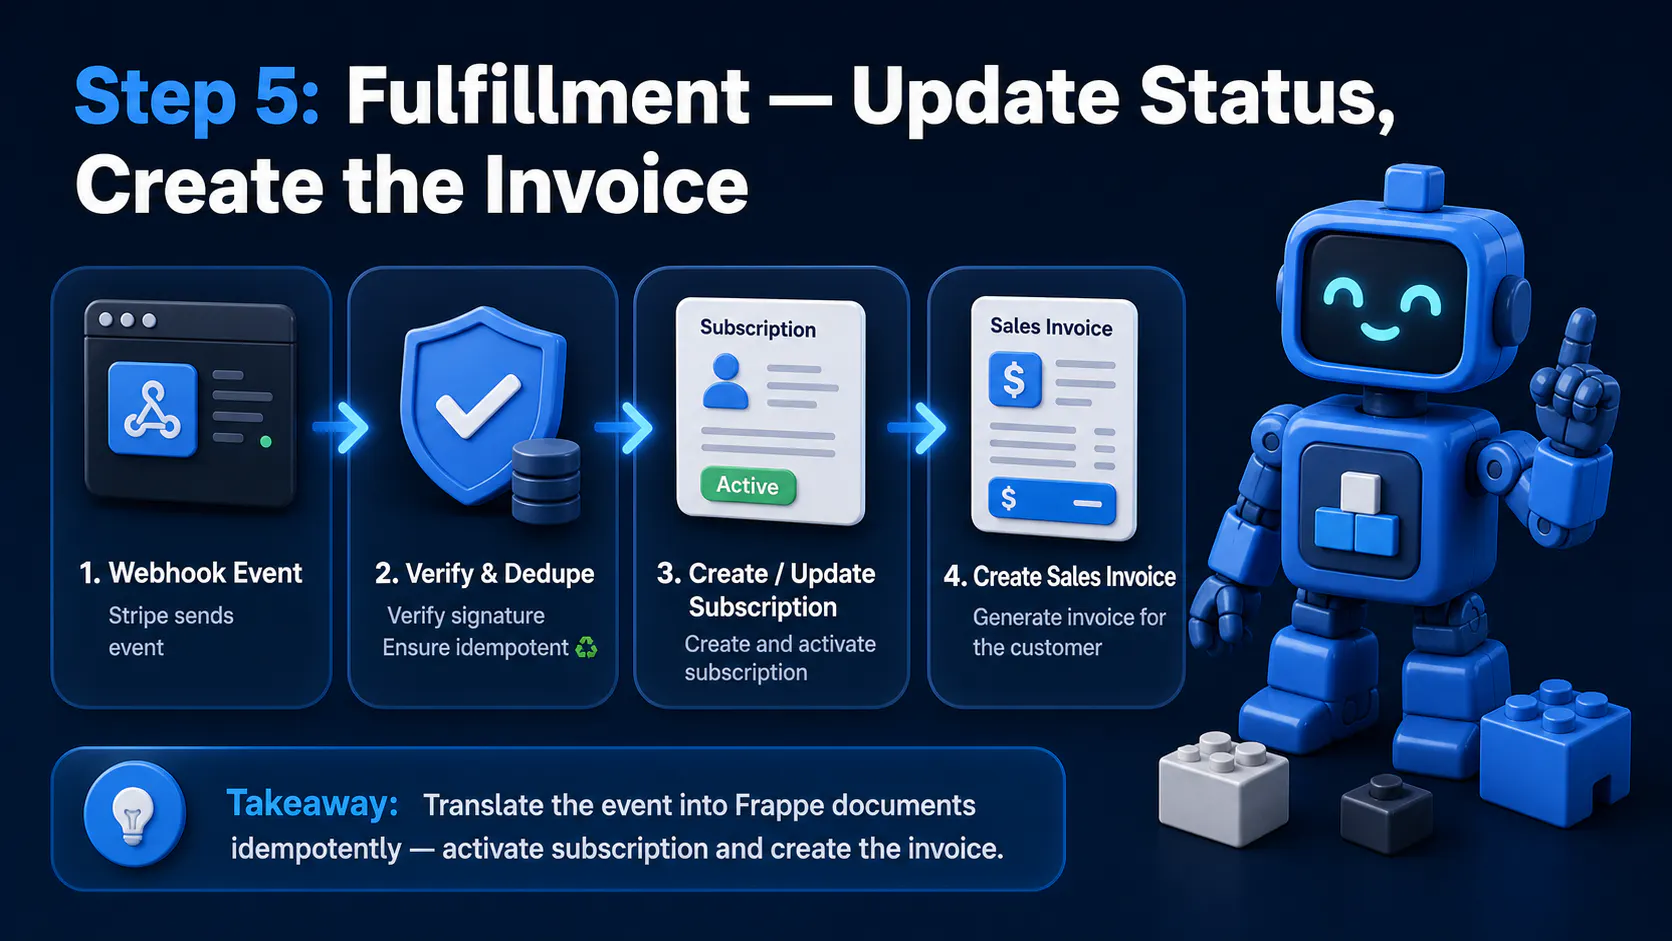
Section visual: Fulfillment Update Status, Create the Invoice.
Once a payload is verified, translate the event into Frappe documents. Keep this idempotent ♻️ — webhooks can be delivered more than once.
def handle_stripe_event(event):
    event_type = event["type"]
    data = event["data"]["object"]

    if event_type == "checkout.session.completed":
        activate_subscription(
            frappe_user=data["client_reference_id"],
            gateway_ref=data["subscription"],
            gateway="Stripe",
        )
    elif event_type == "invoice.payment_failed":
        mark_subscription_past_due(data["subscription"])


def activate_subscription(frappe_user, gateway_ref, gateway):
    sub = frappe.get_doc({
        "doctype": "Subscription",
        "party_type": "Customer",
        "status": "Active",
        "gateway": gateway,
        "stripe_subscription_id": gateway_ref if gateway == "Stripe" else None,
    })
    sub.insert(ignore_permissions=True)

    invoice = frappe.get_doc({
        "doctype": "Sales Invoice",
        "customer": frappe_user,
        # ... items, taxes, etc.
    })
    invoice.insert(ignore_permissions=True)
    invoice.submit()
⚠️ ignore_permissions=True is necessary here because the webhook request has no logged-in user context — you're acting on the system's behalf, so treat this function as trusted only because the signature check already ran.
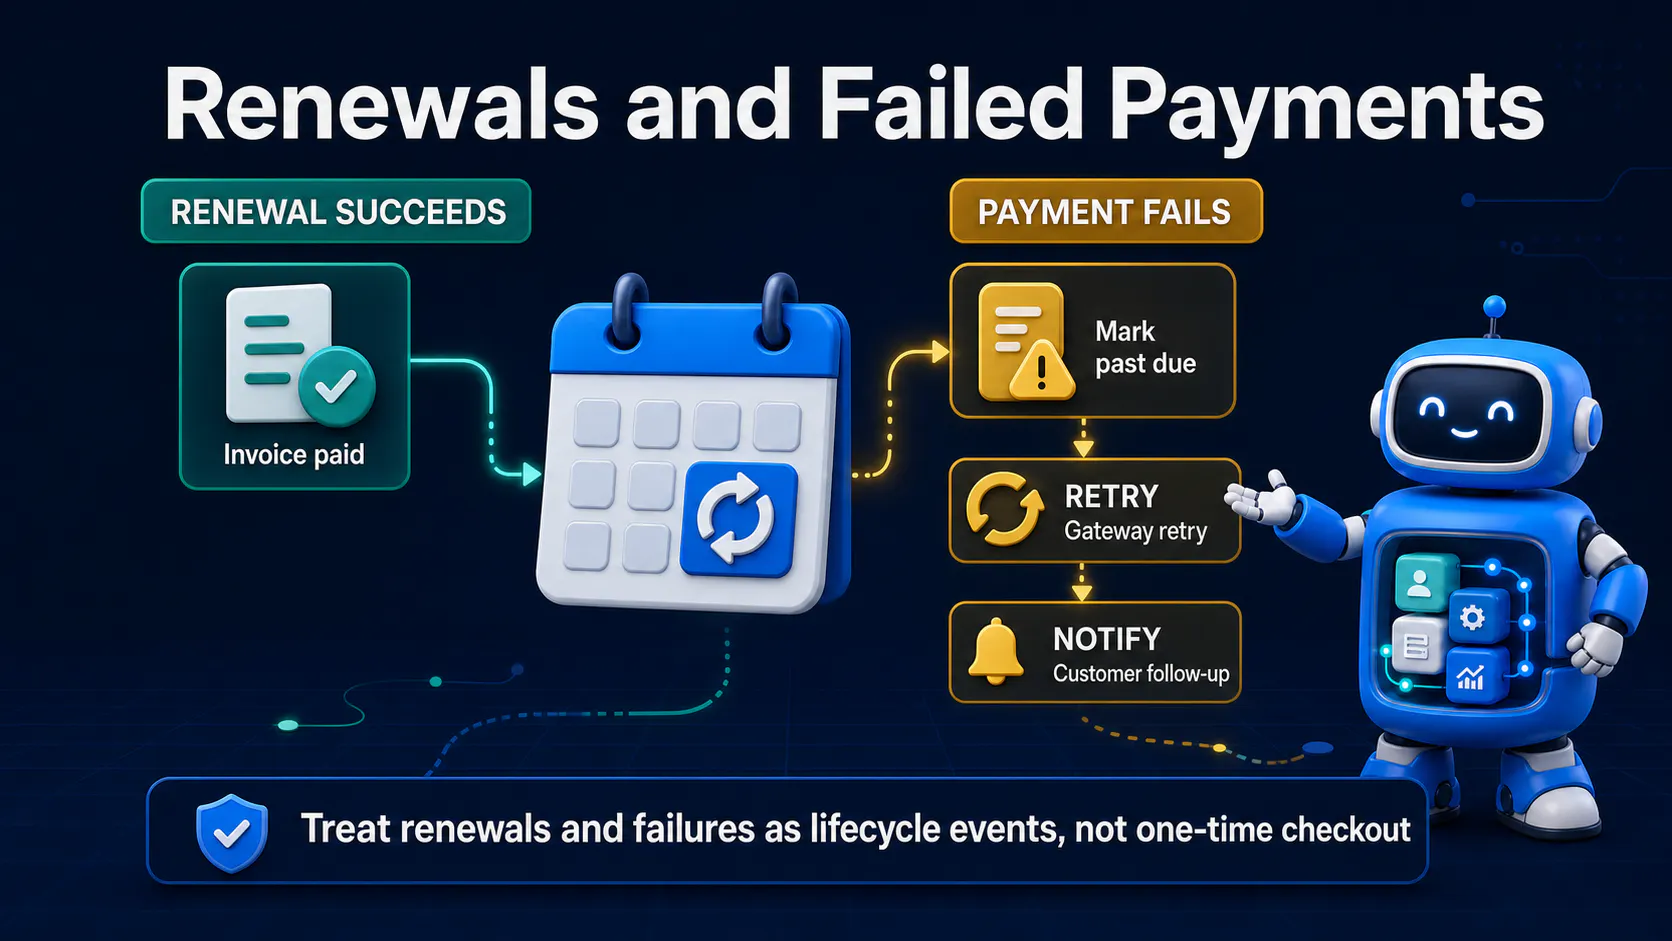
Stripe and Razorpay both retry failed recurring charges automatically 🔁, but your app should still nudge users before a card expires or a subscription lapses. Frappe's scheduler is the natural place for this.
# hooks.py
scheduler_events = {
    "daily": [
        "your_app.api.billing.send_renewal_reminders",
        "your_app.api.billing.check_past_due_subscriptions",
    ]
}
# apps/your_app/your_app/api/billing.py
def send_renewal_reminders():
    upcoming = frappe.get_all(
        "Subscription",
        filters={"status": "Active", "current_invoice_end": ["between", [
            frappe.utils.nowdate(),
            frappe.utils.add_days(frappe.utils.nowdate(), 3),
        ]]},
        pluck="name",
    )
    for name in upcoming:
        # queue a reminder email via frappe.sendmail
        pass
This is also where you'd flag subscriptions stuck in Past Due ⏳ for more than a few days and downgrade them to a free tier automatically, rather than leaving that decision to a human checking a report.
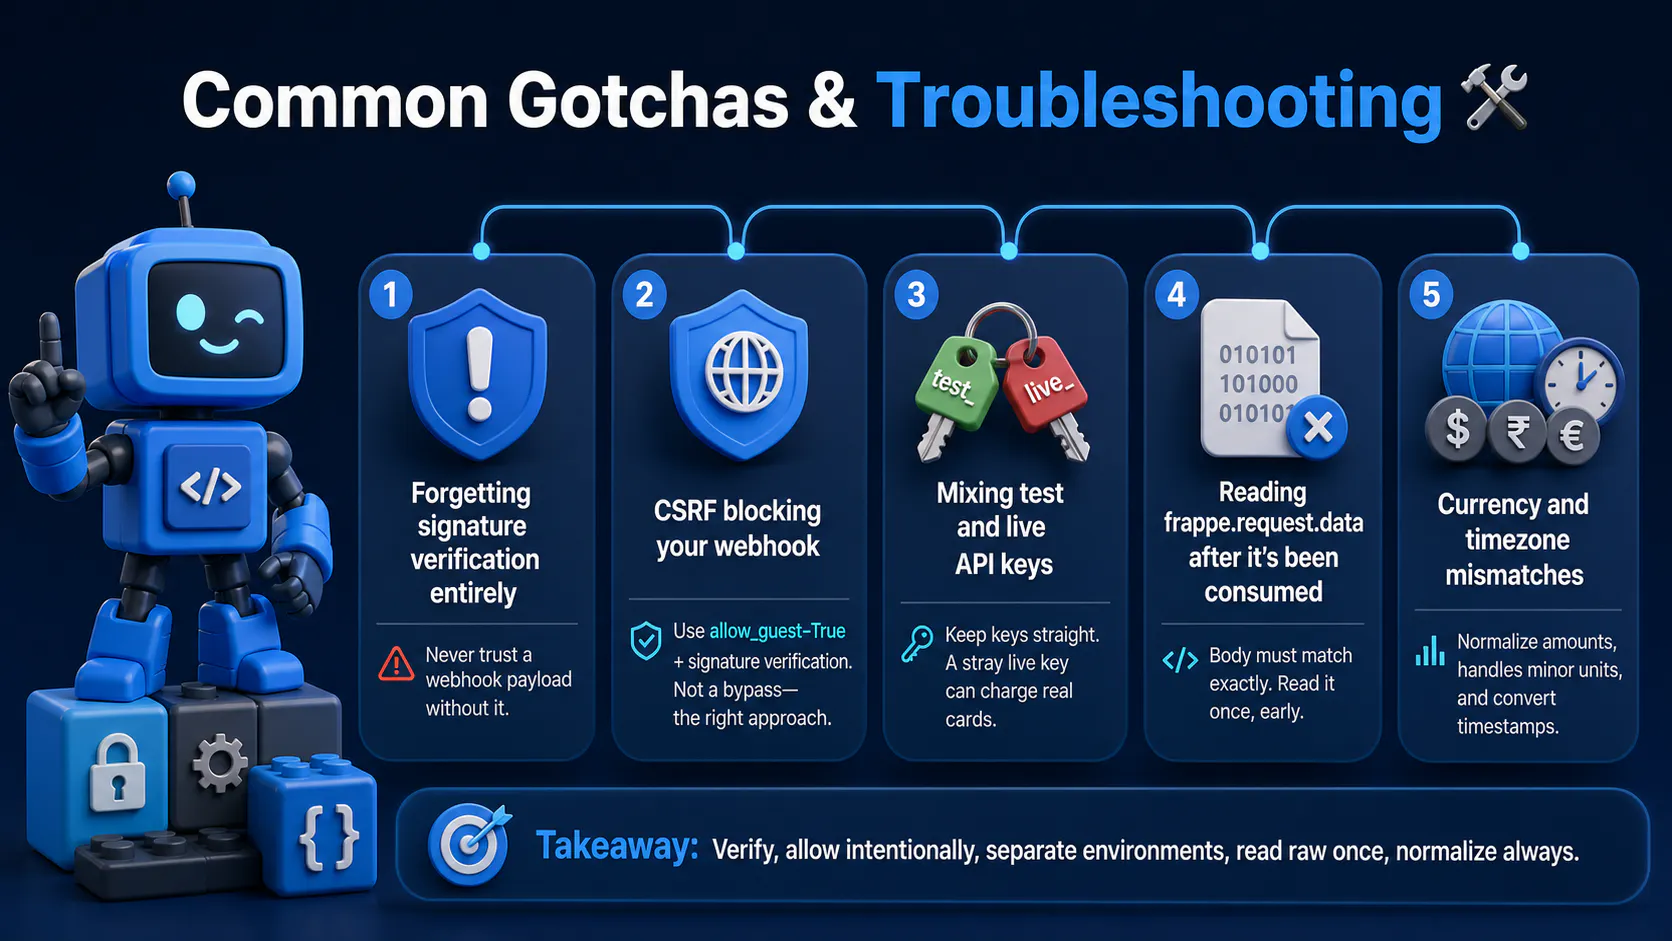
Section visual: Common Gotchas & Troubleshooting.
allow_guest=True combined with signature verification is the correct replacement for CSRF here, not a bypass of security.site_config.json is an easy way to accidentally charge a real card.frappe.request.data after it's been consumed — if any middleware or logging touches the raw request body first, signature verification will fail because the bytes must match exactly what the provider signed.Subscription Plan with an explicit currency field rather than assuming your default currency.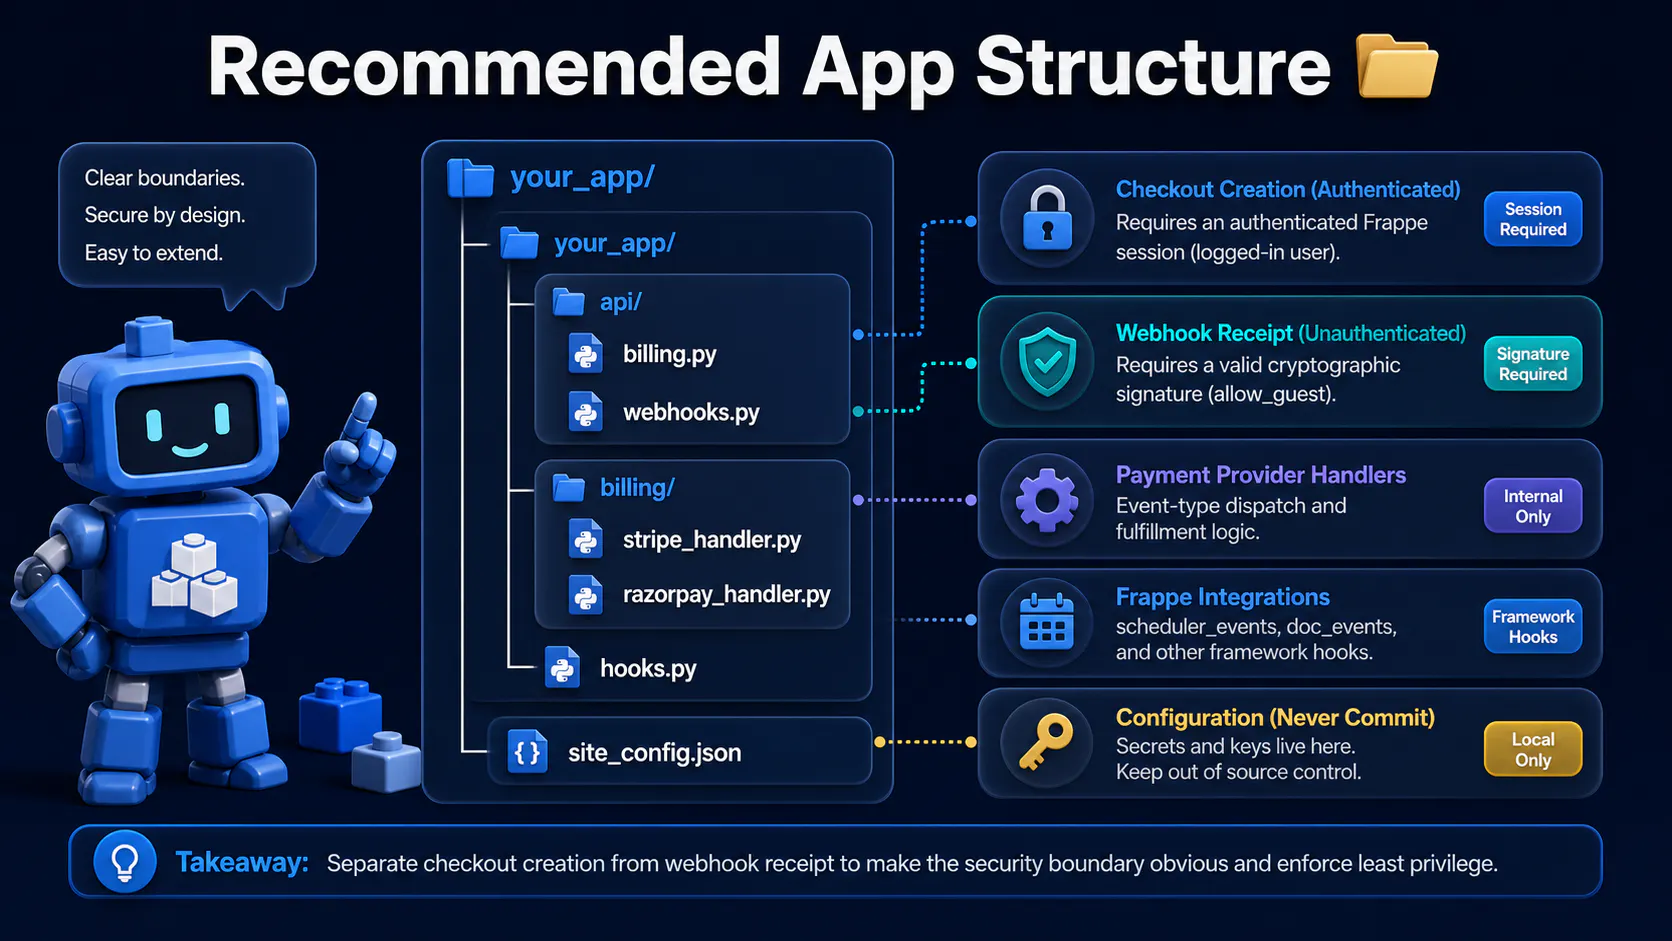
Section visual: Recommended App Structure.
your_app/
├── your_app/
│   ├── api/
│   │   ├── billing.py       # whitelisted checkout/order creation methods
│   │   └── webhooks.py      # allow_guest webhook receivers + signature checks
│   ├── billing/
│   │   ├── stripe_handler.py    # event-type dispatch, fulfillment logic
│   │   └── razorpay_handler.py
│   └── hooks.py              # scheduler_events, doc_events
└── site_config.json          # stripe_secret_key, stripe_webhook_secret,
                               # razorpay_key_id, razorpay_key_secret,
                               # razorpay_webhook_secret (never in source control)
🔍 Keeping checkout creation (billing.py) separate from webhook receipt (webhooks.py) makes the security boundary obvious at a glance: one file requires an authenticated Frappe session, the other requires a valid cryptographic signature instead.
Section visual: Final Thoughts.
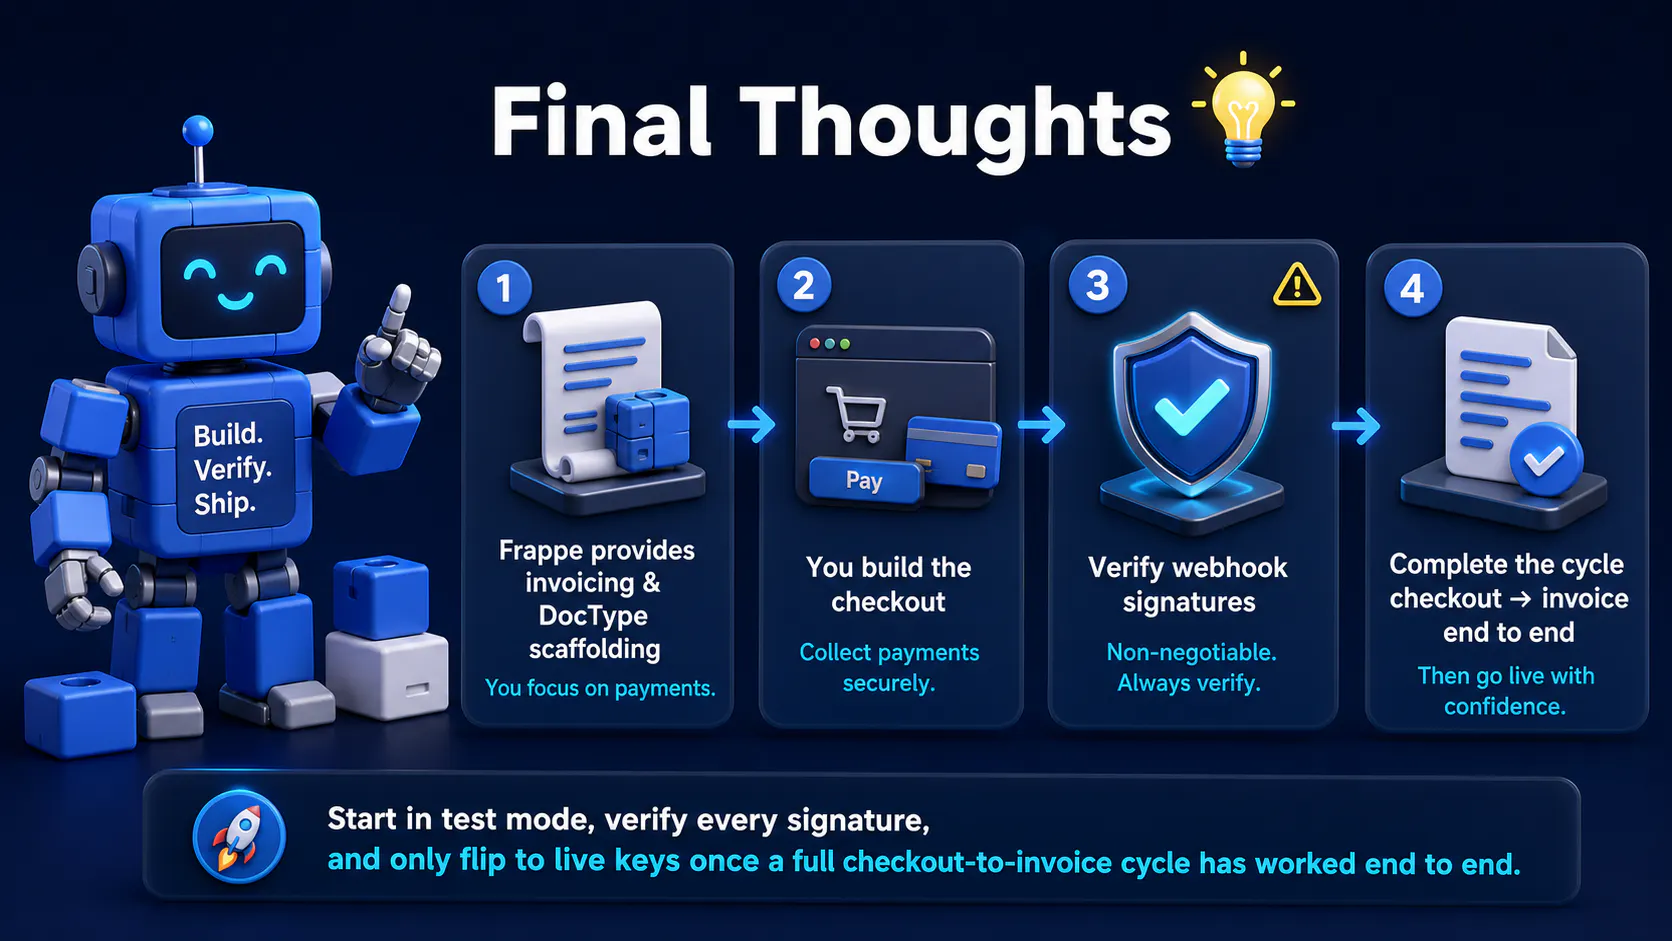
Frappe hands you the invoicing and DocType scaffolding for free, but the actual money-handling — checkout, webhooks, signature verification — is on you to build carefully. None of it is exotic, but the webhook signature step is non-negotiable ⚠️ and worth double-checking against Stripe's and Razorpay's official test payloads before going live. Start in test mode, verify every signature, and only flip to live keys once a full checkout-to-invoice cycle has worked end to end 🚀.

Stop fighting the built-in resource API for complex business logic. Here's how to expose your own Python functions as clean, secure REST endpoints in Frappe

A practical Frappe tutorial for fixing wrong workspace redirects using role-to-route mapping, capture-phase click handling, and a reusable Desk JavaScript file.
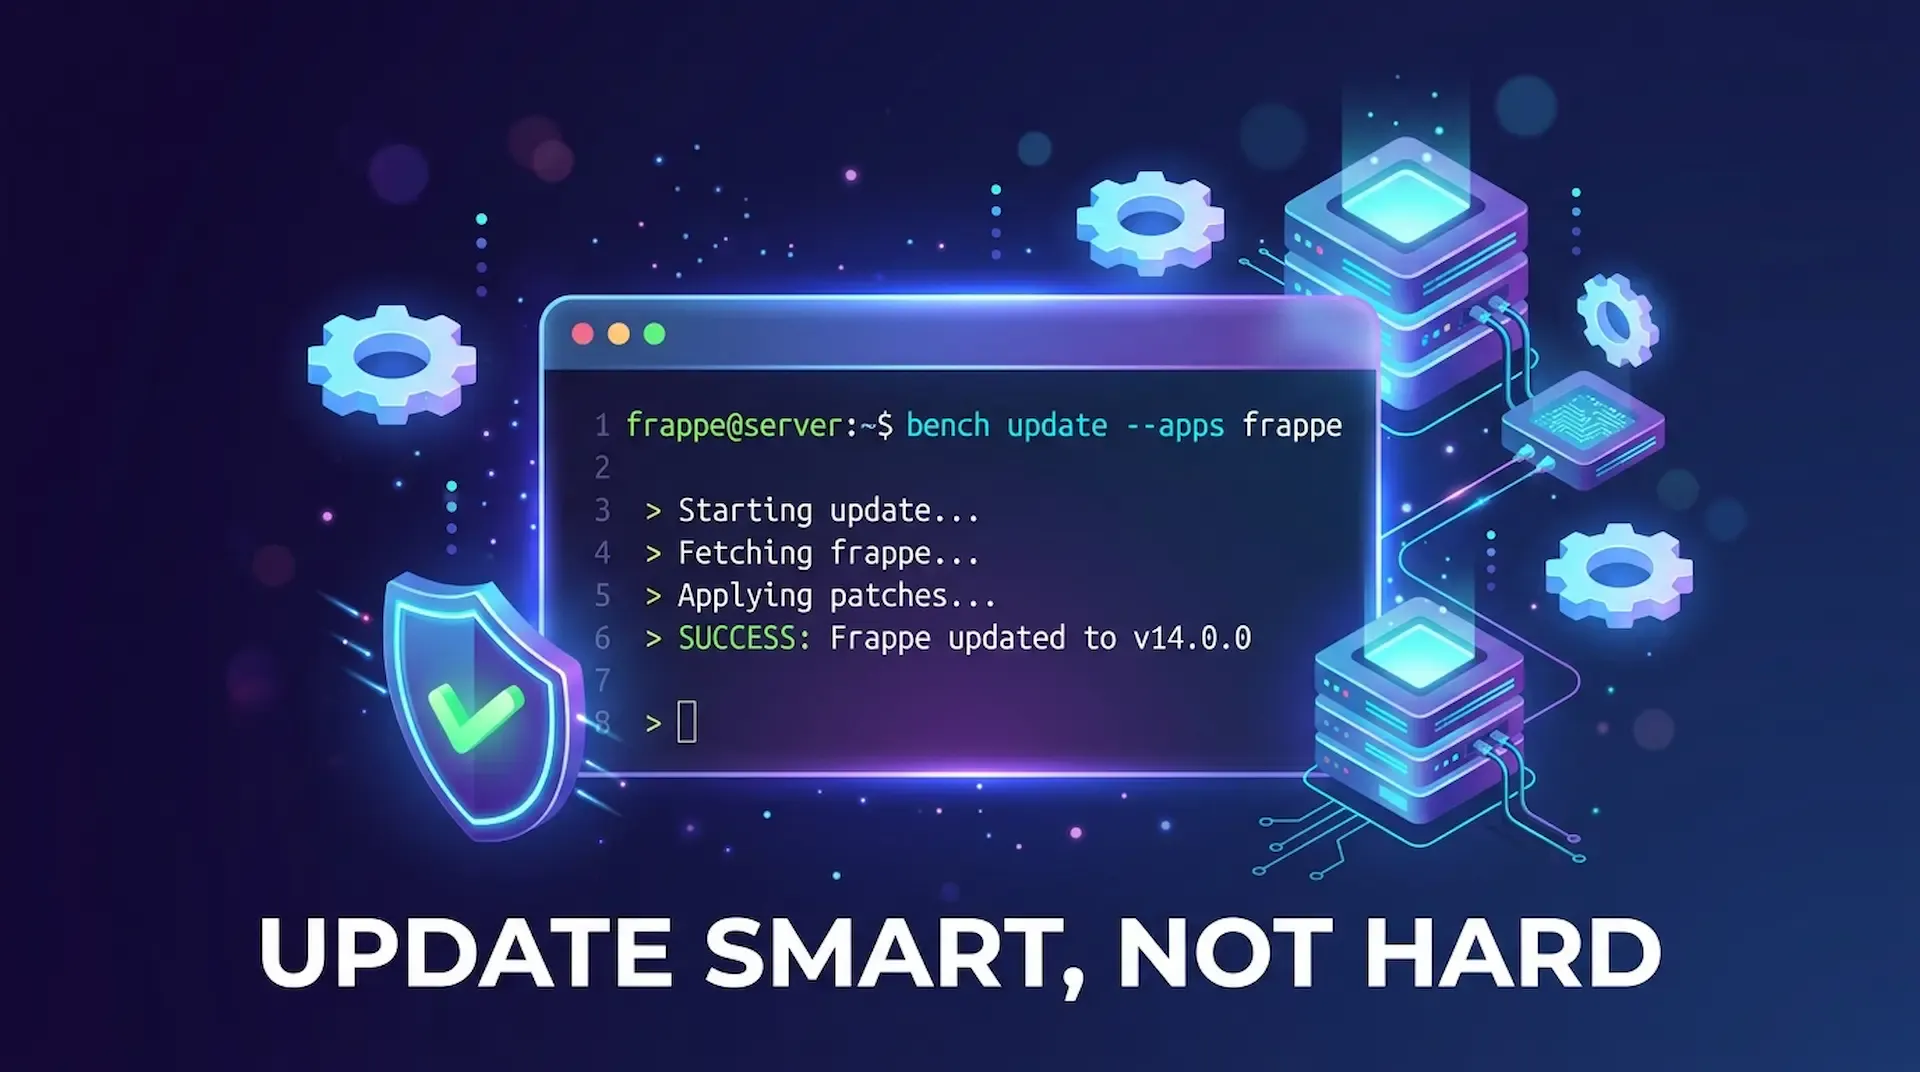
ired of bench update messing up your custom app? This guide shows you how to update only Frappe or any single app, fix common blockers like 503 errors and permission issues, and keep your bench stable.